
Have you been followed my previously blog to build up Hyper-V nested virtual machine on Microsoft Azure? If you don’t, you better build it right now, because this is pre-requisites and you will get lots of benefit for your lab or even production environment, you can reference this link and build it. If you did, congratulation! You can create a nested gest virtual machine and install Firewall (e.g. Sophos XG, Fortinet…) for free, why we still need to build firewall at our Azure Hyper-V nested environment? Because it supports lots functions that we cannot get the functions for free from Azure, e.g. server load balance, firewall, SNAT, application filter, IPS…and so on, we also can use it for LAB or simulate issues or POC. I am going to show how to build Sophos XG here.
-
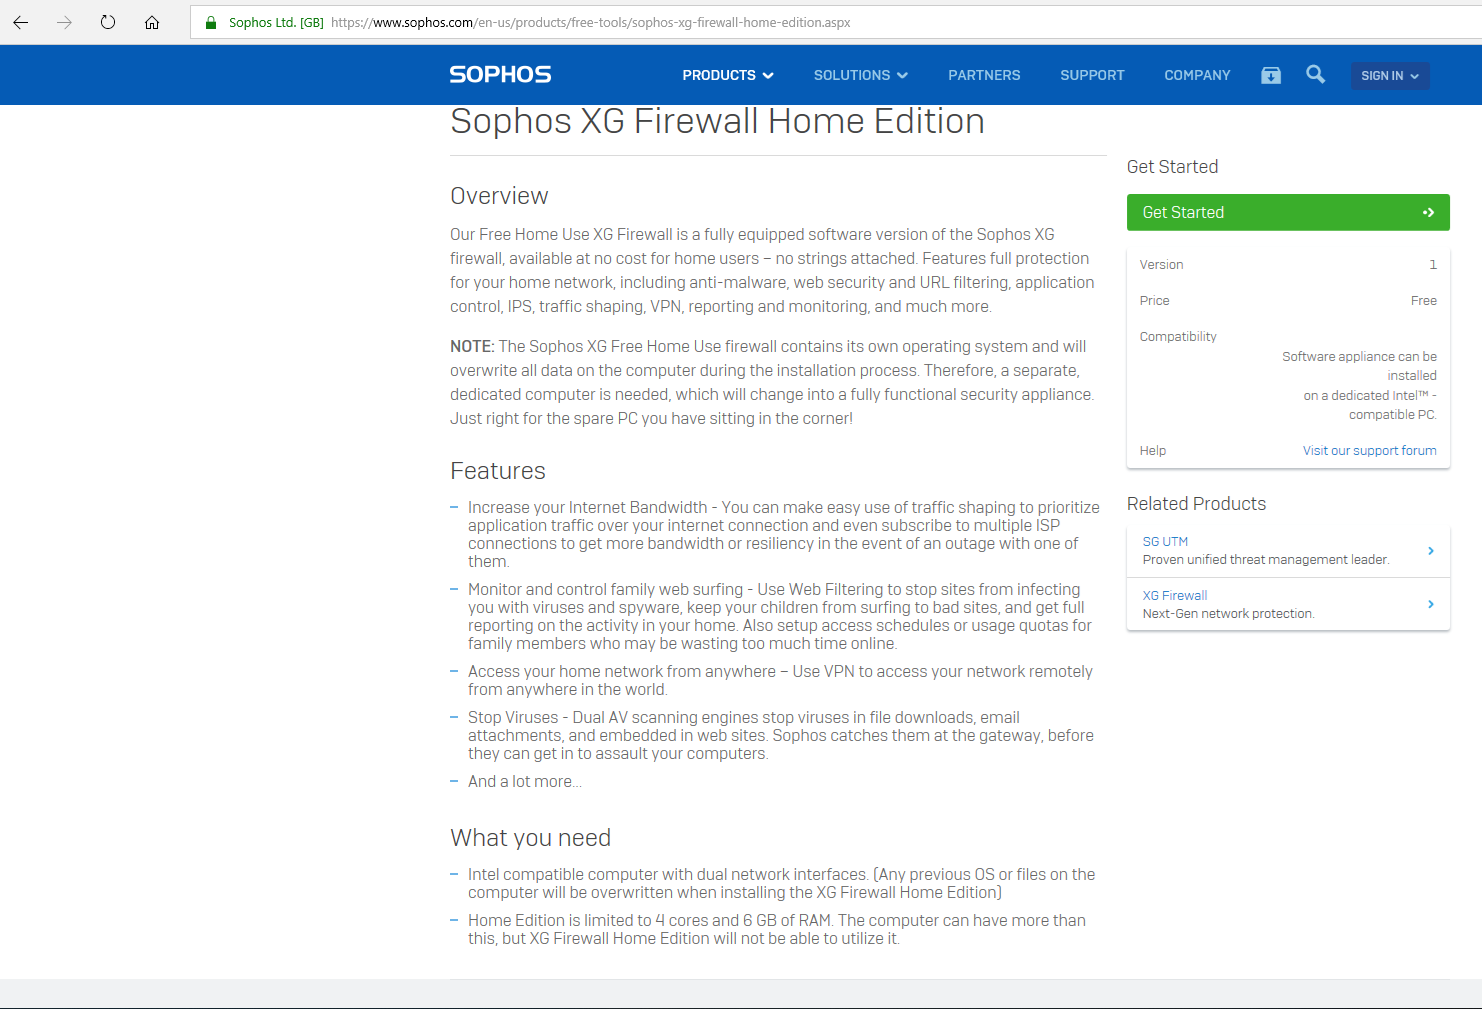
At the first, you need to apply a Sophos XG Firewall Home Edition via follow link. You may wait for couple hours or days, and they will send the XG firewall serial number to you.
https://www.sophos.com/en-us/products/free-tools/sophos-xg-firewall-home-edition.aspx
-
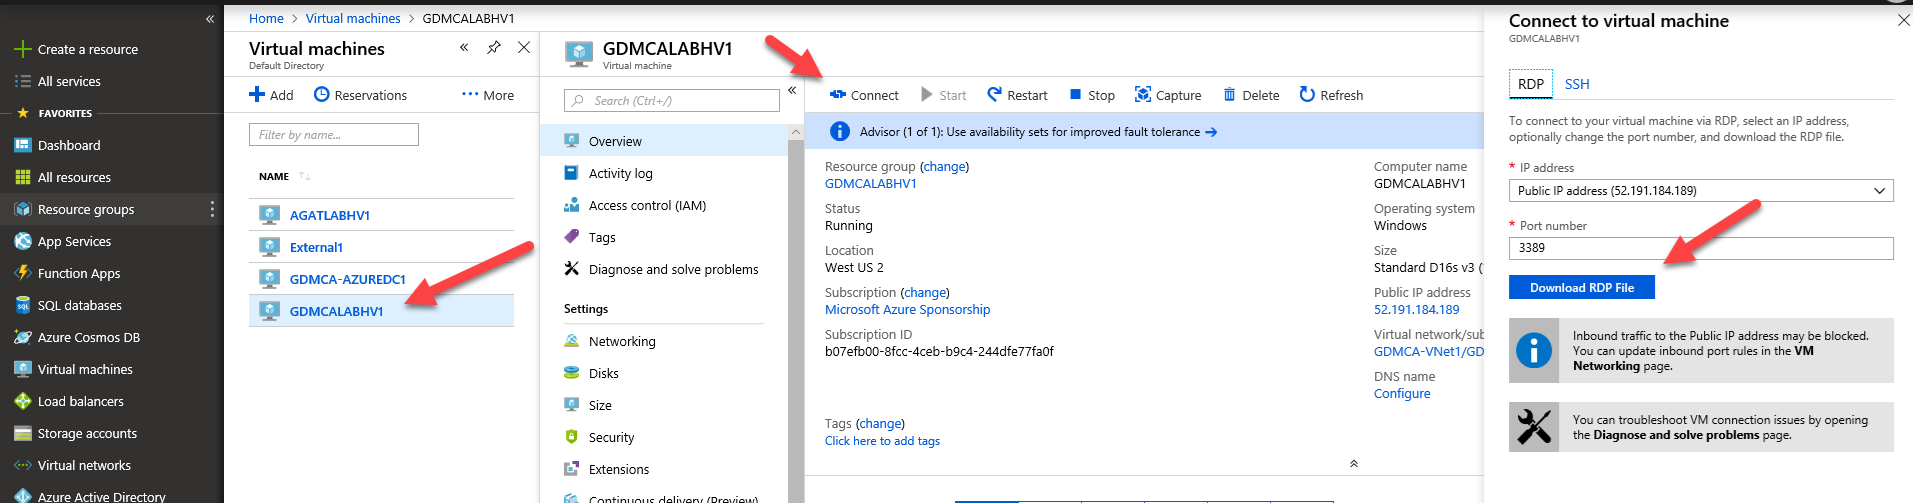
Login to Azure and RDP to your virtual machine.
-
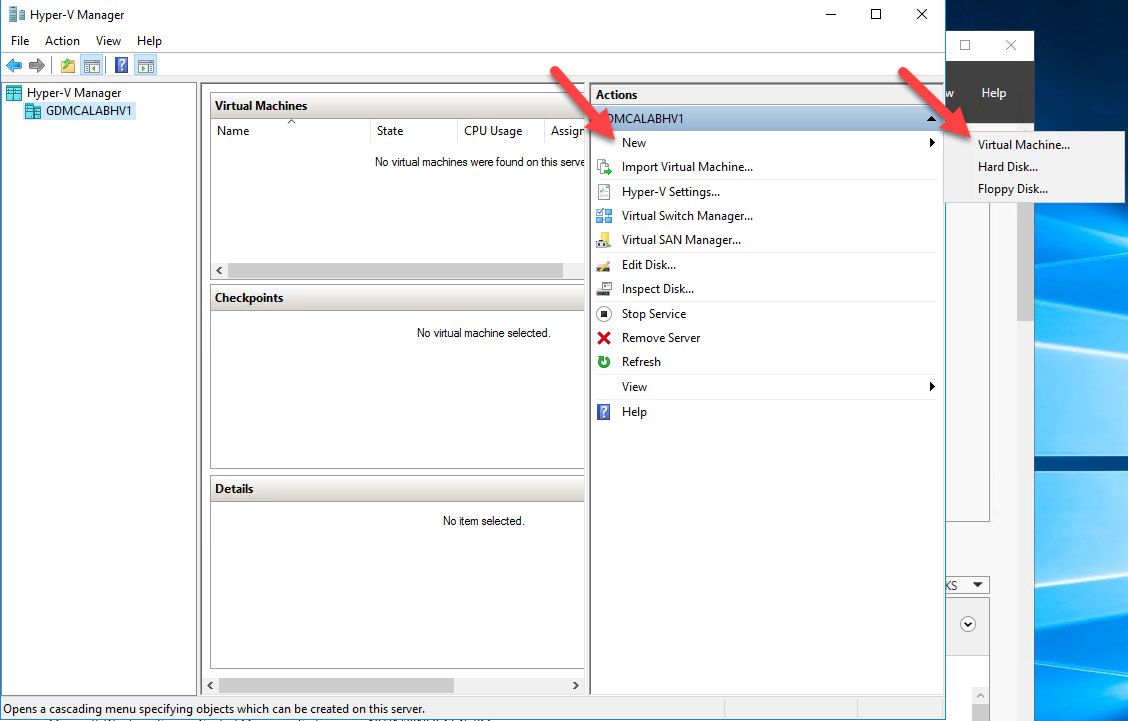
Open Hyper-V Manager tool, select New at Action pane and then click Virtual Machine.
-
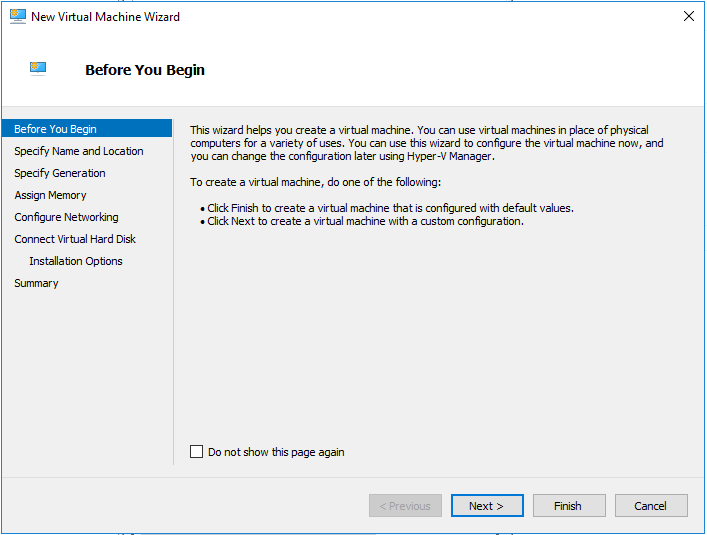
On the Before You Begin page, click Next.
-
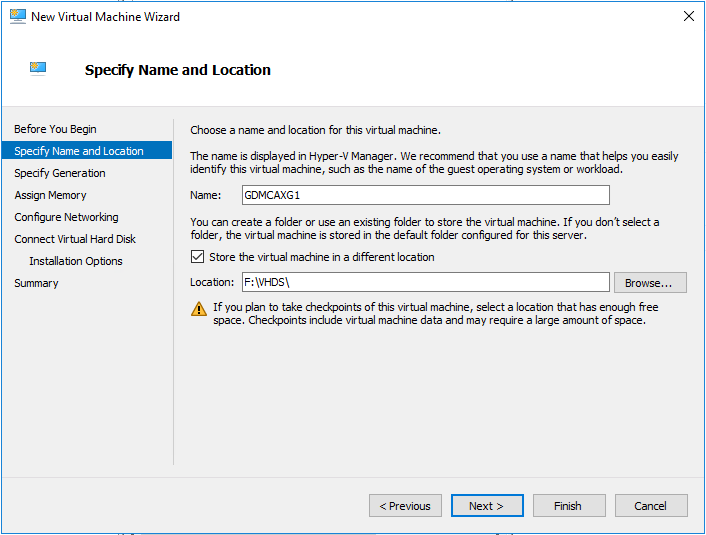
On the Specify Name and Location page, enter name for this virtual machine and then click Next.
-
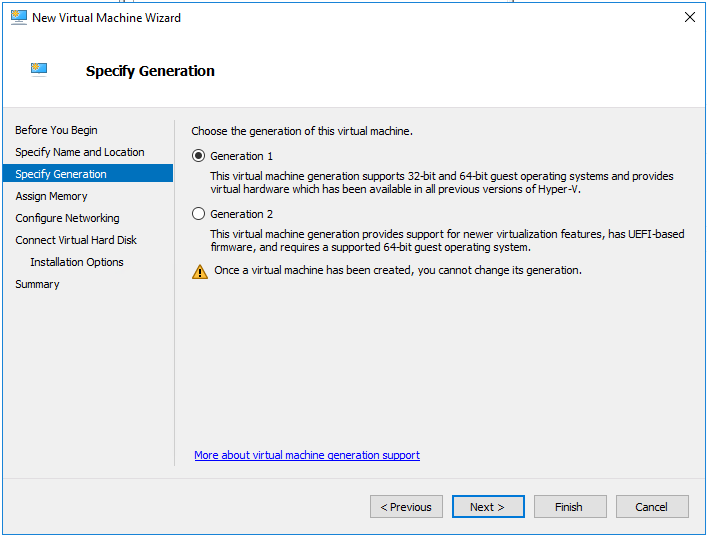
On the Specify Generation page, select Generation 1 and then click Next.
-
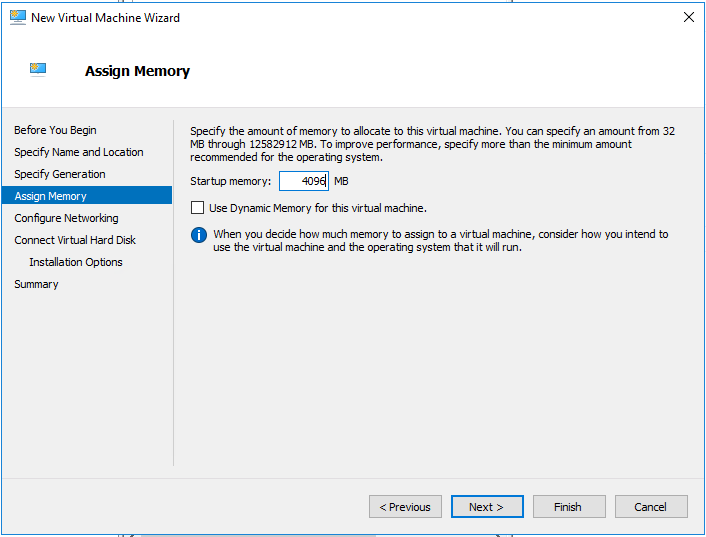
On the Assign Memory page, enter 4096MB for startup memory and then click Next.
-
On the Configure Networking, select NAT Network Switch and then click Next.

-
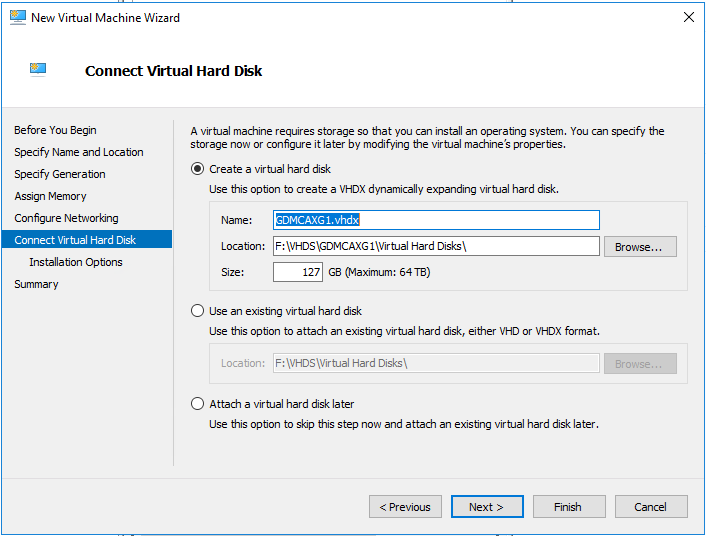
On the Connect Virtual Hard Disk page, keep the default settings and then click Next.
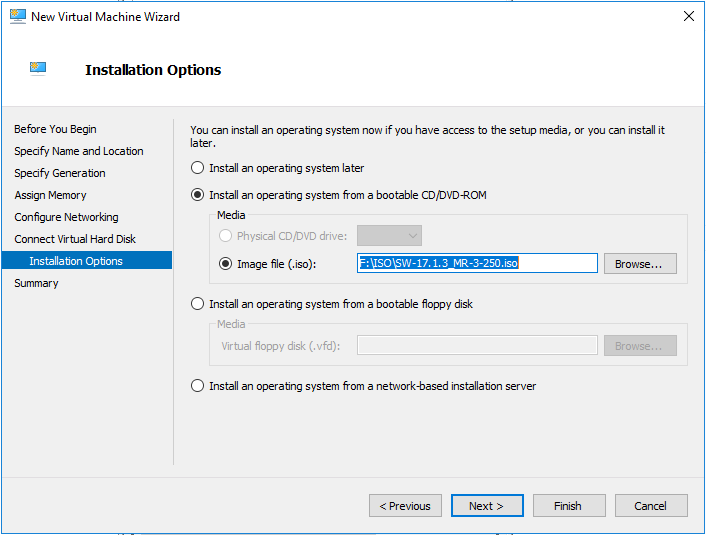
- On the Installation Options, select Install an operating system from a bootable CD/DVD-ROM.
-
Select you Image file (.ISO) which you download from Sophos Web site, and then click Next.
-
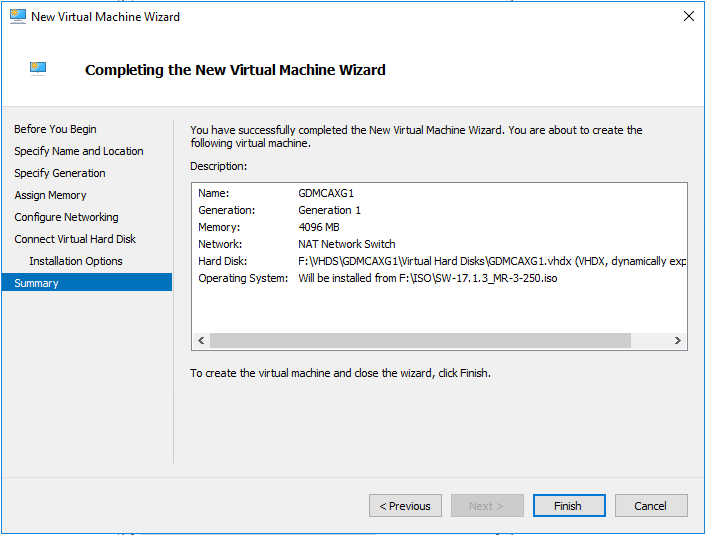
On the Completing the New Virtual Machine Wizard page, review the settings and click Finish.
-
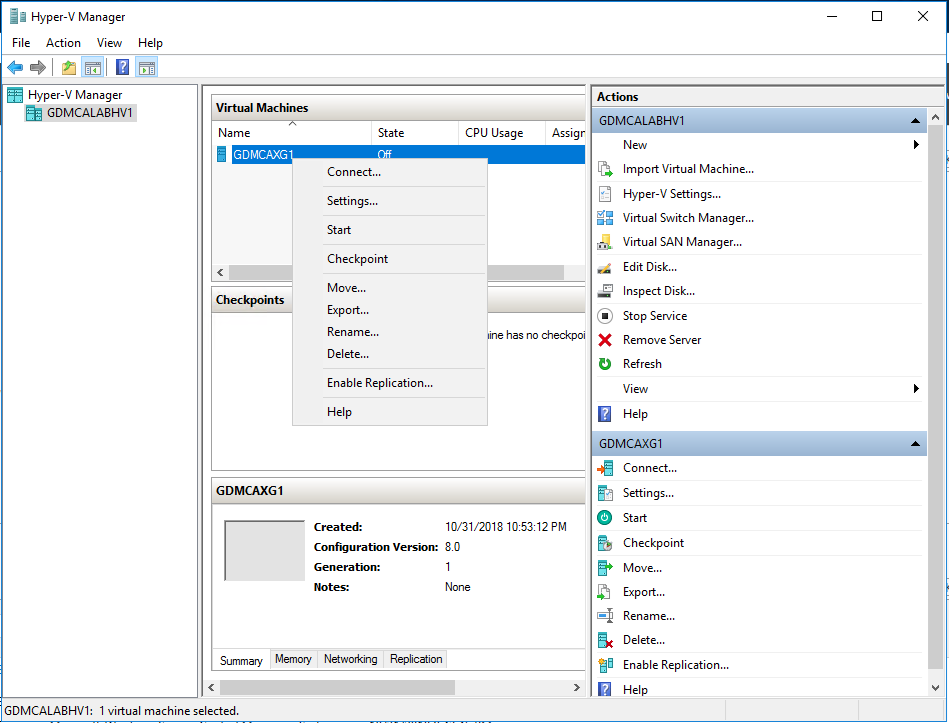
ON the Hyper-V Manager tool, right click virtual machine name and then select settings.
- Select Processor and change Number of virtual processor to 4.
-
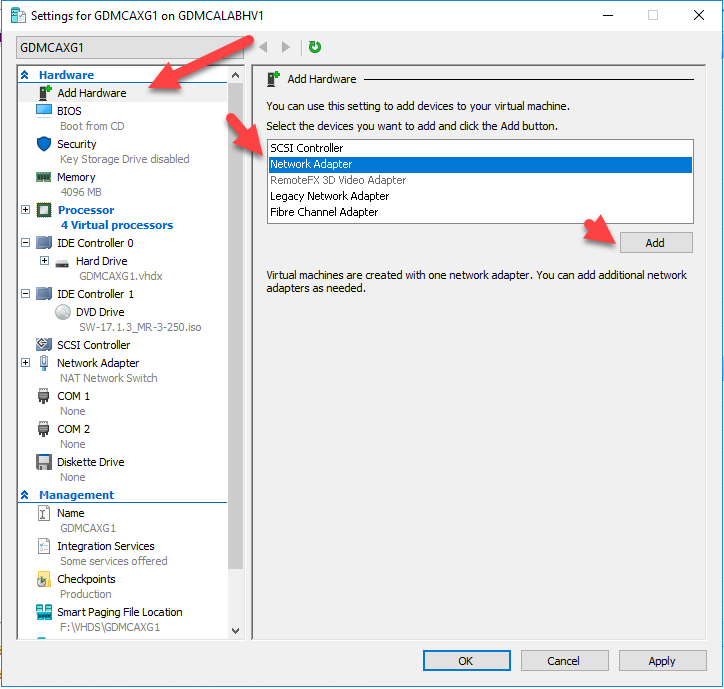
Select Add Hardware, select Network Adapter and then click Add.
-
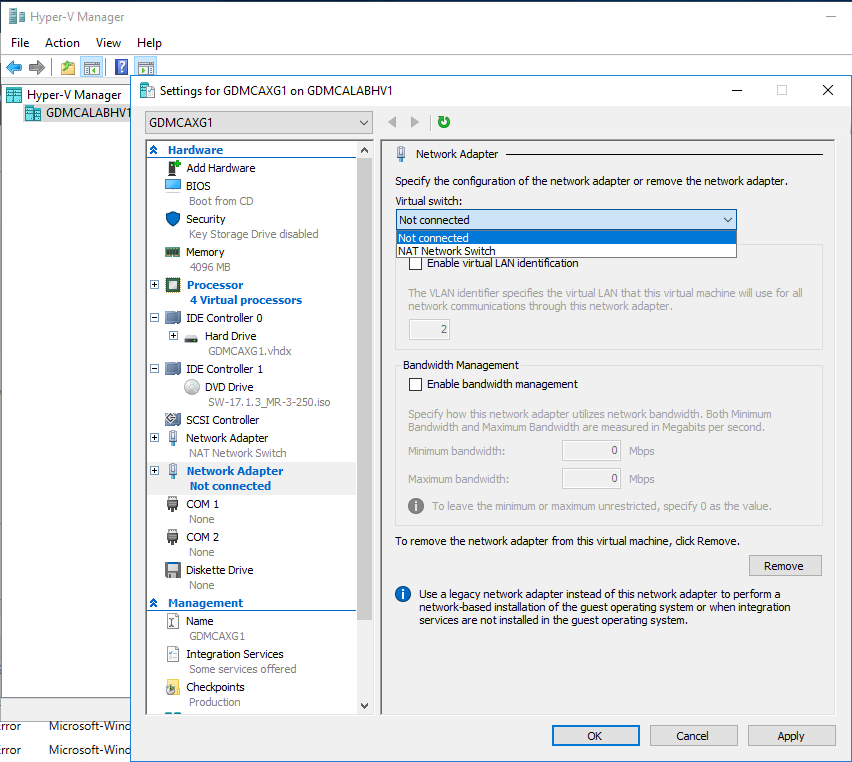
Change Virtual switch from Not connected to NAT Network Switch and then click Apply.
-
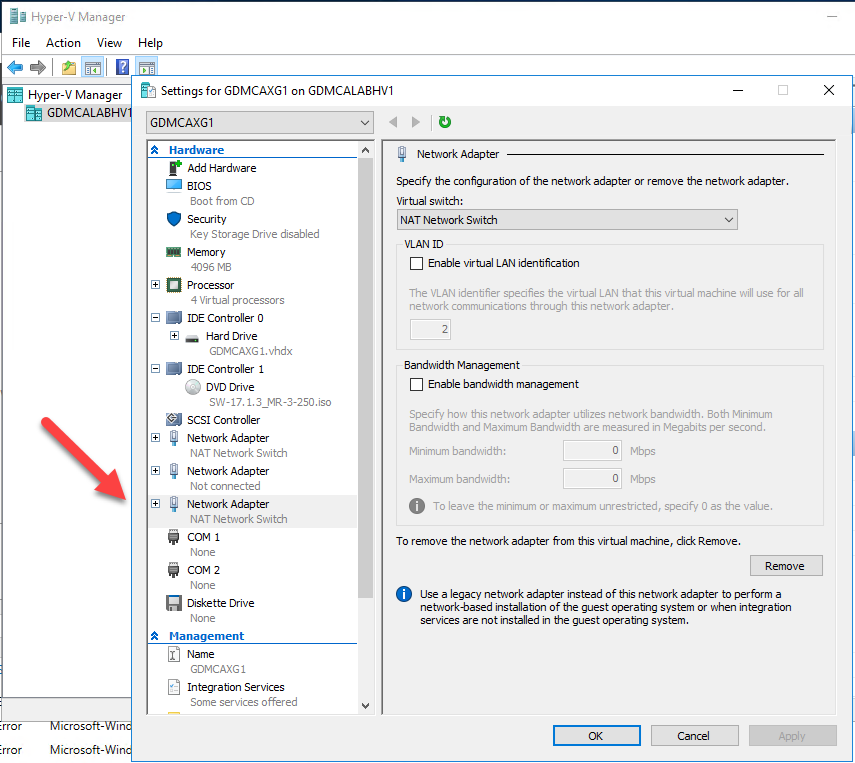
Repeat steps to add one more Network adapter and then click OK.
-
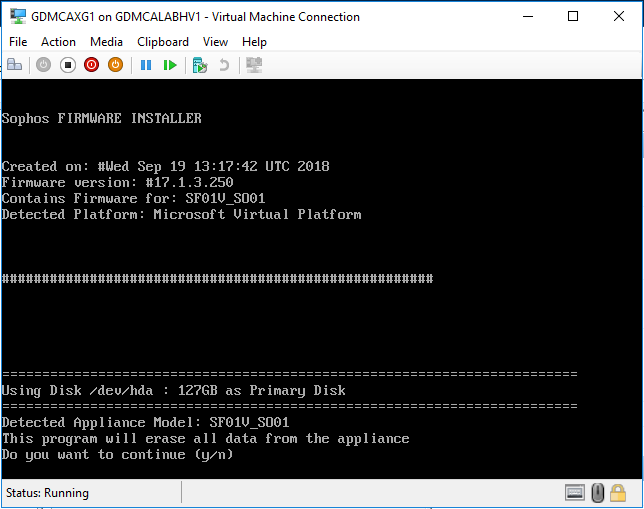
Start this virtual machine, type y and then click enter to continue install.
-
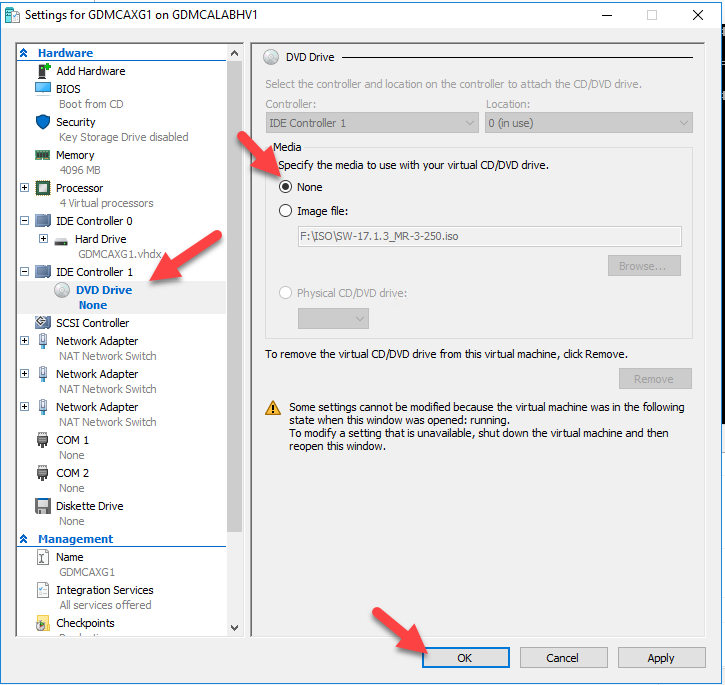
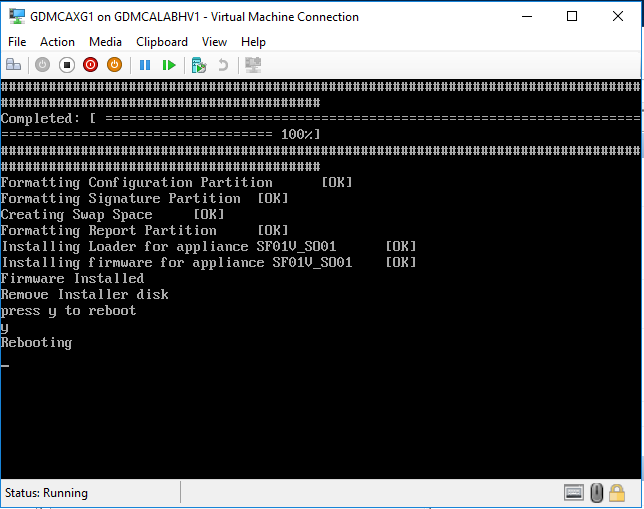
You need to remove install disk (.iso image file) from virtual machine settings after installation complete and press y to reboot virtual machine.
-
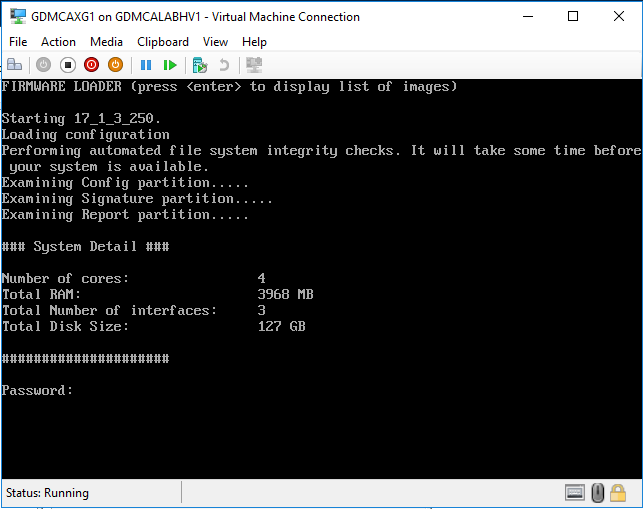
Enter the default password admin.
-
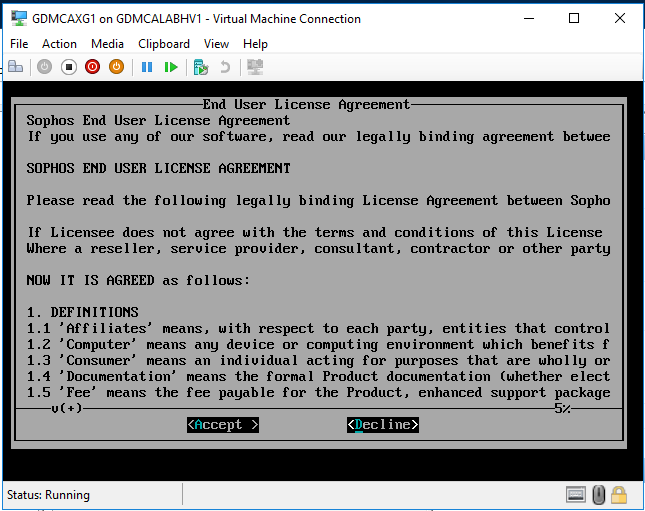
Select Accent for the End User License Agreement.
-
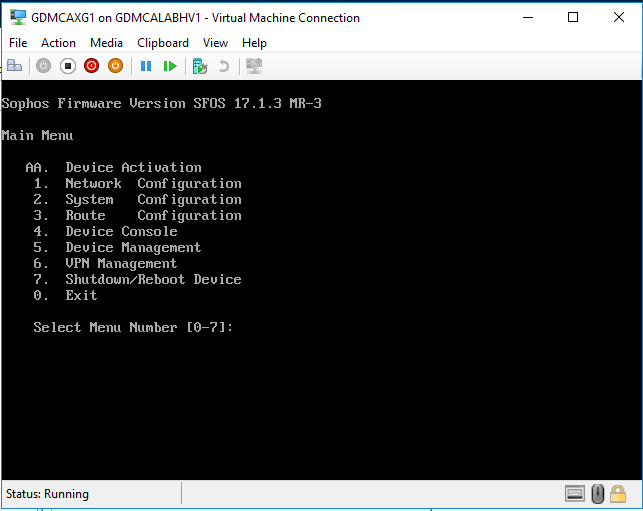
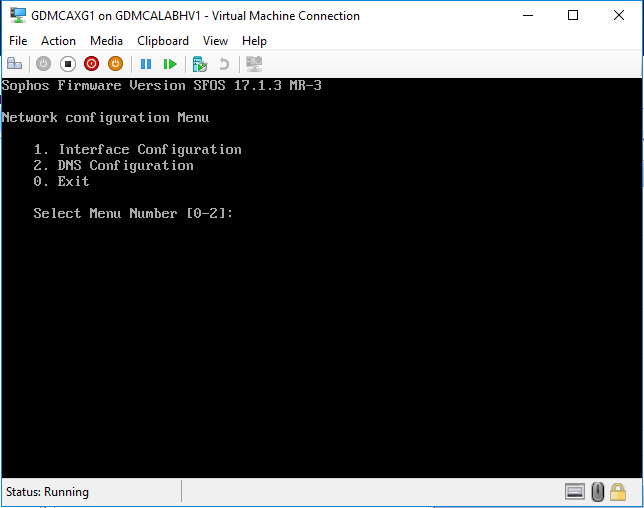
On the Main Menu, select 1 Network Configuration.
-
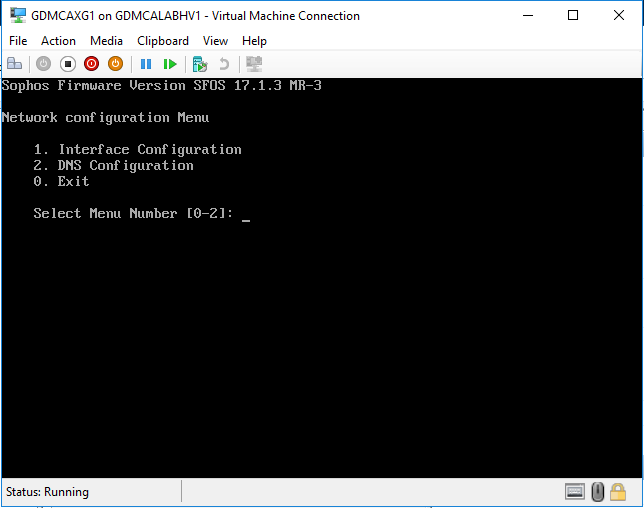
On the Network Configuration Menu, select 1 Interface Configuration.
-
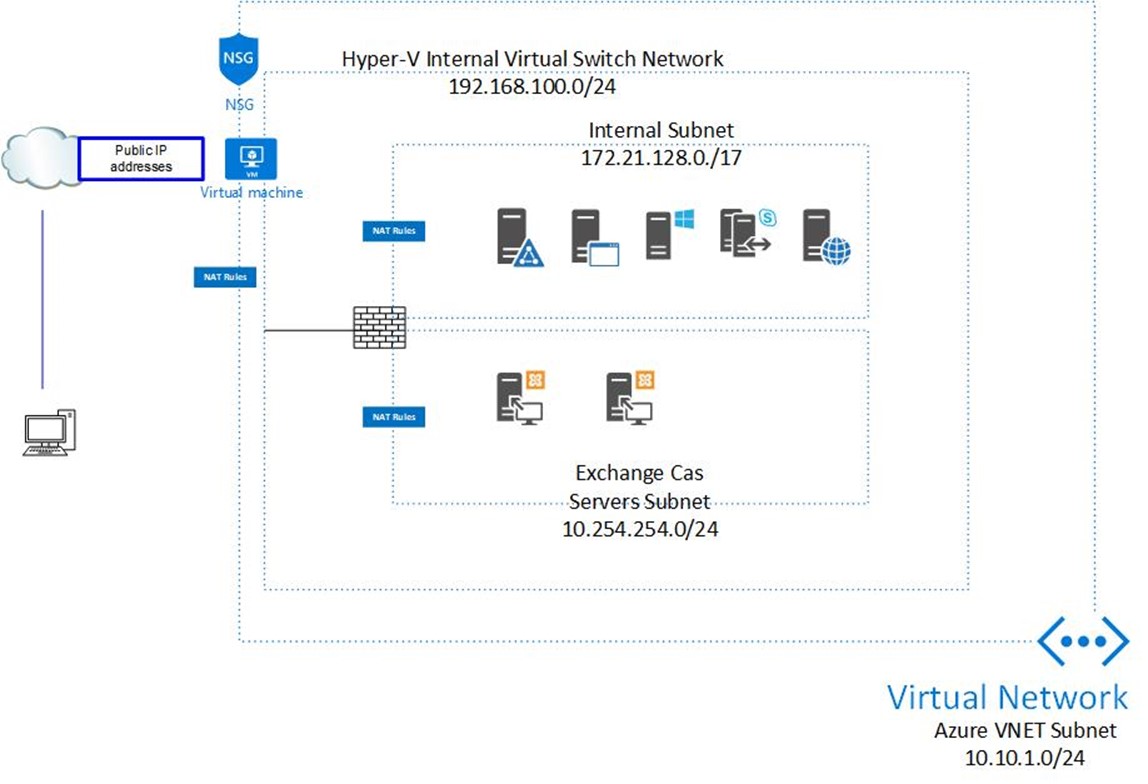
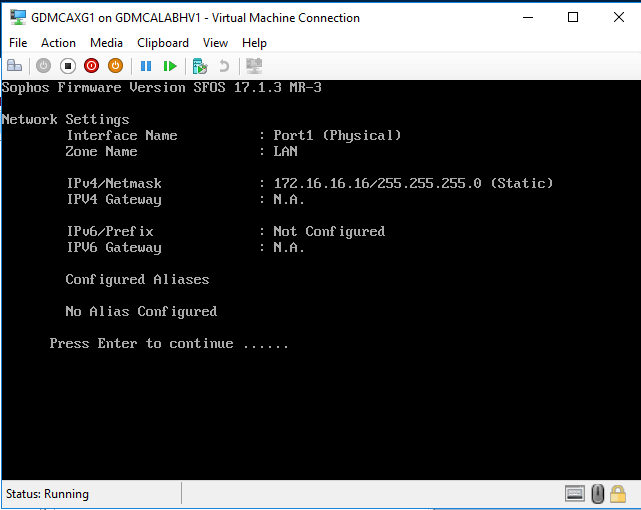
On the Network settings page, you will see interface Port 1 (LAN) default IP address is 172.16.16.16/24, press Enter.
-
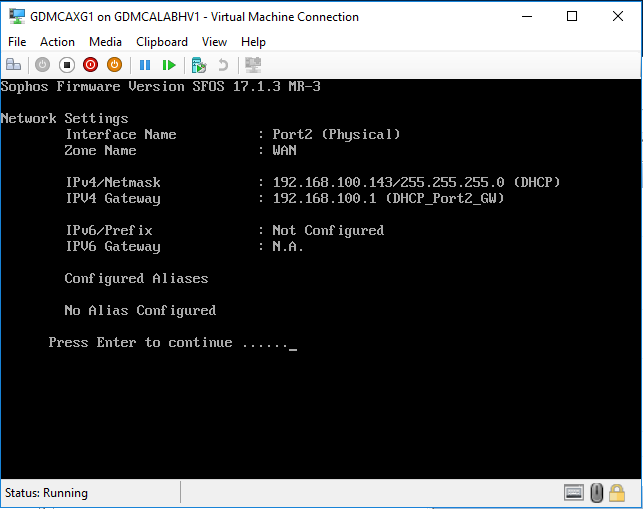
It may show Port 2 (WAN) IP address if you enable the DHCP at NAT settings on the Azure Virtual Machine, but we cannot use it to access firewall because we don’t enable the permissions yet, press enter.
-
It will ask you to configure IP address for the third network interface, press enter twice, we will configure it later via GUI.

-
On the Network Configuration Menu, select 0 exit.
-
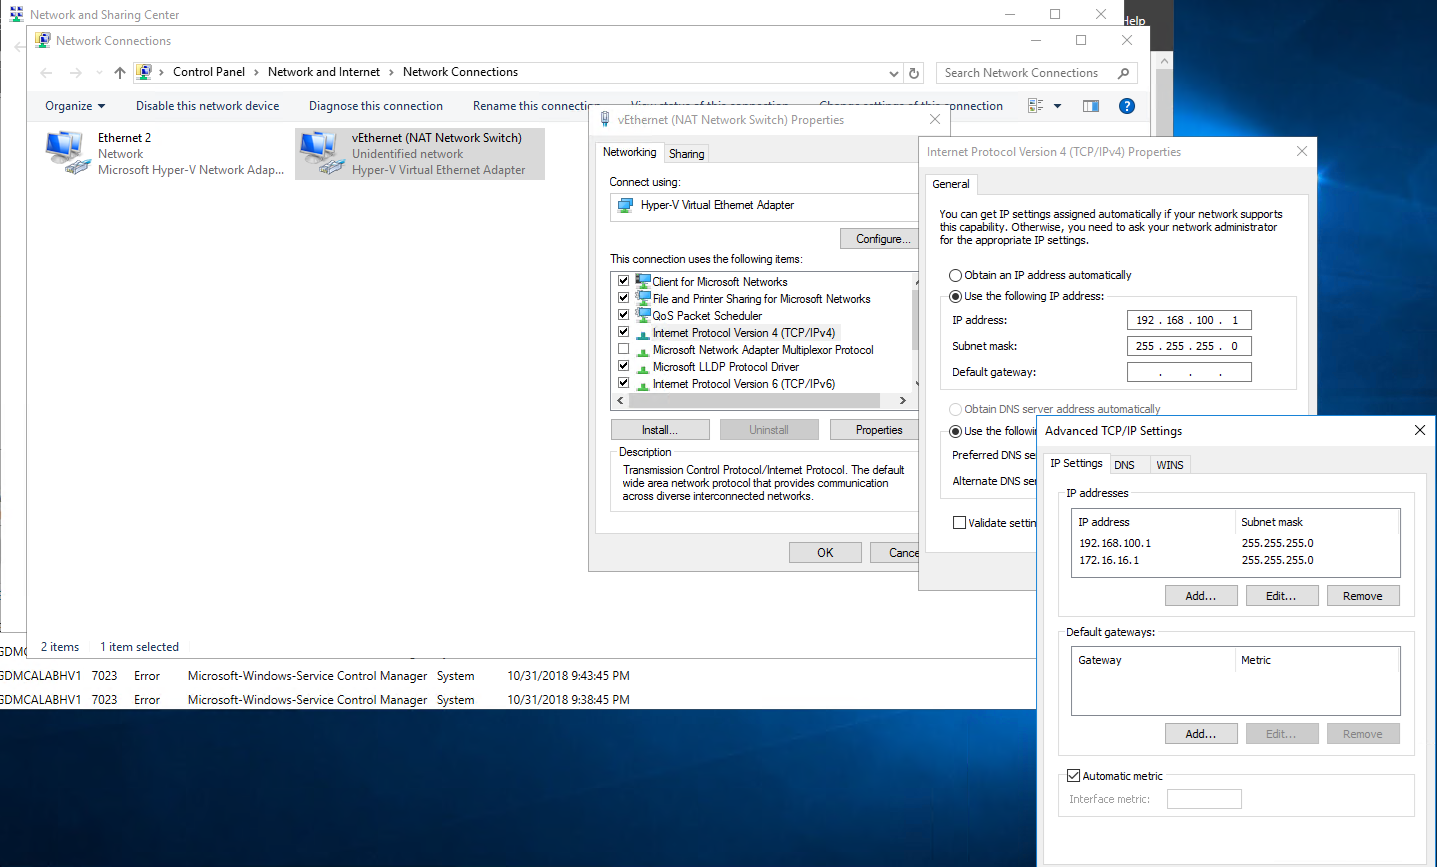
I am going to add 172.16.16.1/24 to vEthernet (NAT Network Switch) temporary, so we can configure firewall from this Azure virtual machine (Host).
-
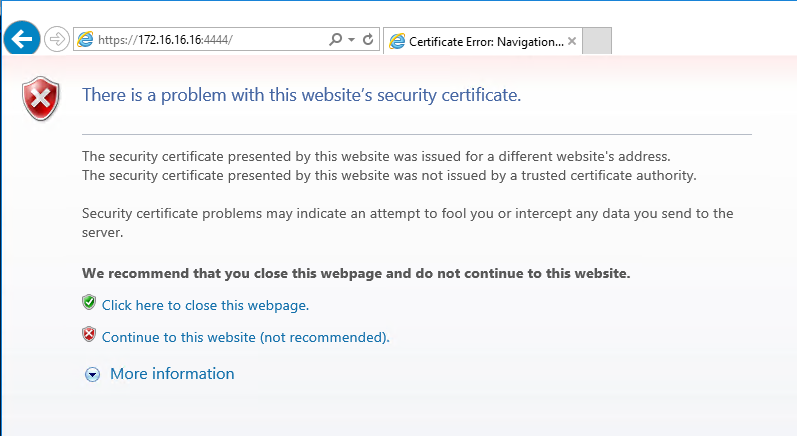
Open internet explorer and enter https://172.16.16.16:4444 and Select Continue to this website.
-
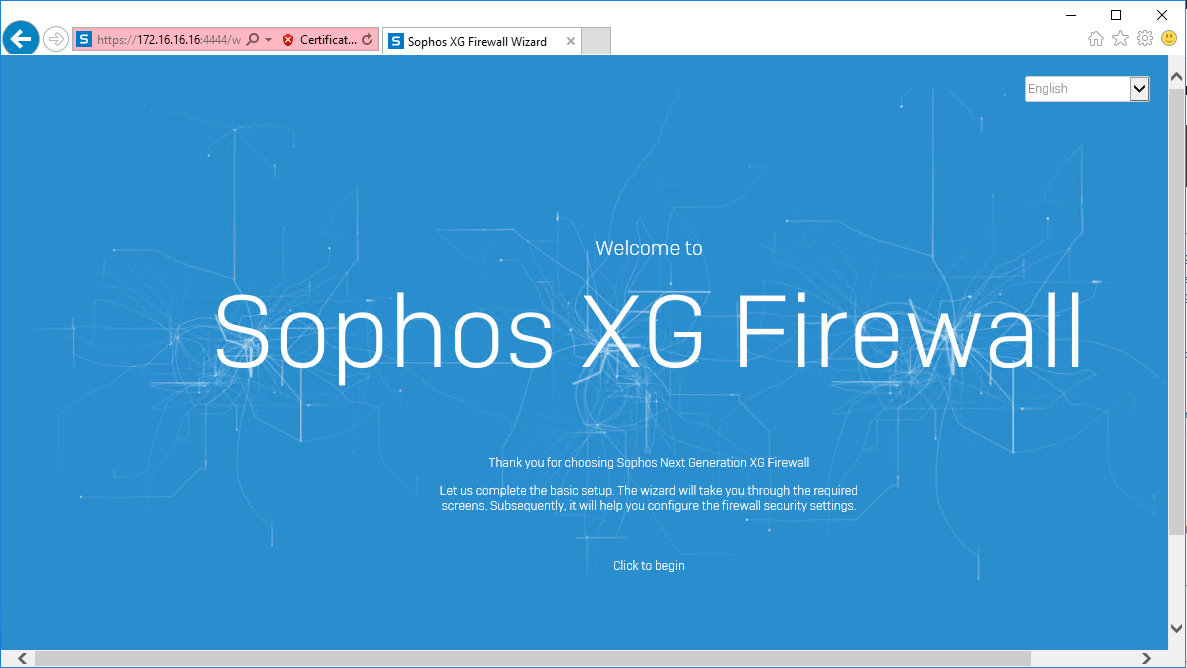
On the Sophos XG Firewall welcome page, click Click to begin.
-
On the Basic Configuration page, enter the new Admin Password, select I agree to the License Agreement and then click Continue.

-
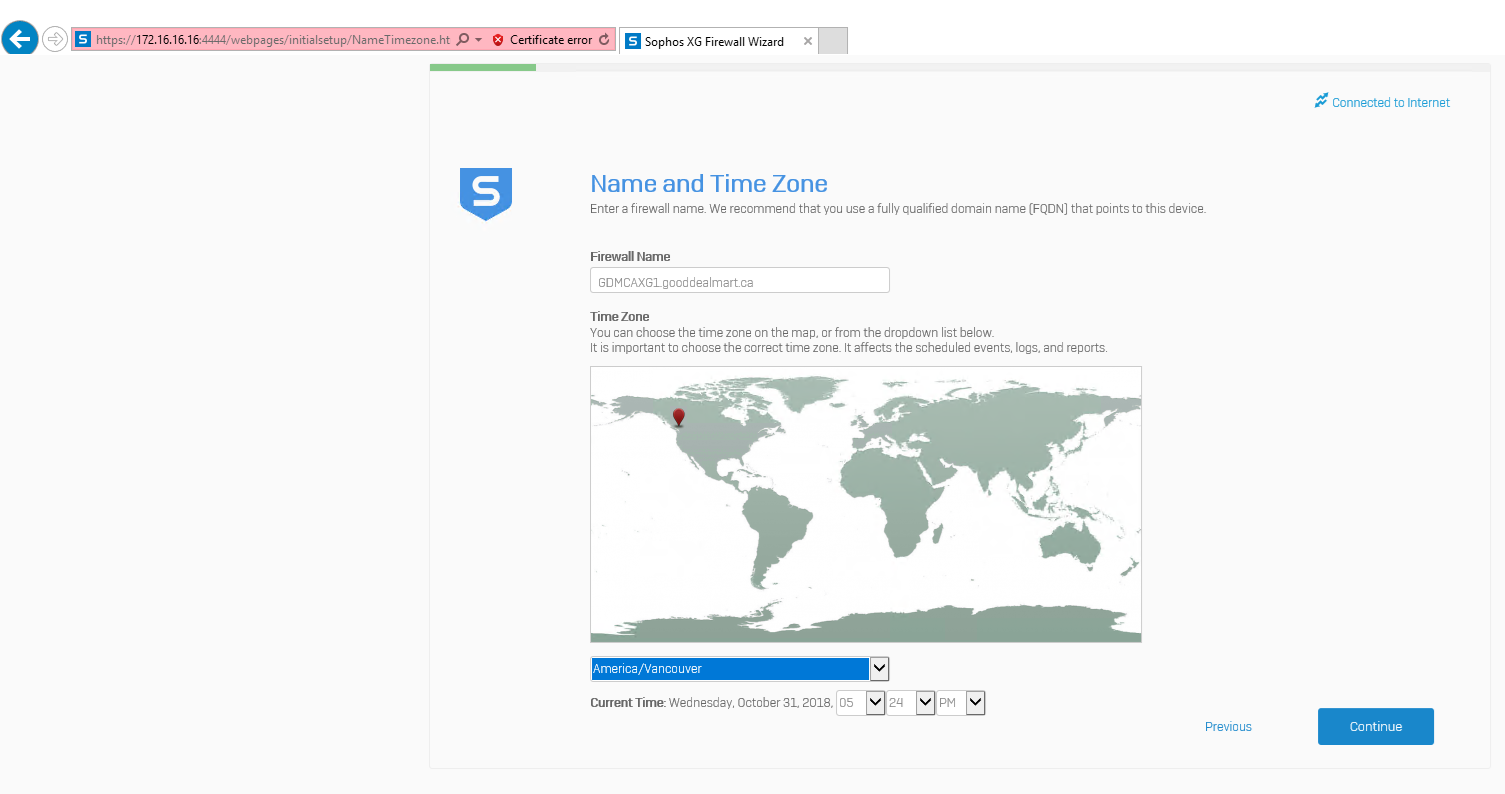
Enter firewall Name and select time zone and then click Continue.
-
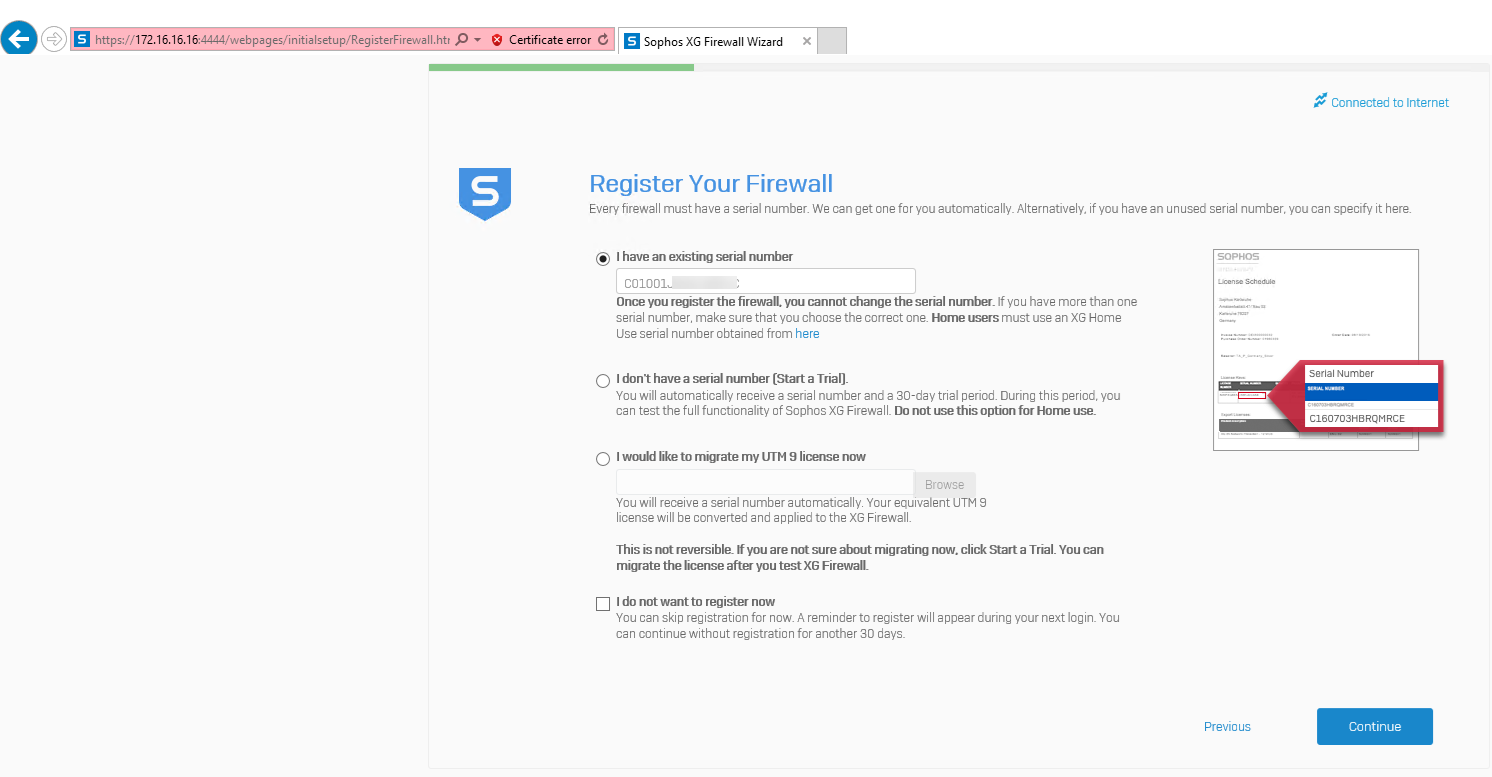
On the Register Your Firewall page, enter your serial number which you got it from Sophos and then click Continue.
-
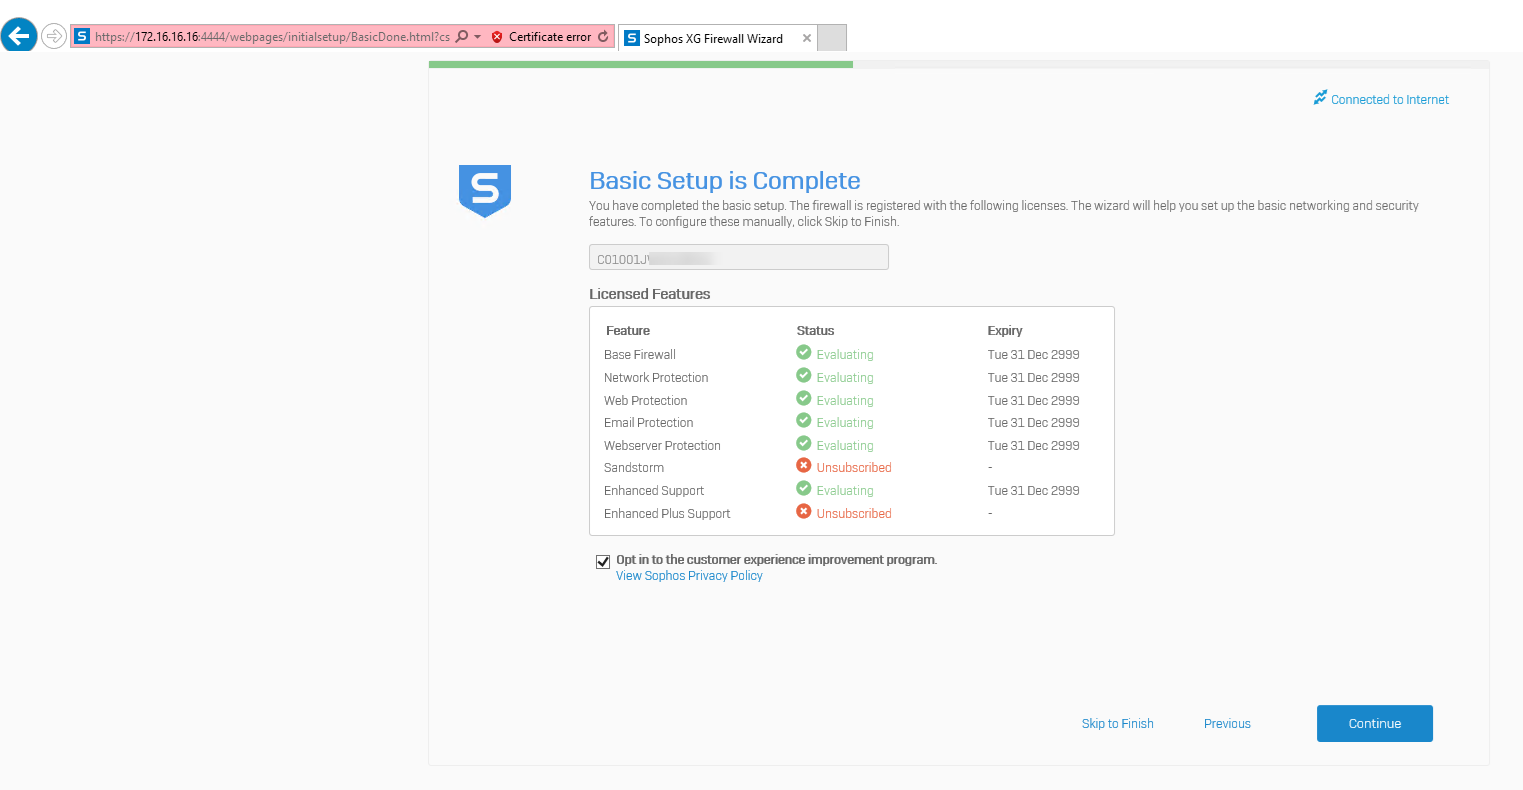
One the Basic Setup is Complete page, click Continue.
-
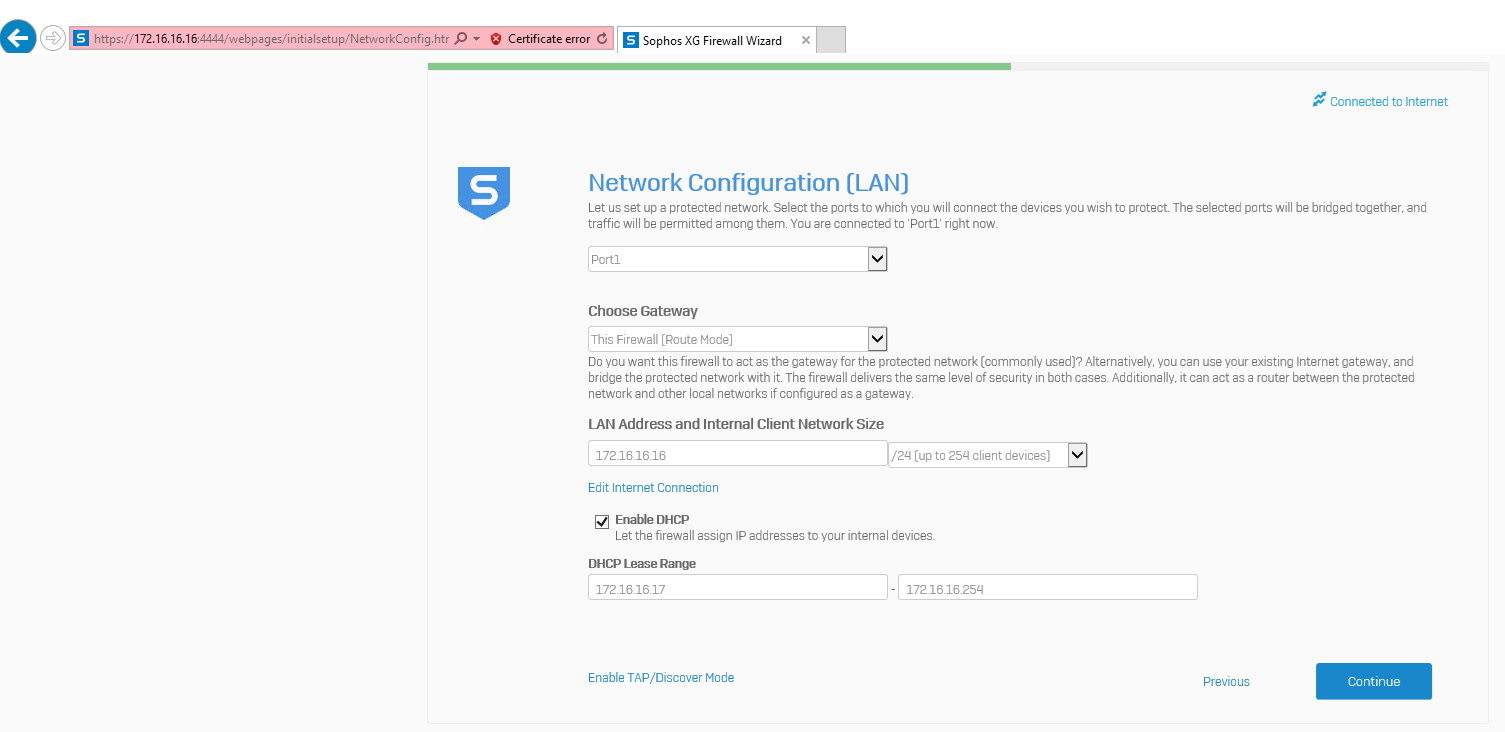
On the Network Configuration (LAN) page, click Continue, we will modify them later.
-
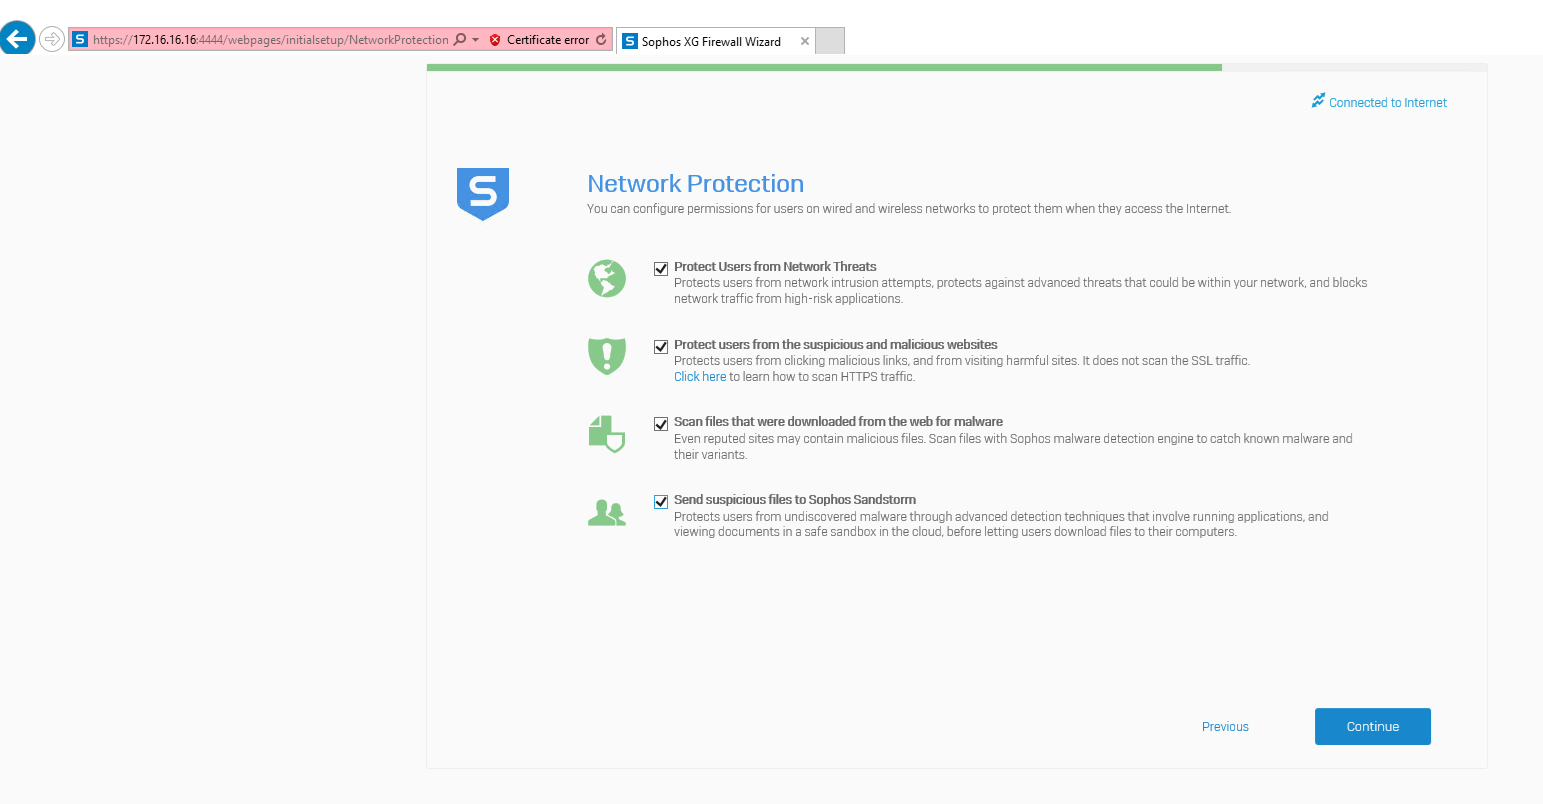
On the Network Protection page, select all of them and then click Continue.
-
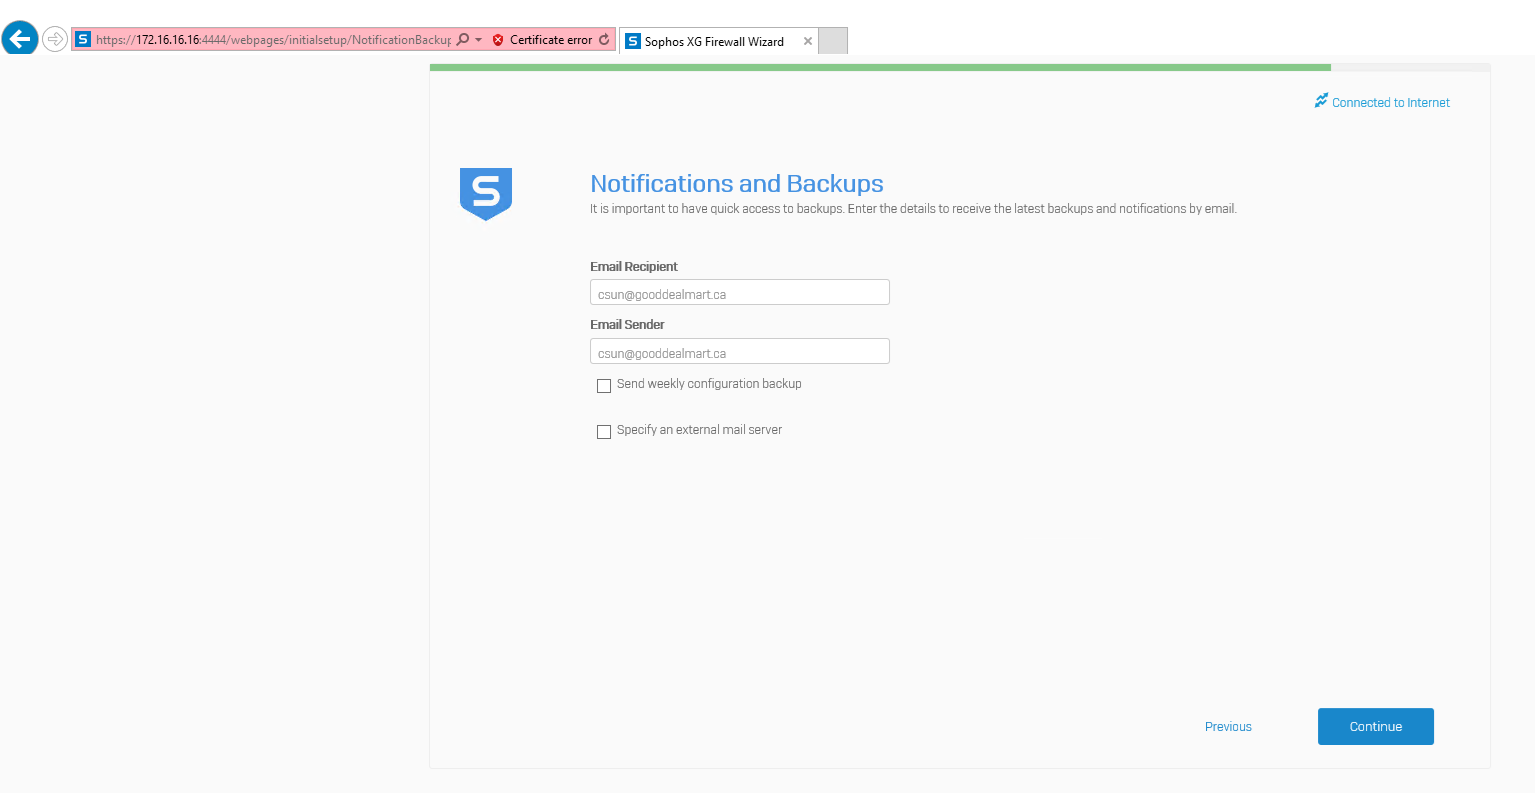
On the Notifications and Backups page, enter email address for Recipient and Sender and then click Continue.
-
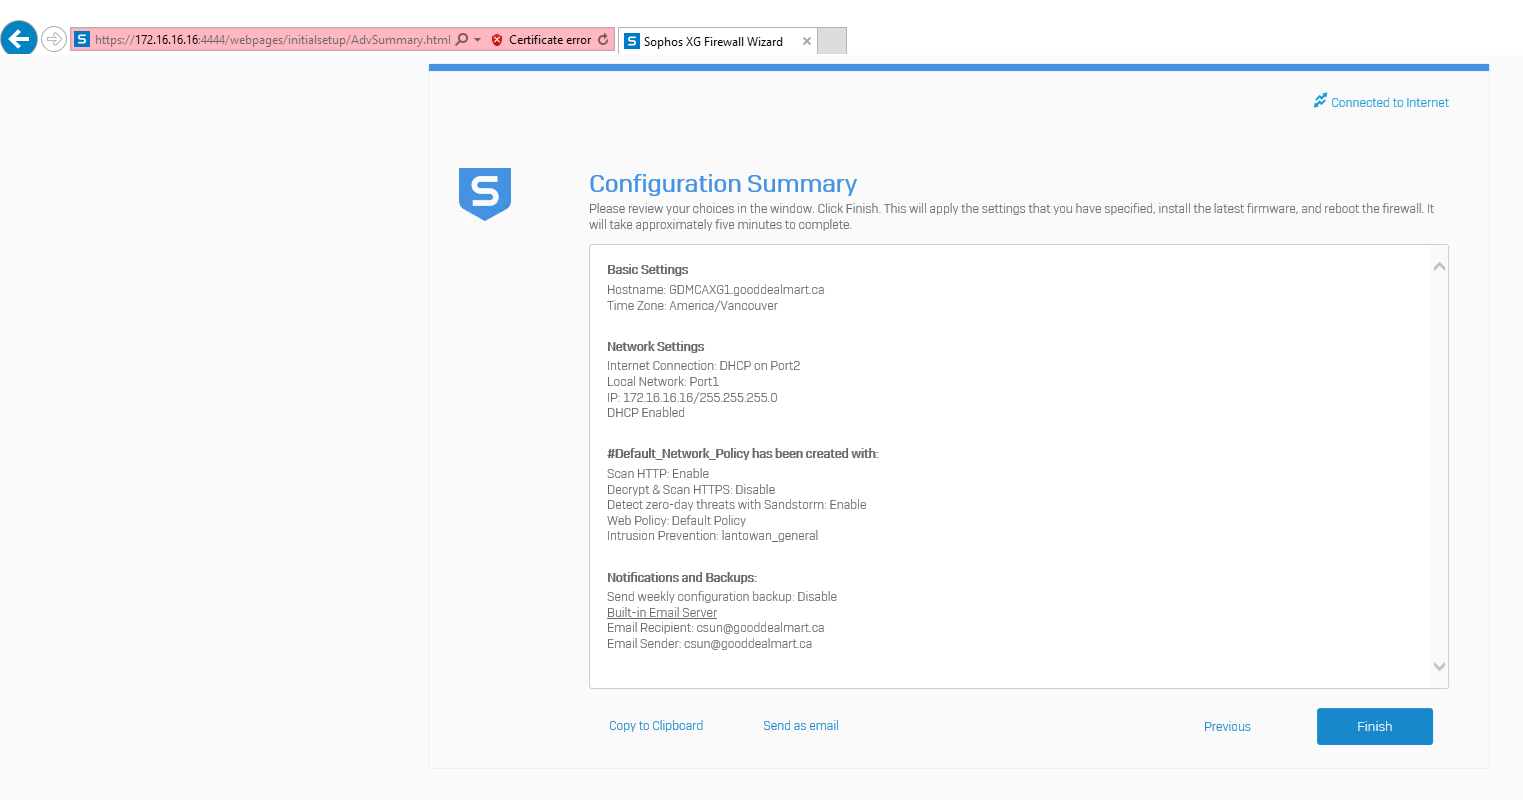
On the Configuration Summary page, click Finish.
-
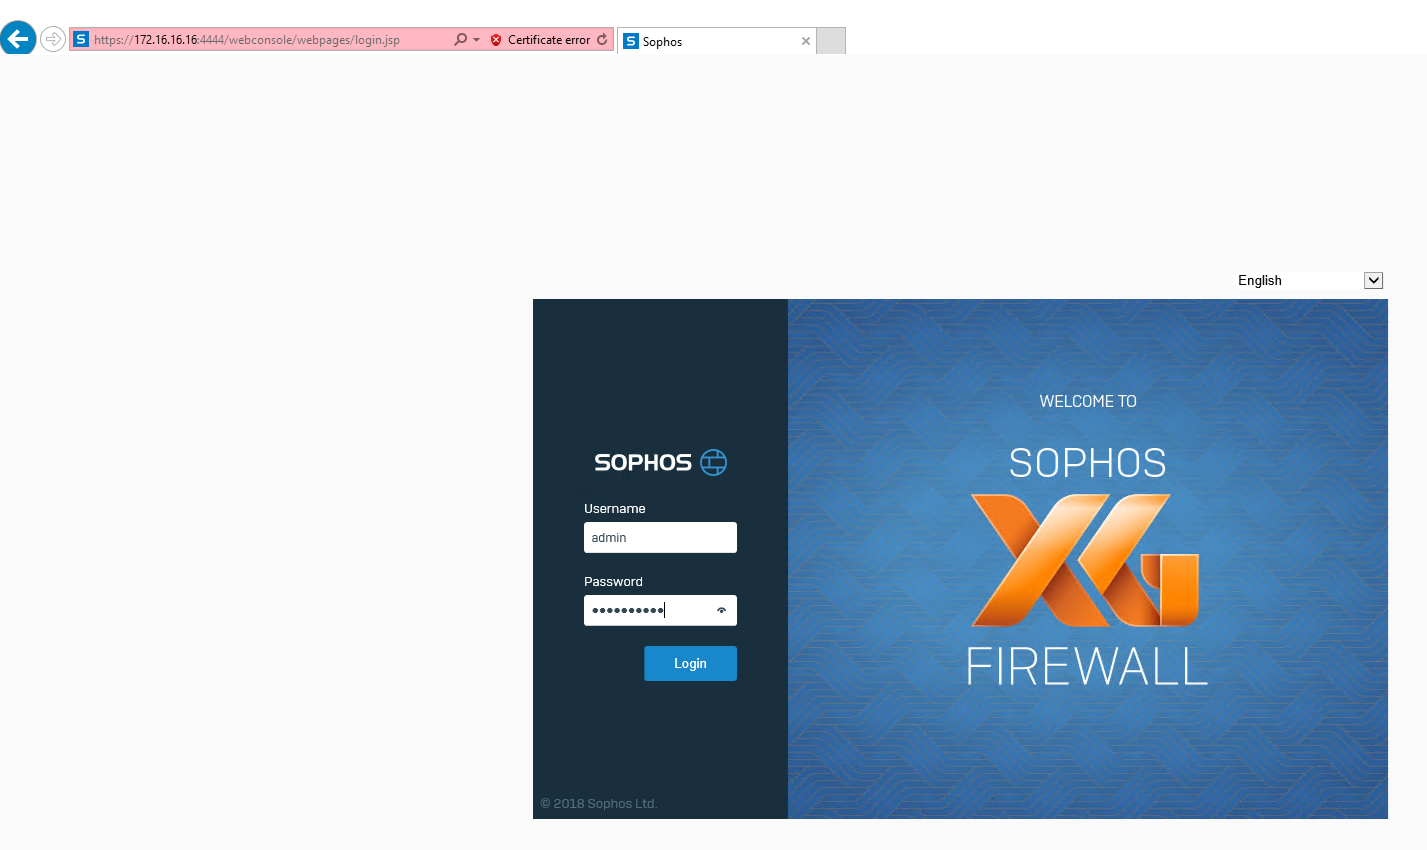
XG firewall will auto-reboot after apply configuration, and then you will see the login page, type username and password and then click Login.
-
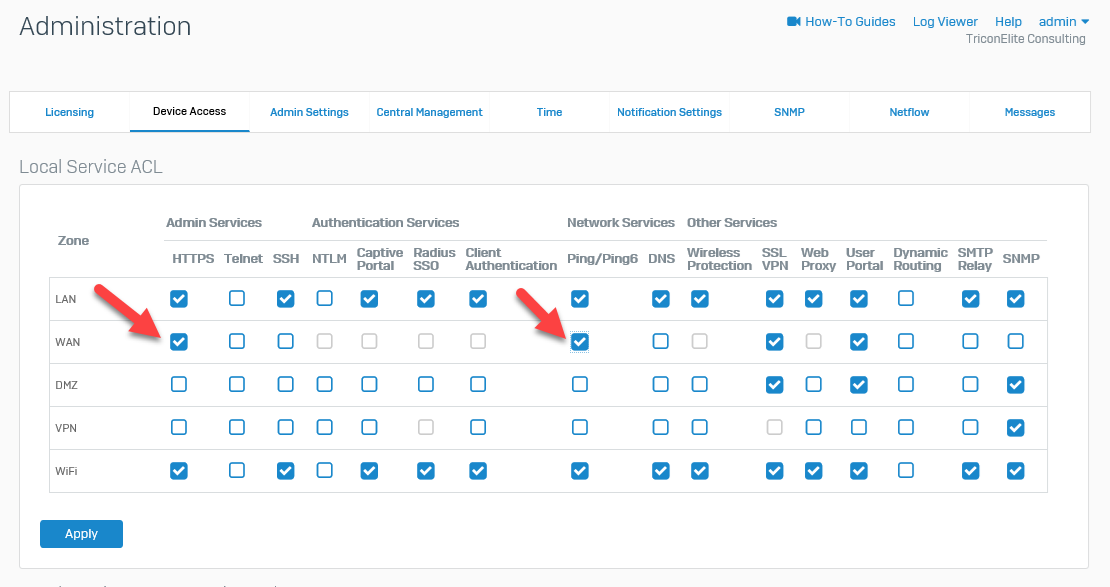
Navigate to Administration and then select Device Access.

-
On the Local Service ACL, enable HTTPS and Ping/Ping6 at WAN Zone and then click Apply.
-
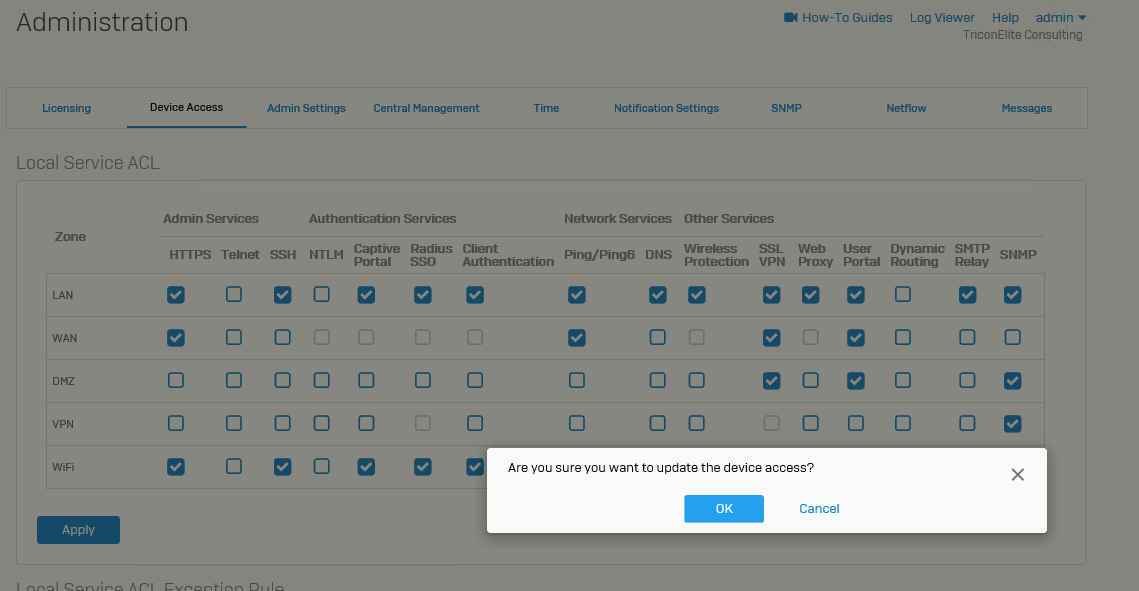
Click OK at update device access message pop up.
-
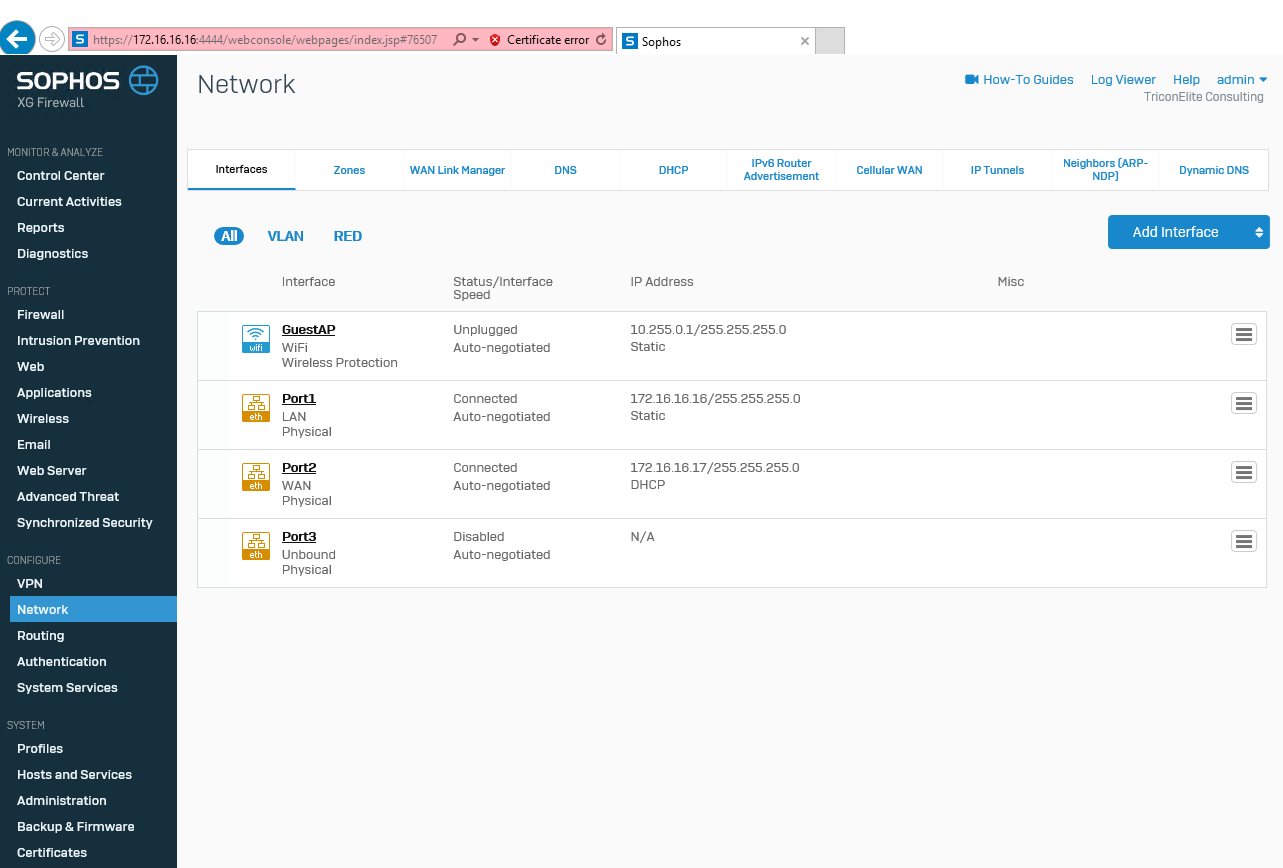
Navigate to Network, select Interfaces and then click Port2 (WAN).
-
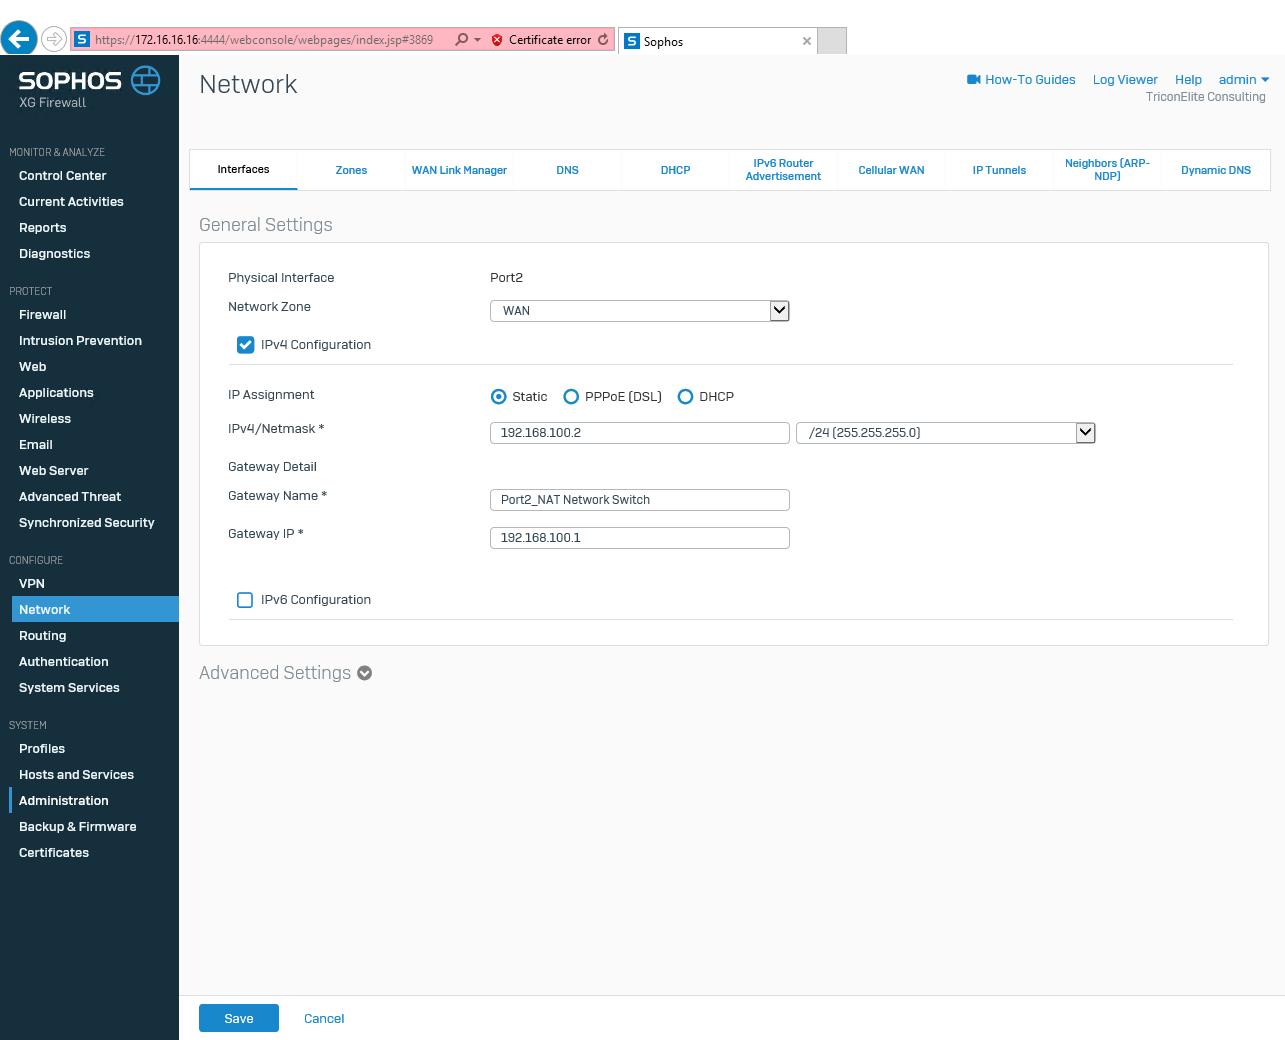
Change IP Assignment from DHCP to Static, change IP address to 192.168.100.2/24, change Gateway Name to Port2_NAT Network Switch, change Gateway IP address to 192.168.100.1 and then click Save.
-
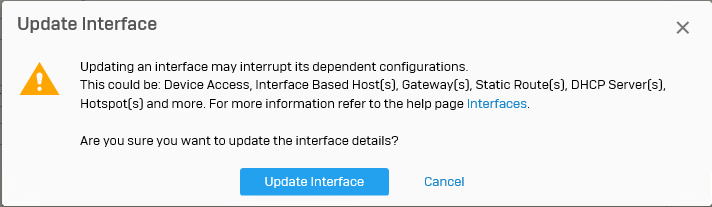
Click Update Interface on Update Interface warning.
-
Repeat steps to change Port3(LAN) IP address to 10.254.254.1/24.

-
Repeat steps to change Port3(LAN) IP address to 172.21.128.2/17.

-
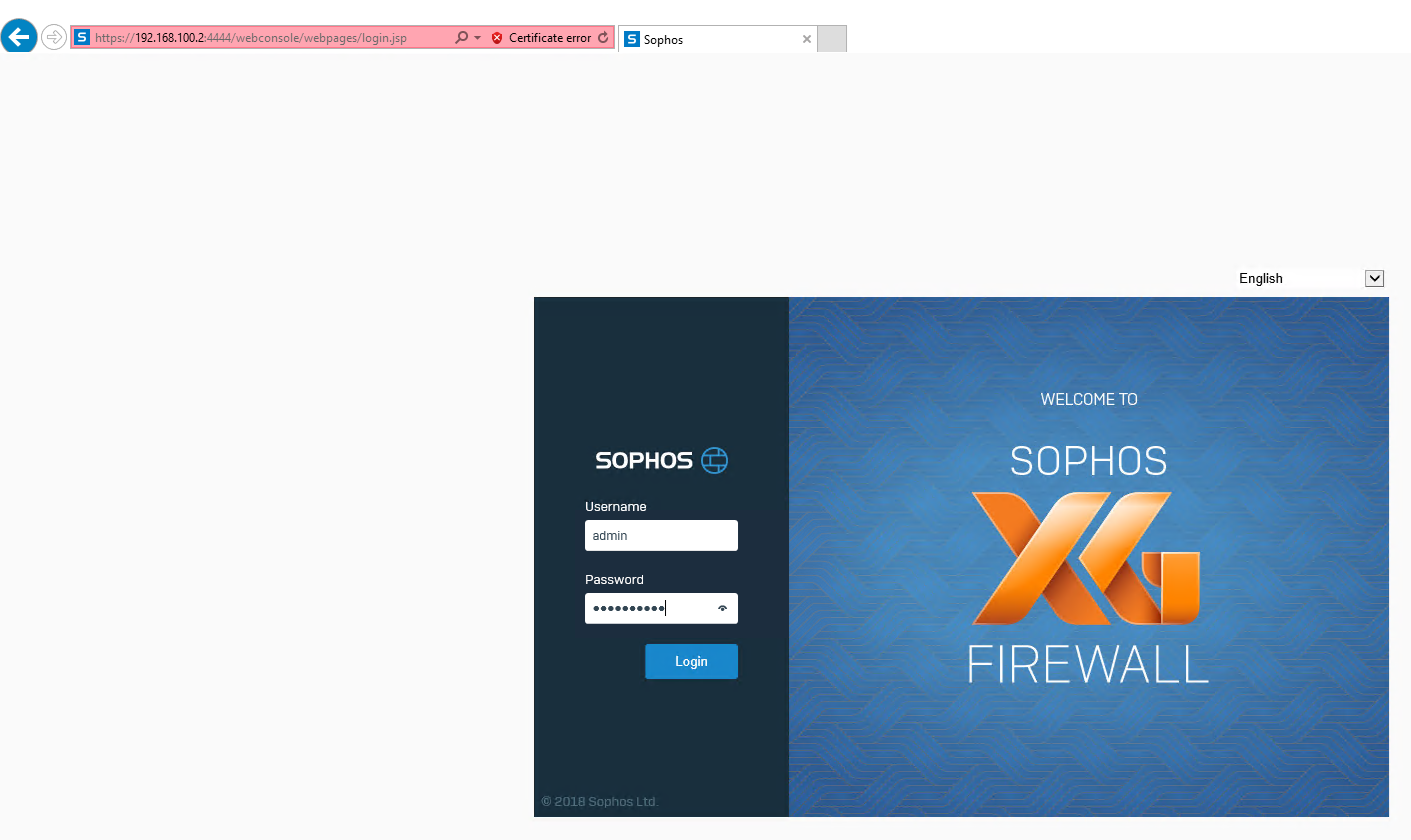
You may find that you lost the XG firewall configuration portal connection, that’s normal, you need to change url to https://192.168.100.2:4444 and you will reconnect it again.
Congratulation! You installed XG firewall at Azure nested guest VM successful!!
Hope you enjoy this post.
Cary Sun
Twitter: @SifuSun