
As we know, Microsoft Server 2019 has lot of features improved, also you may need a pilot test environment to test it with applications but don’t want to impact product. Don’t worry, today, I am going to show you how to create a Windows Server 2019 virtual machine at the Windows 10 laptop.
- Ensure that hardware virtualization support is turned on in the BIOS settings.
- Login to Windows 10.
-
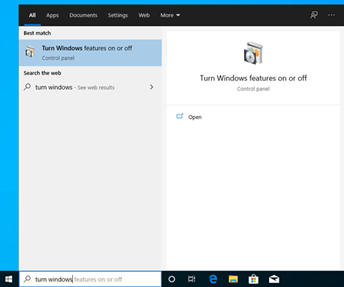
Click the search and type turn windows features on or off and select it.
-
On the Turn Windows features on or off page, select Hyper-V, click OK.

-
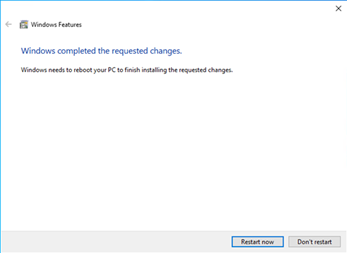
On the Windows Completed the requested changes page, click Restart now.
-
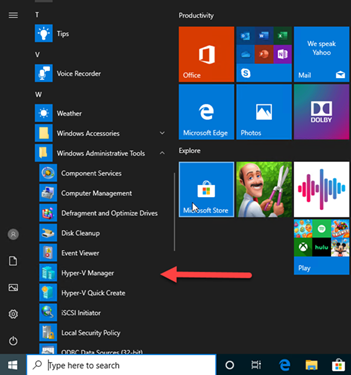
Login Windows 10, click Start, expand Windows Administrative Tools and select Hyper-V Manager.
-
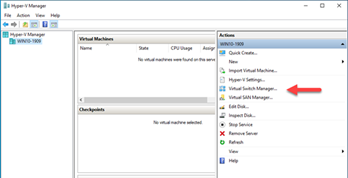
On the V Manager page, select the windows 10 and click Virtual Switch Manager.
-
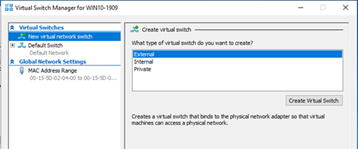
On the Virtual Switches page, select New Virtual network switch, select External for the virtual switch type, click Create Virtual Switch.
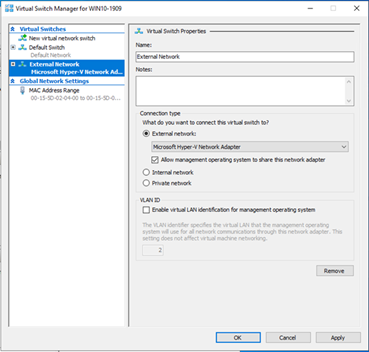
- On the Virtual Switch Properties page, type the name for the New Virtual Switch.
-
On the connect type, select External network, select your Network adapter card, select Allow management operating system to share this network adapter, click Apply.
-
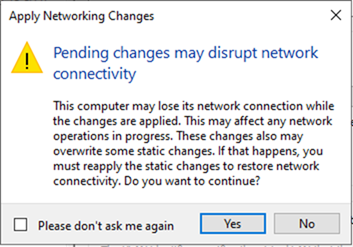
On the Pending changes may disrupt network connectivity warning page, click Yes.
-
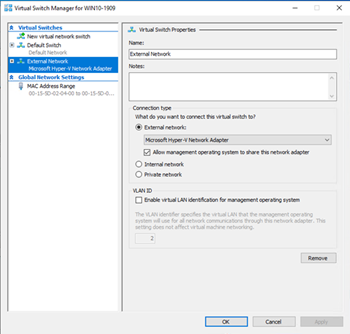
On the Virtual Switch Properties page, click OK.
-
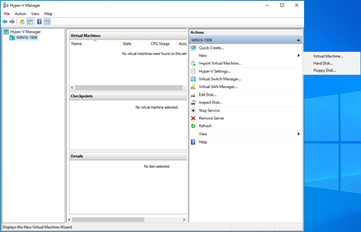
On the Hyper-V Manager page, select the Windows 10, click New from Actions and then select Virtual Machine.
-
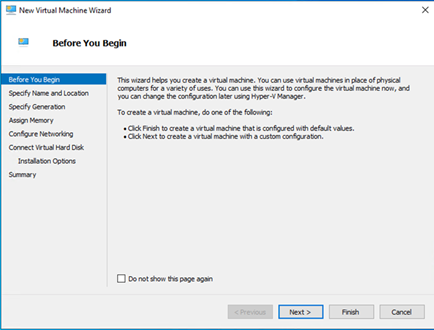
On the Before You Begin page, click Next.
-
On the Specify Name and Location page, type name for your Virtual Machine, and select folder for the location of VM, click Next.

-
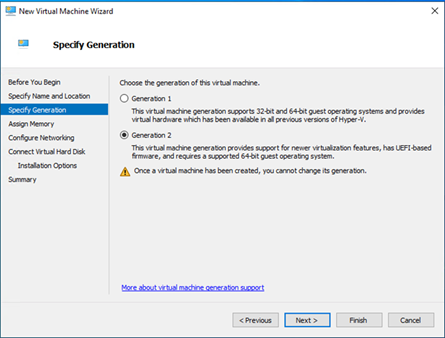
On the Specify Generation page, select Generation 2 and click Next.
-
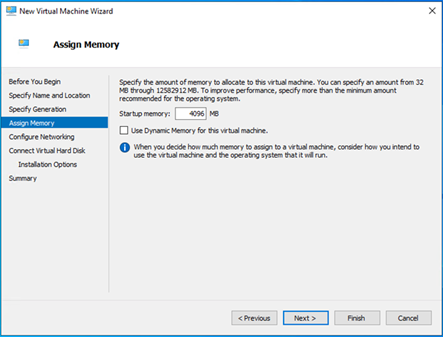
On the Assign Memory page, assign 4GB memory for the new VM, click Next.
-
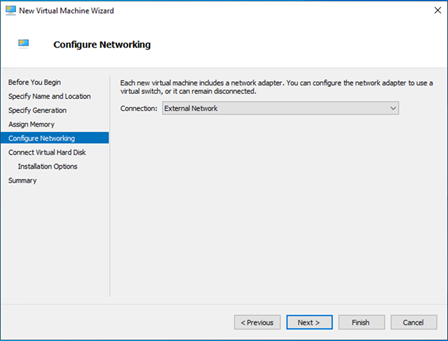
On the Configure Networking page, select External Network for the Connection.
-
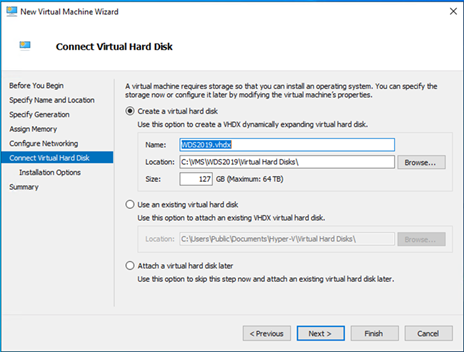
On the Connect Virtual Hard Disk page, keep the default settings, click Next.
-
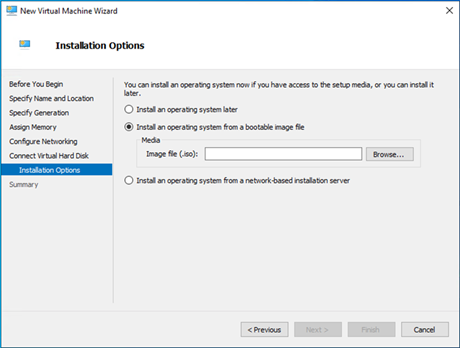
On the Installation Options page, select Install and Operating system later, click Browse.
-
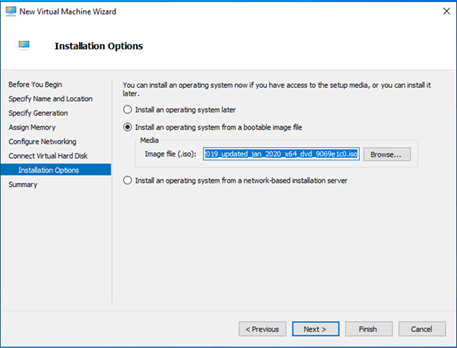
Select the Windows Server 2019 ISO file, click Open.

-
On the Installation Options page, click Next.
-
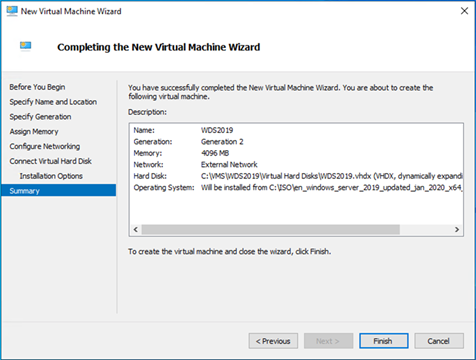
On the Completing the New Virtual Machine Wizard page, click Finish.
-
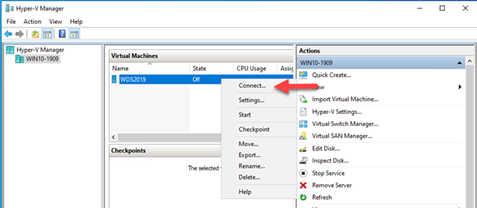
On the Hyper-V Manager page, right-click the new virtual machine (WDS2019) and select Connect.
-
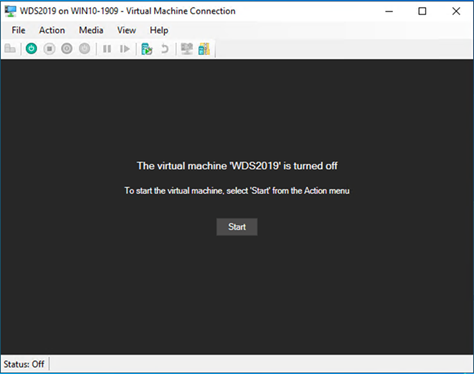
On the virtual machine console, click Start.
-
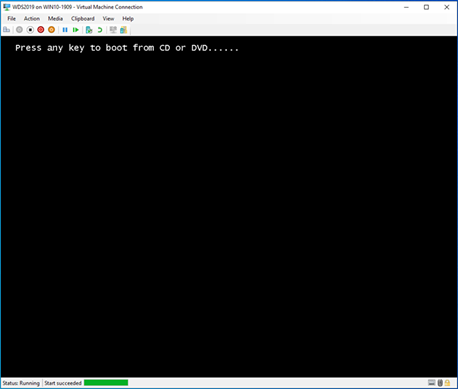
Press any key to boot from DVD and start Install Windows Server 2019.
-
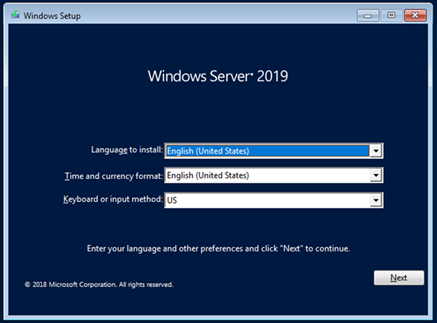
On the Language, Time and Keyboard settings page, click Next.
-
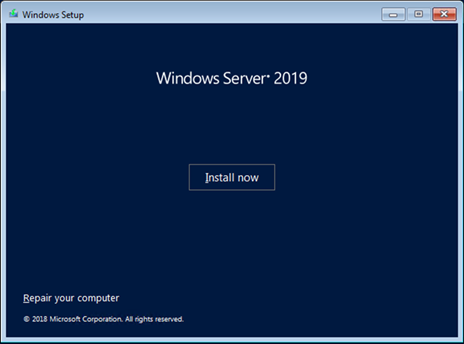
On the Install now page, click Install now.
-
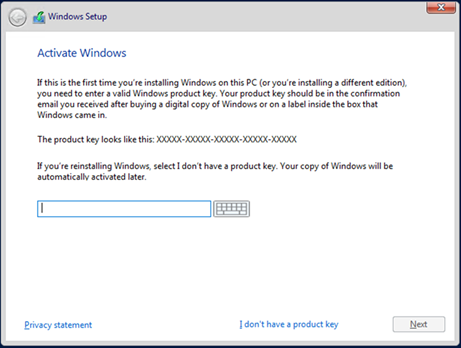
On the Activate Windows page, click I don’t have a product key.
-
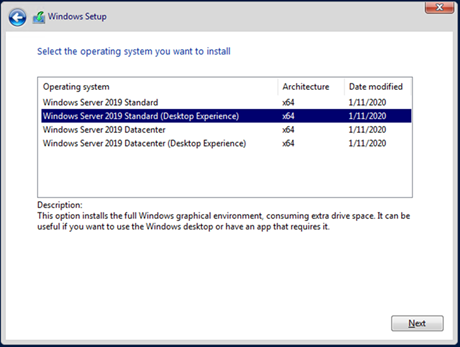
On the Select the operating system you want to install page, select Windows Server 2019 Standard (Desktop Experience), click Next.
-
On the Applicable notice and license terms page, select I accept the license terms, click Next.

-
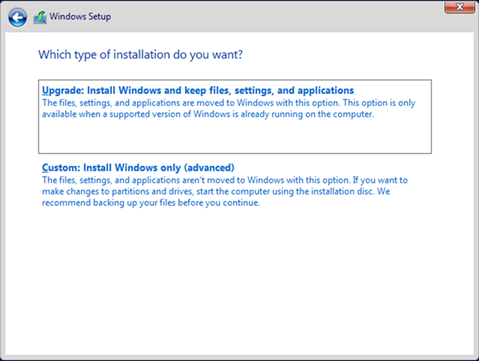
On the Which type of installation do you want page, select Custom: Install Windows only (advanced).
-
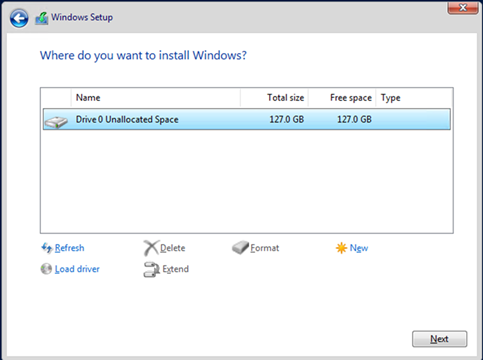
On the Where do you want to install Windows page, click Next.
-
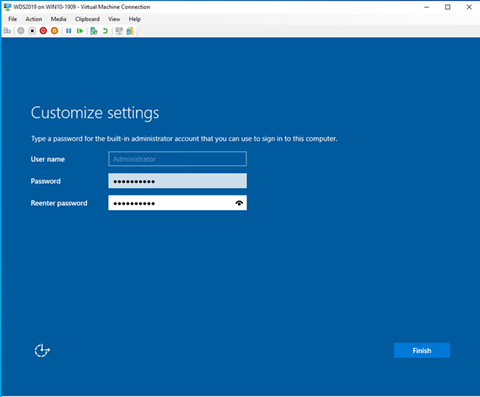
On the customize settings page, enter password for Administrator account, click Finish.
Hope you enjoy this post.
Cary Sun
Twitter: @SifuSun