
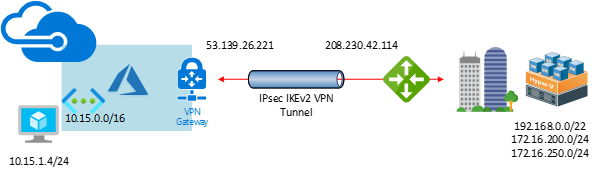
This document will show you how to step by step to configure Cisco Meraki to azure site to site VPN tunnels IKEv2.
The Cisco Meraki Security appliances running firmware must be on firmware 15 or greater to take advantage of IKEv2, because the firmware 15.x is still beta version, you need to ask Meraki support to upgrade it for you if you need it.
Settings at Azure site
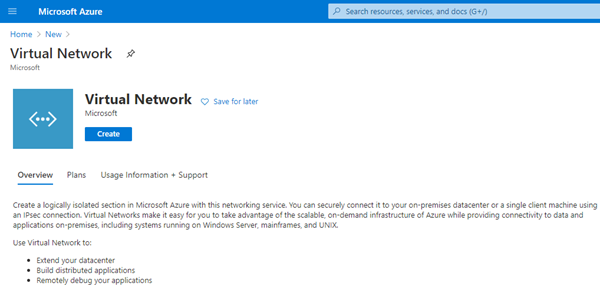
Create Azure Virtual network
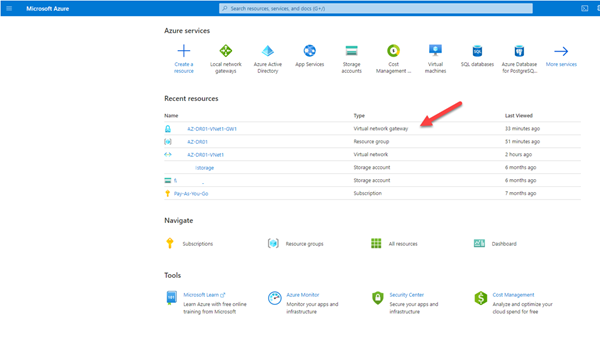
1.Signin to Azure portal.
2.In Search resources, service, and docs (G+/), type virtual network.
3.Select Virtual Network from the Services results.

4.On the Virtual Network page, select Create.
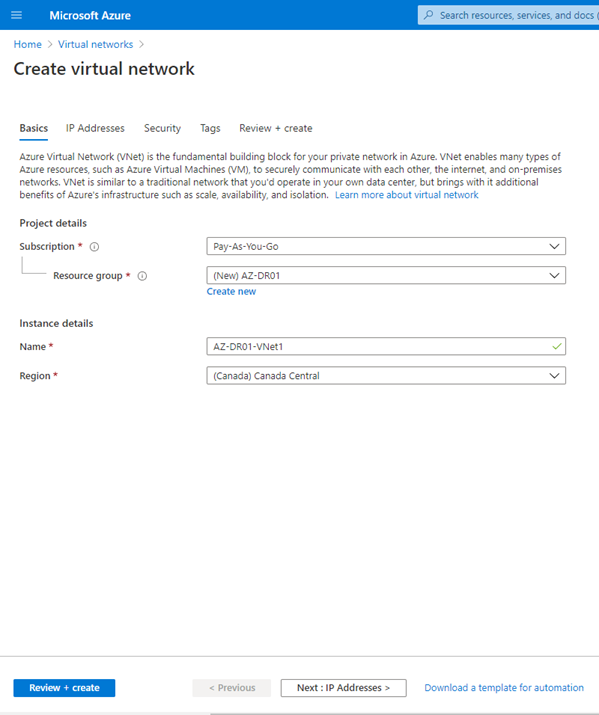
5.Once you select Create, the Create virtual network page opens.
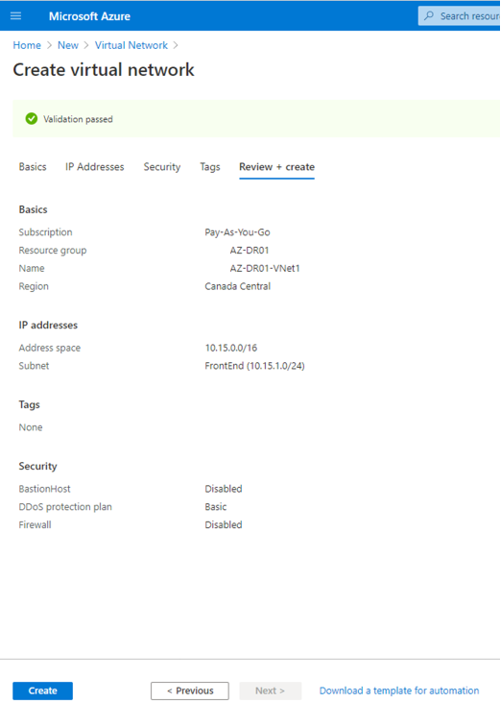
6.On the Basics tab, configure Project details and Instance details VNet settings.
When you fill in the fields, you see a green check mark when the characters you enter in the field are validated. Some values are auto filled, which you can replace with your own values:
- Subscription: Select Pay-As-You-Go.
- Resource group: Select the existing (Create new) Resource group AZ-DR01.

- Name: Type AZ-DR01-VNet1.
- Region: Select Canada Central.
7.Click Next: IP Address.
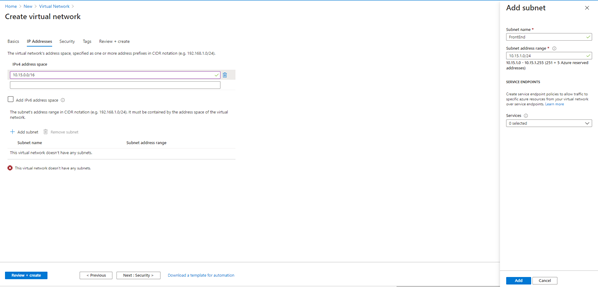
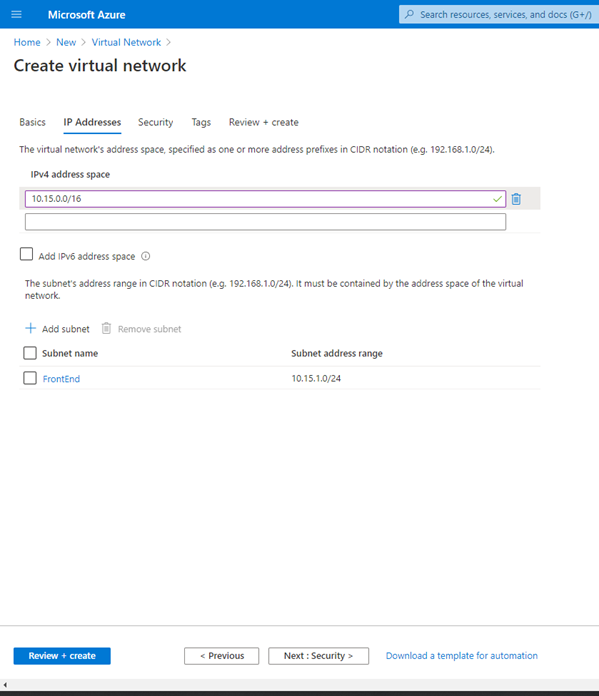
8.On the IP Addresses tab, configure the values.
- IPv4 address space: Type 10.15.0.0/16.
9.Click +Add subnet.
- Subnet name: type FrontEnd.
- Subnet address range: 10.15.1.0/24.
- Services: Keep the default settings (0 selected)
10.Click Add.
11.Click Next: Security.
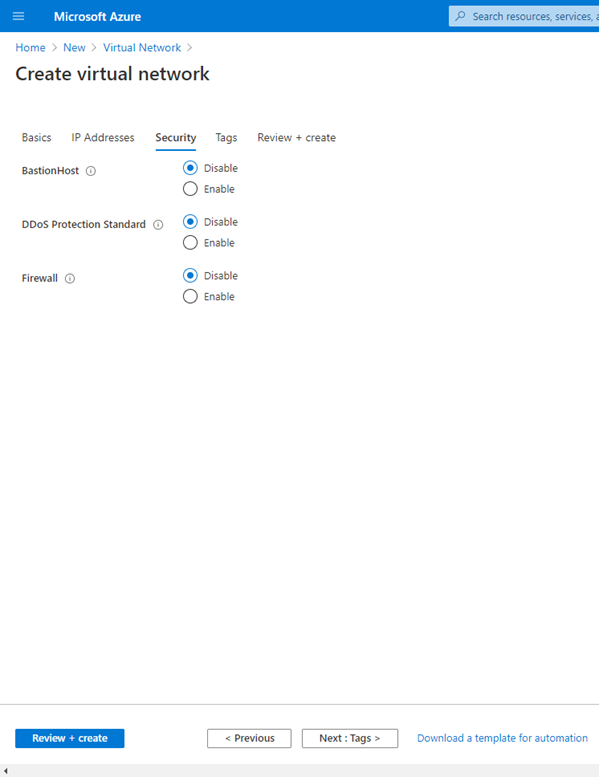
12.On the Security tab, at this time, leave the default values:
- BastionHost: Disable.
- DDoS Protection Standard: Disable.
- Firewall: Disable.
13.Click Next: Tags.
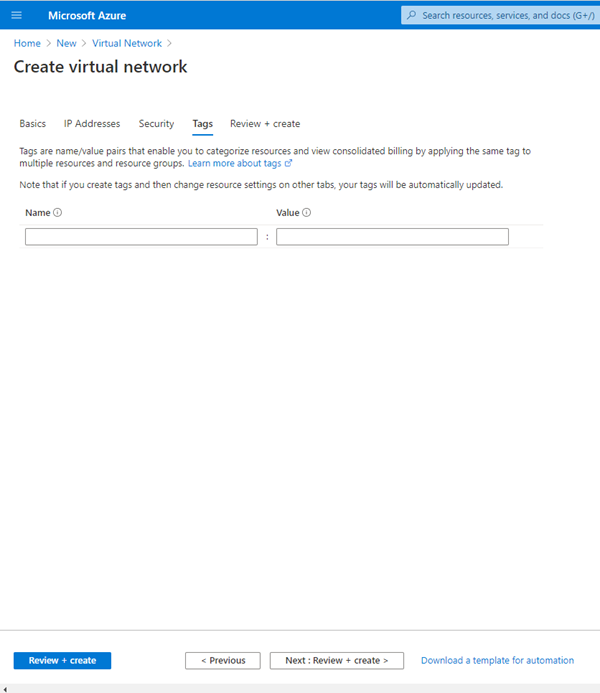
14.On the Tags tab, leave the default values.
15.Click Next: Review + create.
16.After the settings have been validated, select Create.
17.Make sure the new VNet deployment is complete without issues, click Go to resource.

Create Azure VPN Gateway
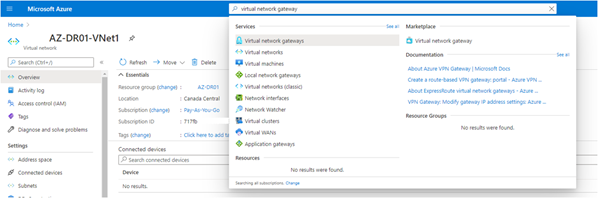
1.In Search resources, service, and docs (G+/), type virtual network gateway.
2.Select Virtual network gateway from the Services results.
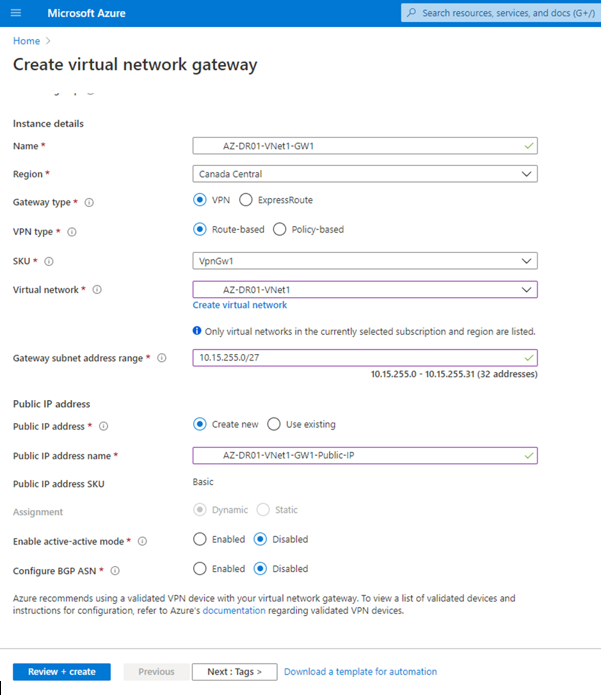
3.On the Basics tab, configure Project details and Instance details and Public IP address for Virtual network gateway settings.
- Subscription: Select Pay-As-You-Go.
- Name: Type AZ-DR01-VNet1-GW1.
- Region: Select Canada Central.
- Gateway type: Select VPN.
- VPN type: Select Route-Based.
- SKU: Select VpnGW1 (Bandwidth:650Mbps)
- Virtual network: Select AZ-DR01-VNet1.
- Gateway subnet address range: Type 10.15.255.0/27
- Public IP address: Leave Create new selected.
- Public IP address name: AZ-DR01-VNet1-GW1-Public-IP
- Assignment: VPN gateway supports only Dynamic.
- Enable Active-Active mode: Select Disabled.
- Configure BGP ASN: Select Disabled.
4.Click Next: Tags.
5.On the Tags tab, leave the default values.
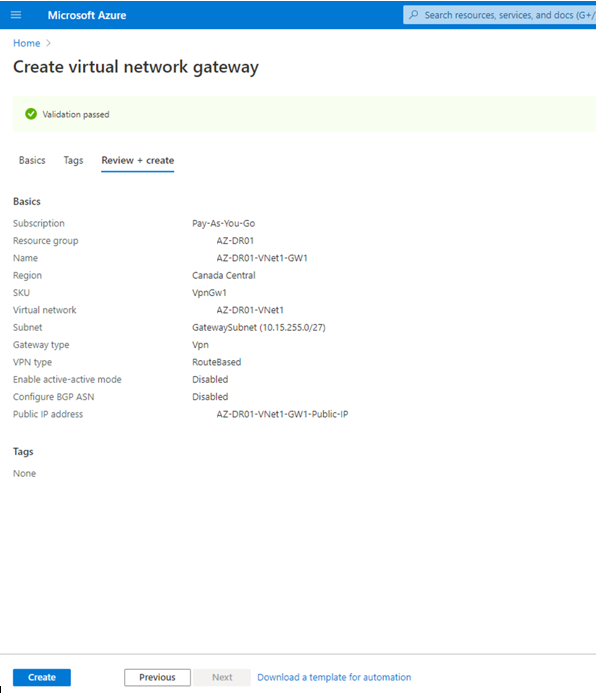
6.Click Next: Review + create.

7.After the settings have been validated, select Create.
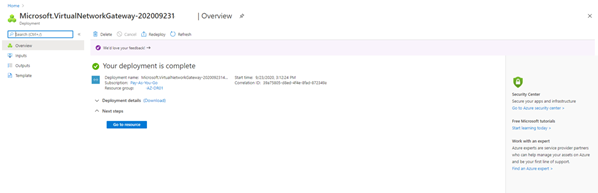
8.Make sure the new Virtual network gateway deployment is complete without issues, click Go to resource.
Create Azure Local Network Gateway
1.In Search resources, service, and docs (G+/), type virtual network gateway.
2.Select Local network gateway from the Services results.

3.Click Create local network gateway.

4.On the Create local network gateway page, specify the values for your local network gateway.
- Name: Type OFFICECalgary.
- IP address: Type OFFICE-Calgary WAN IP address (208.230.42.114).
- Address Space: add 192.168.0.0/22 and 172.16.200.0/24 and 172.16.250.0/24
- Configure BGP settings: Use only when configuring BGP. Otherwise, don’t select this.
- Subscription: Select Pay-As-You-Go.
- Resource Group: Select AZ-DR01.
- Location: Select Canada Central.
5.Click Create.

Create VPN connection
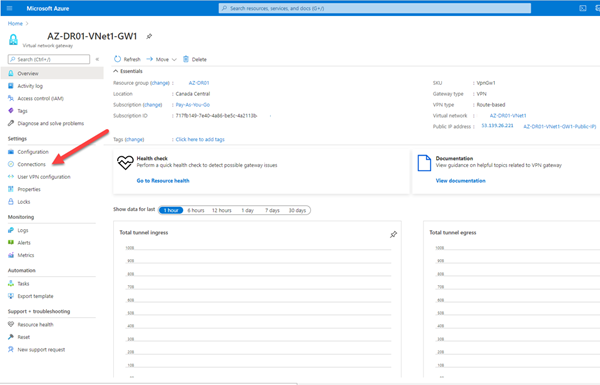
1.on the Azure Services page, click the new create Virtual network gateway.
2.on the Virtual network gateway page, select Connections.
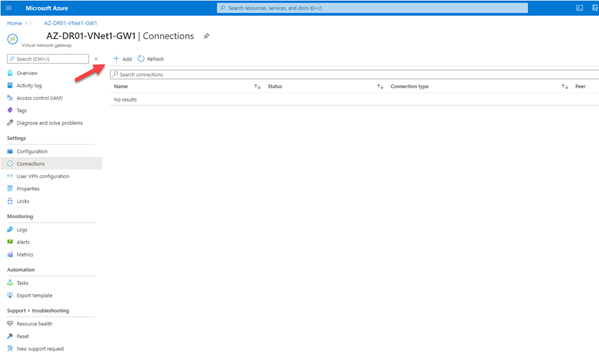
3.On the Connections page, click +Add.
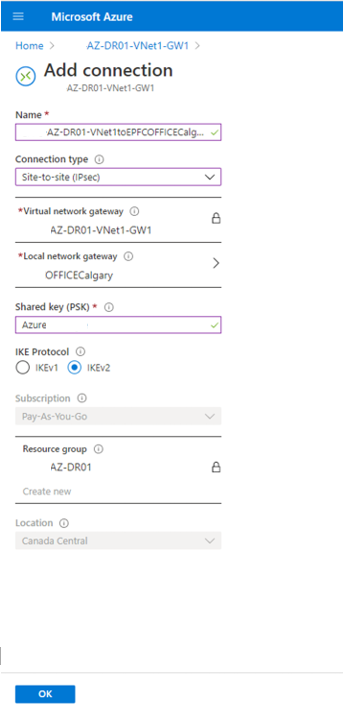
4.On the Add connection page, configure the values for your connection.
- Name: Type AZ-DR01-VNet1toOFFICECalgary
- Connection type: Select Site-to-site(IPSec).
- Virtual network gateway: The value is fixed because you are connecting from this gateway.
- Local network gateway: Click Choose a local network gateway and select the local network gateway that you want to use.
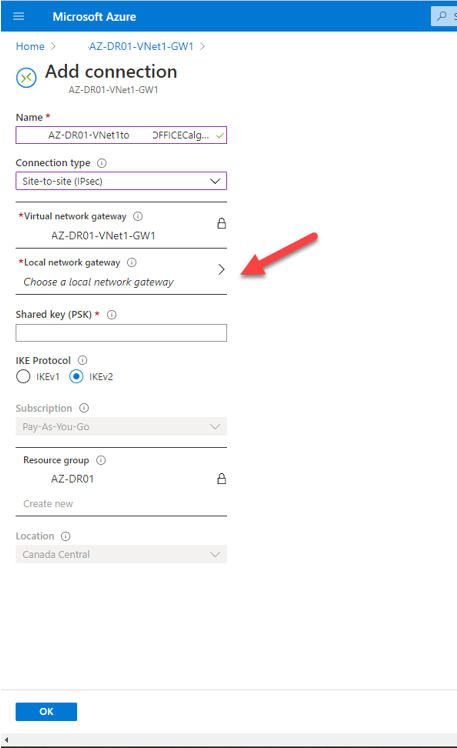
- Click the OFFICECalgary local network gateway.

- Shared Key: Type Azure
- IKE Protocol: Select IKEv2
- Resource Group: Select AZ-DR01
5.Click OK.
Settings at Meraki site
1.Signin to Cisco Meraki portal.
2.Select Security & SD-WAN, click Site-to-site VPN.

3.On the Site-to-site VPN field, select Hub.
4.On the VPN settings field, select the local networks that you want to connect to Azure and then select VPN on.

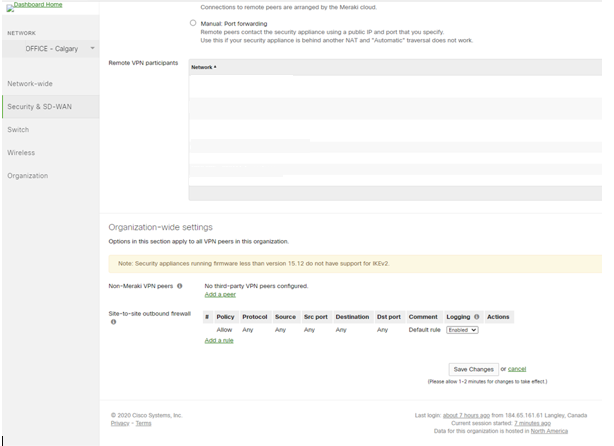
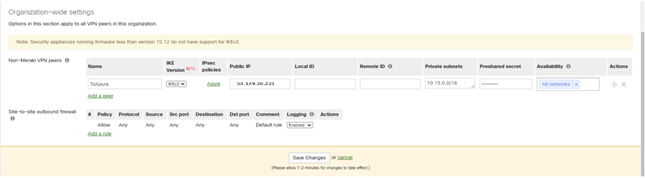
5. On the Organization-wide settings page, click add a peer in the Non-Meraki VPN peers.
6.On the Non-Meraki VPN peers, configure details settings.
- Name: Type ToAzure
- IKE Version: Select IKEv2
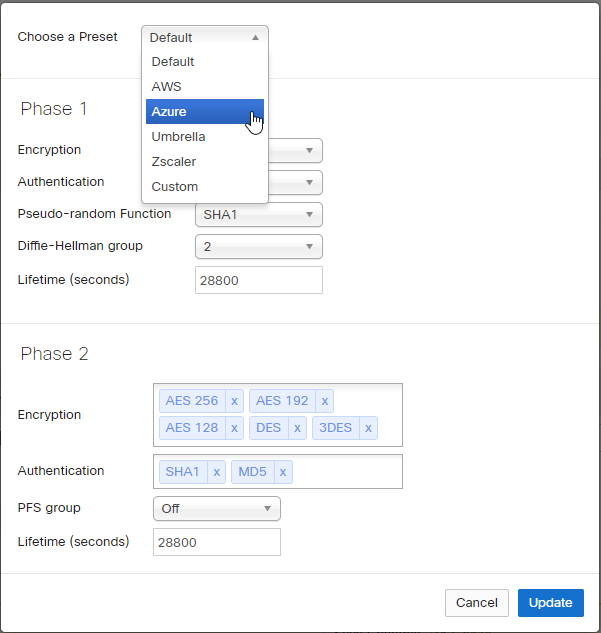
- IPsec Policies: Click Default and then change Default to Azure
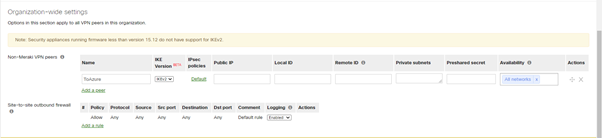
Click Update.
- Public IP: Type Azure Virtual Network Gateway Public IP address (53.139.26.221)
- Private subnets: Type 10.15.0.0/16
- Preshared secret: Type Azure.
- Availability: select All Networks.
7.Click Save Changes.
Verify the VPN connection
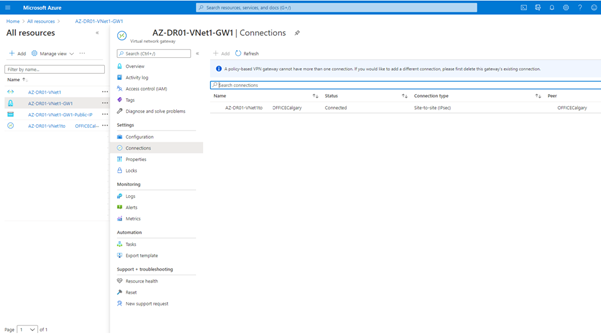
In the Azure portal, you can view the connection status of a Resource Manager VPN Gateway by navigating to the connection.
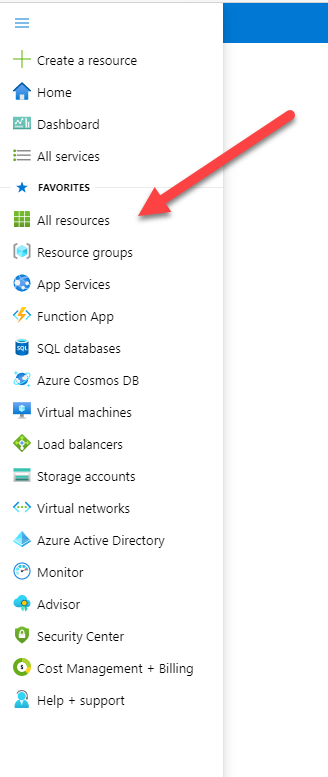
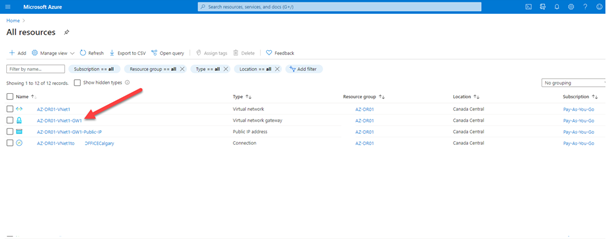
1.In the Azure portal menu, select All resources or search for and select All resources from any page.
2.Select to the virtual network gateway.
3.On the blade for the virtual network gateway, click Connections. You can see the status of each connection.
In the Meraki portal, you can view the VPN status of a Meraki by navigating to the Non-Meraki peer.
1.Signin Meraki portal.
2.Select Security & SD-WAN, click VPN Status.

3.Click Non-Meraki peer.

4.Make sure the Status light show green.
