
Today, I am going to show you how to demote the domain controller from virtual machine of Azure.
1.Sign in Azure portal.
2. In Search resources, service, and docs (G+/), type Virtual Machine.
3.Select Virtual Machine from the Services.

4.On the Virtual Machine page, click the virtual machine, in my case is AZDC01.

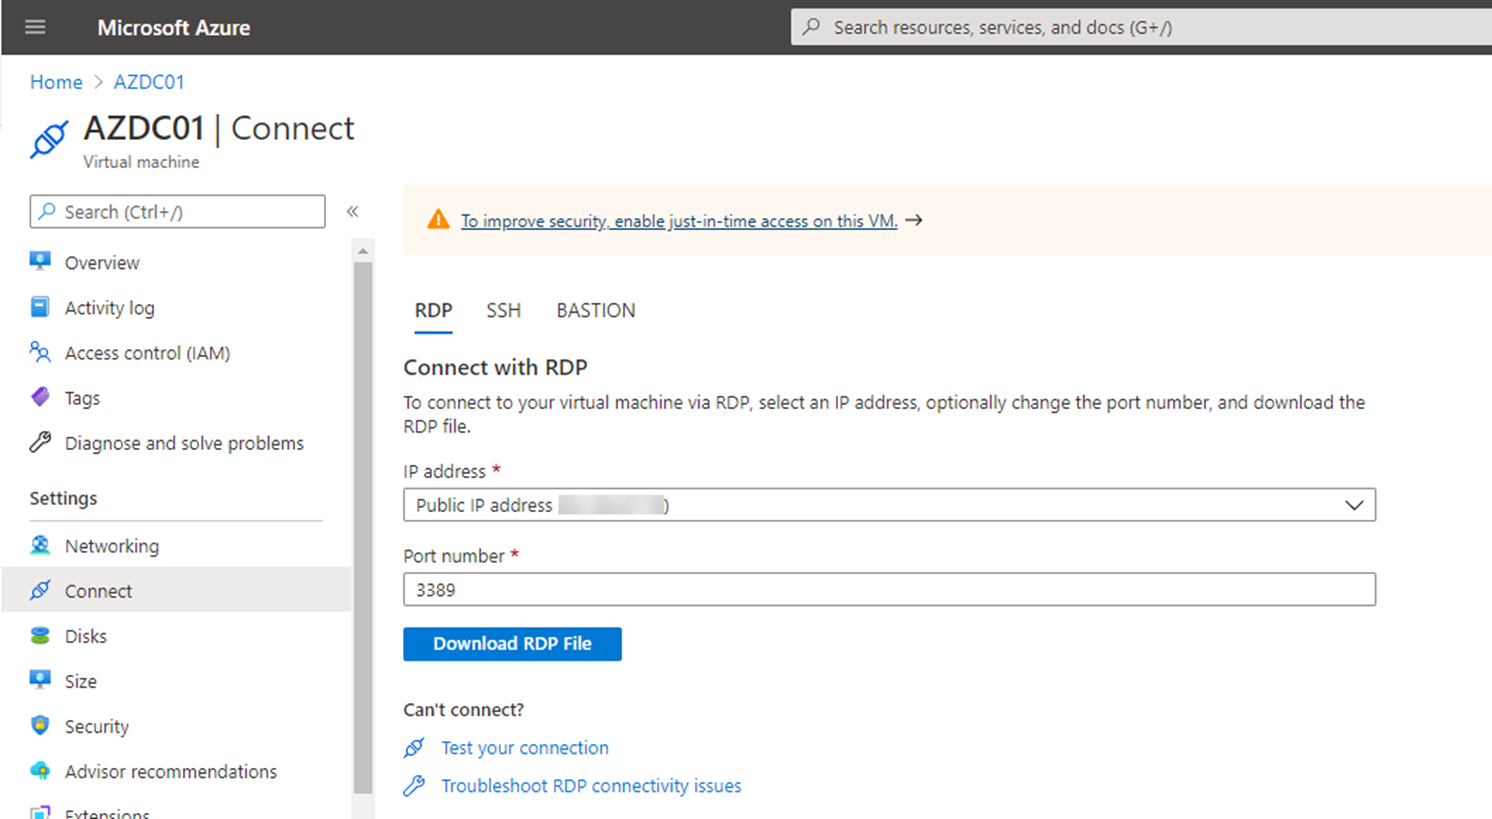
5.On the domain controller Virtual Machine page, click Connect, select RDP.

6.On the RDP page, click Download RDP file.
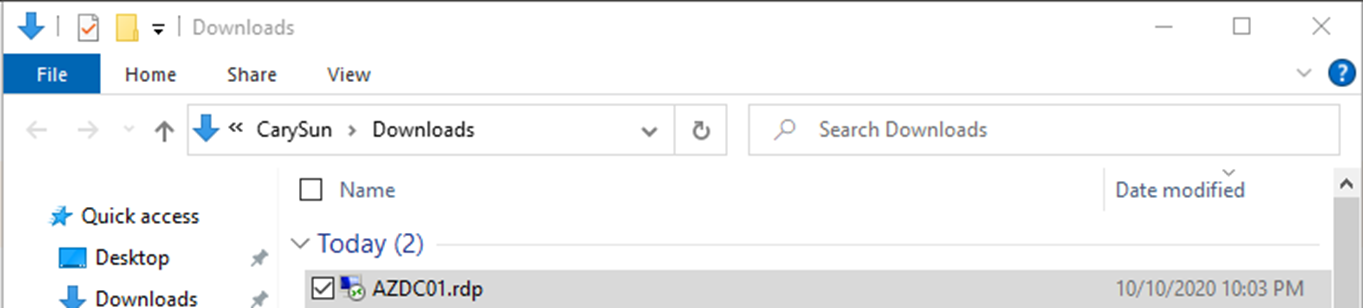
7.Click the download file.
8.Login to domain controller server.
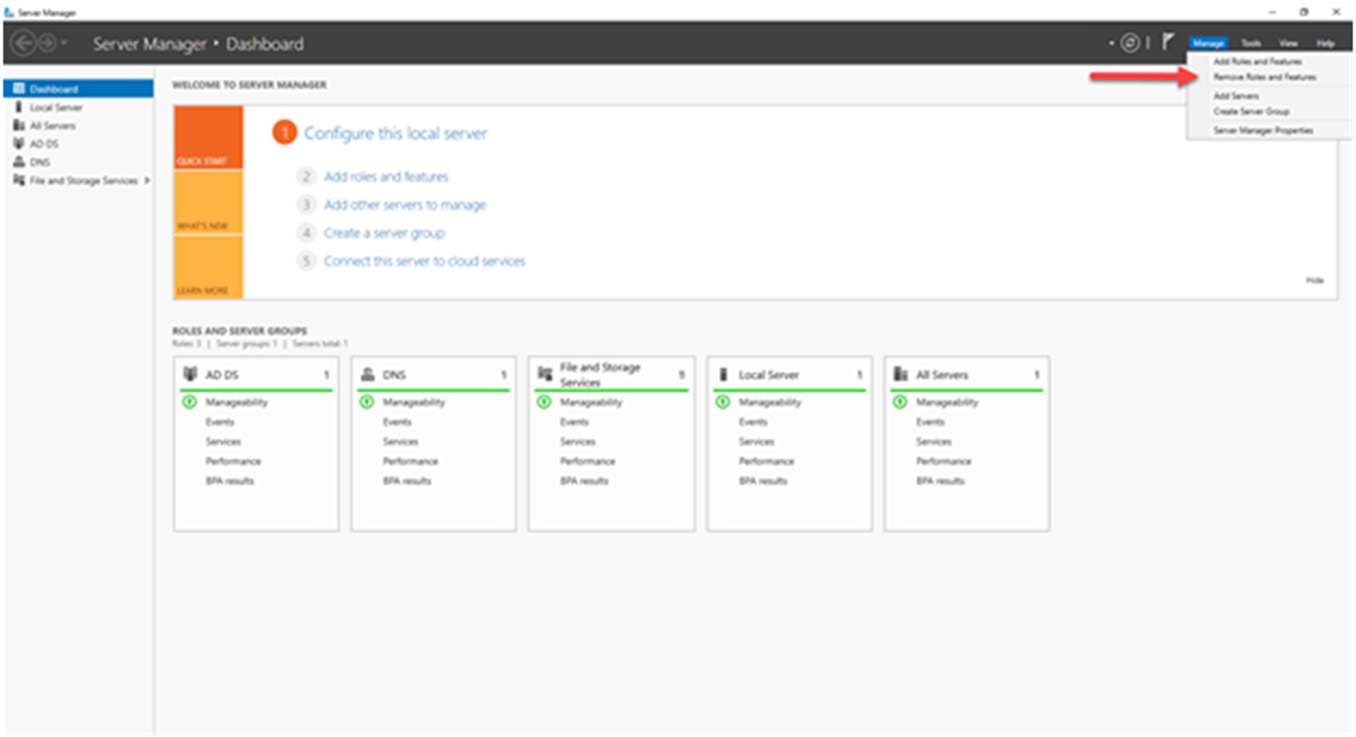
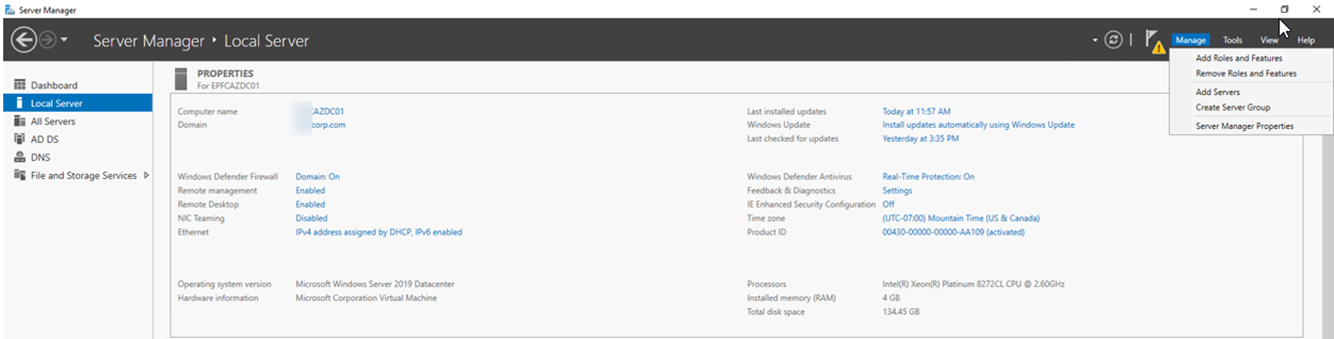
9.On the Server Manager page, select Manager, click Remove Roles and Features.
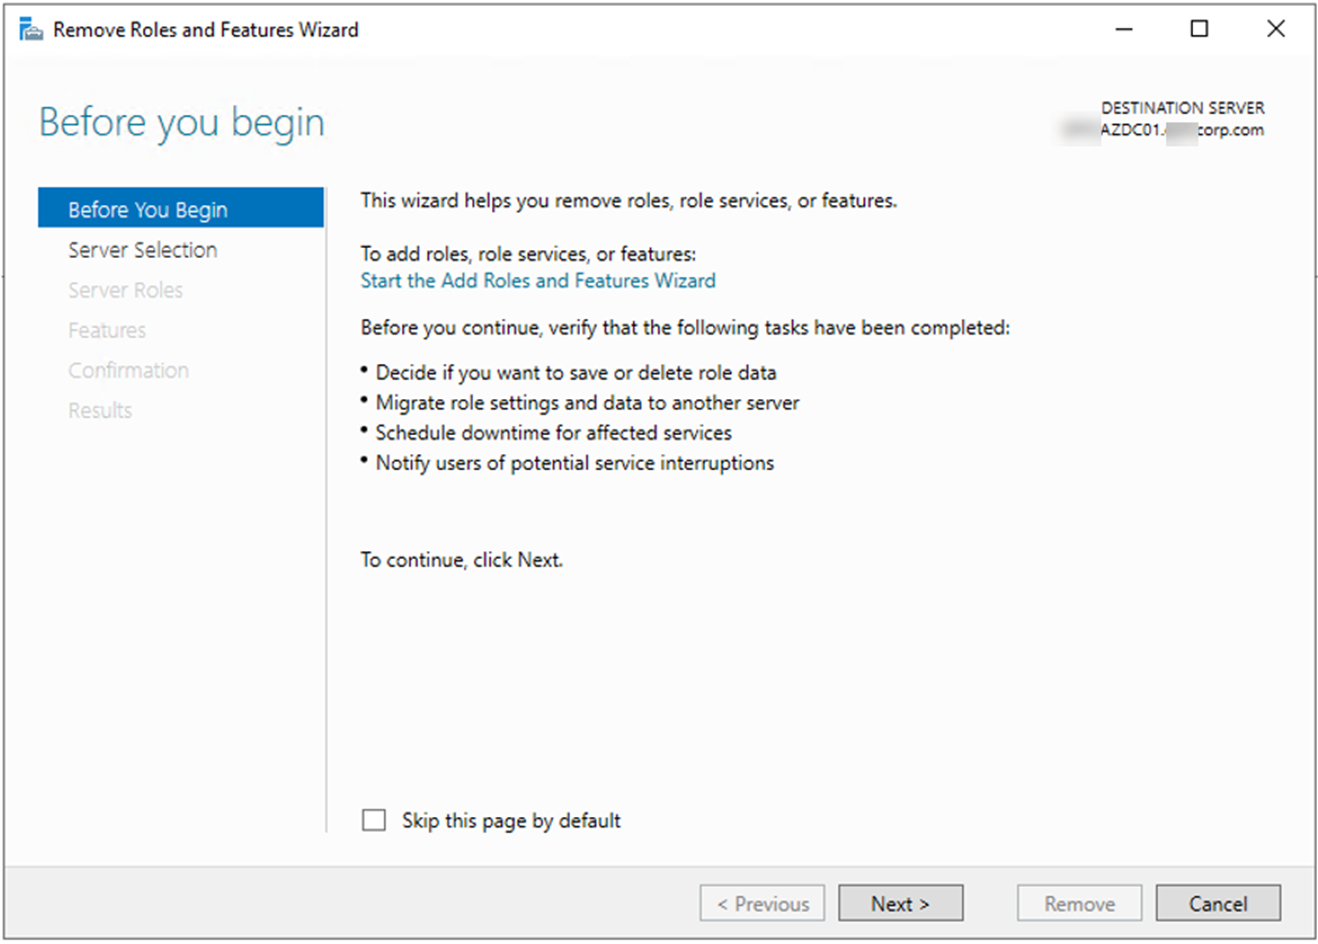
10.On the Before You begin page, click Next.

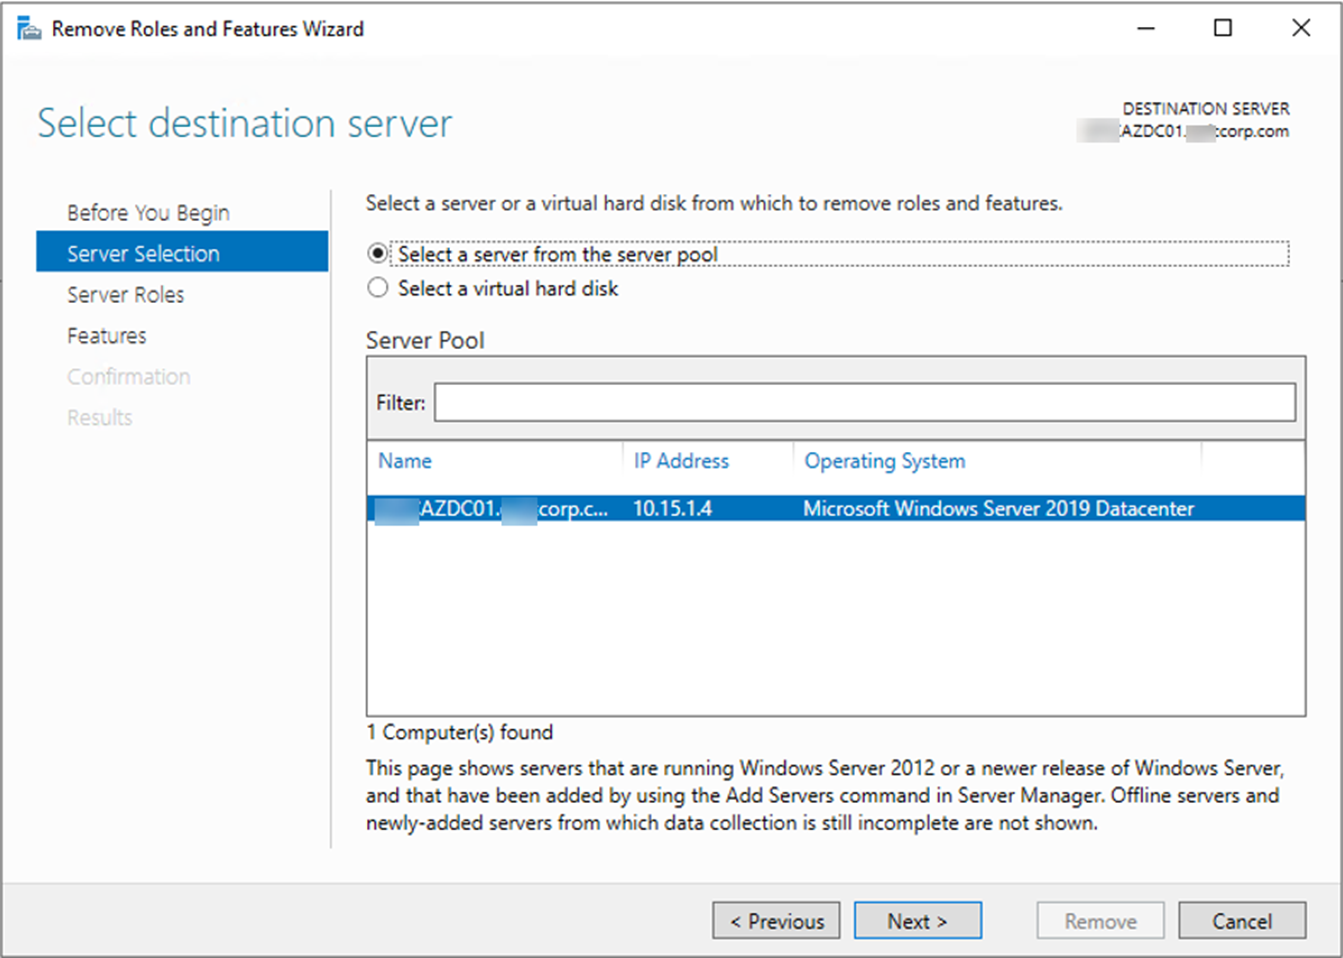
11.On the Select Destination server page, click Next.
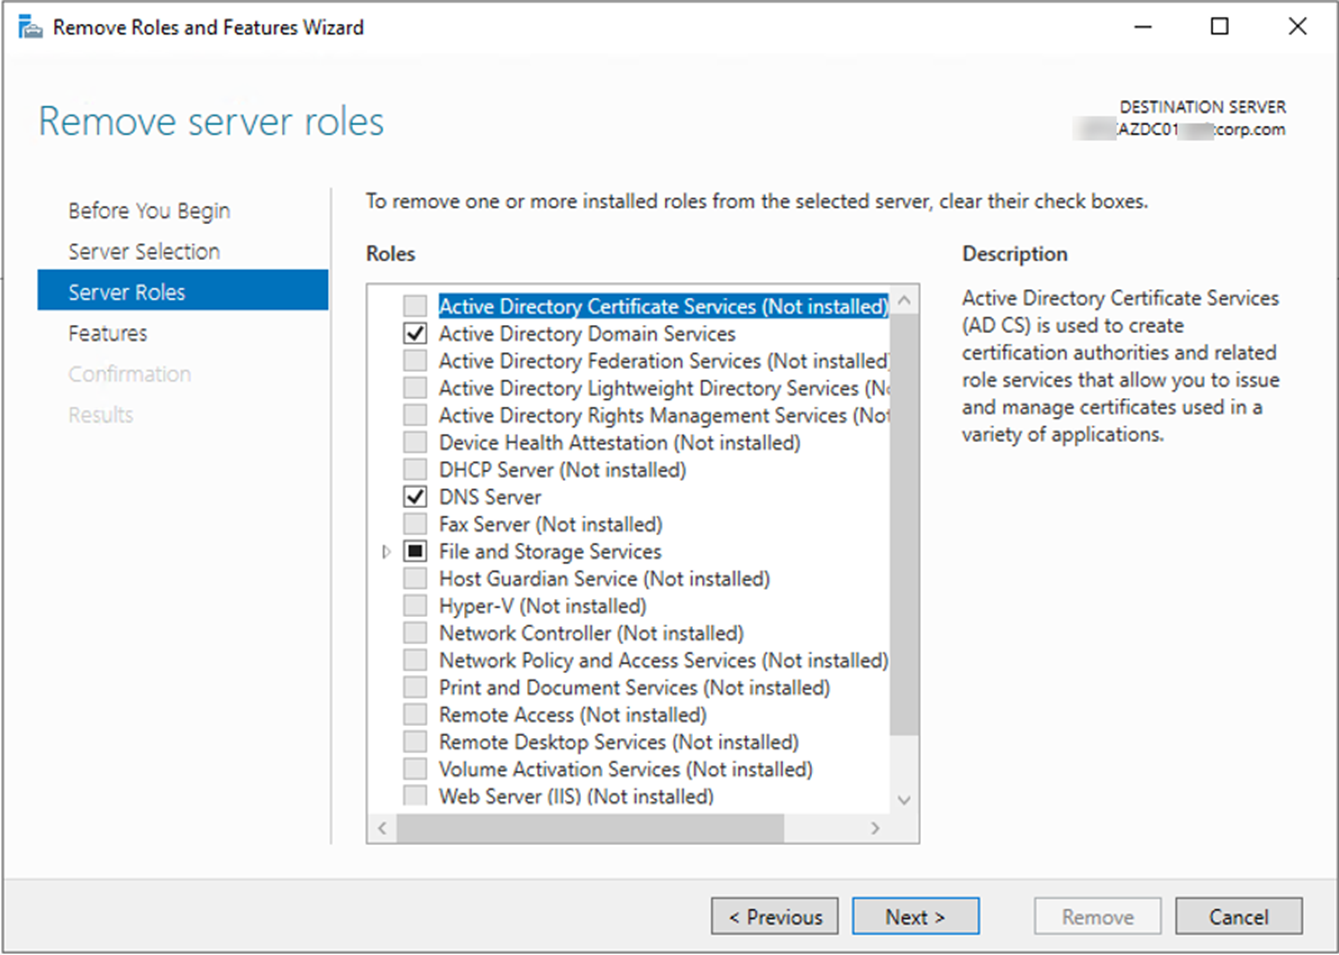
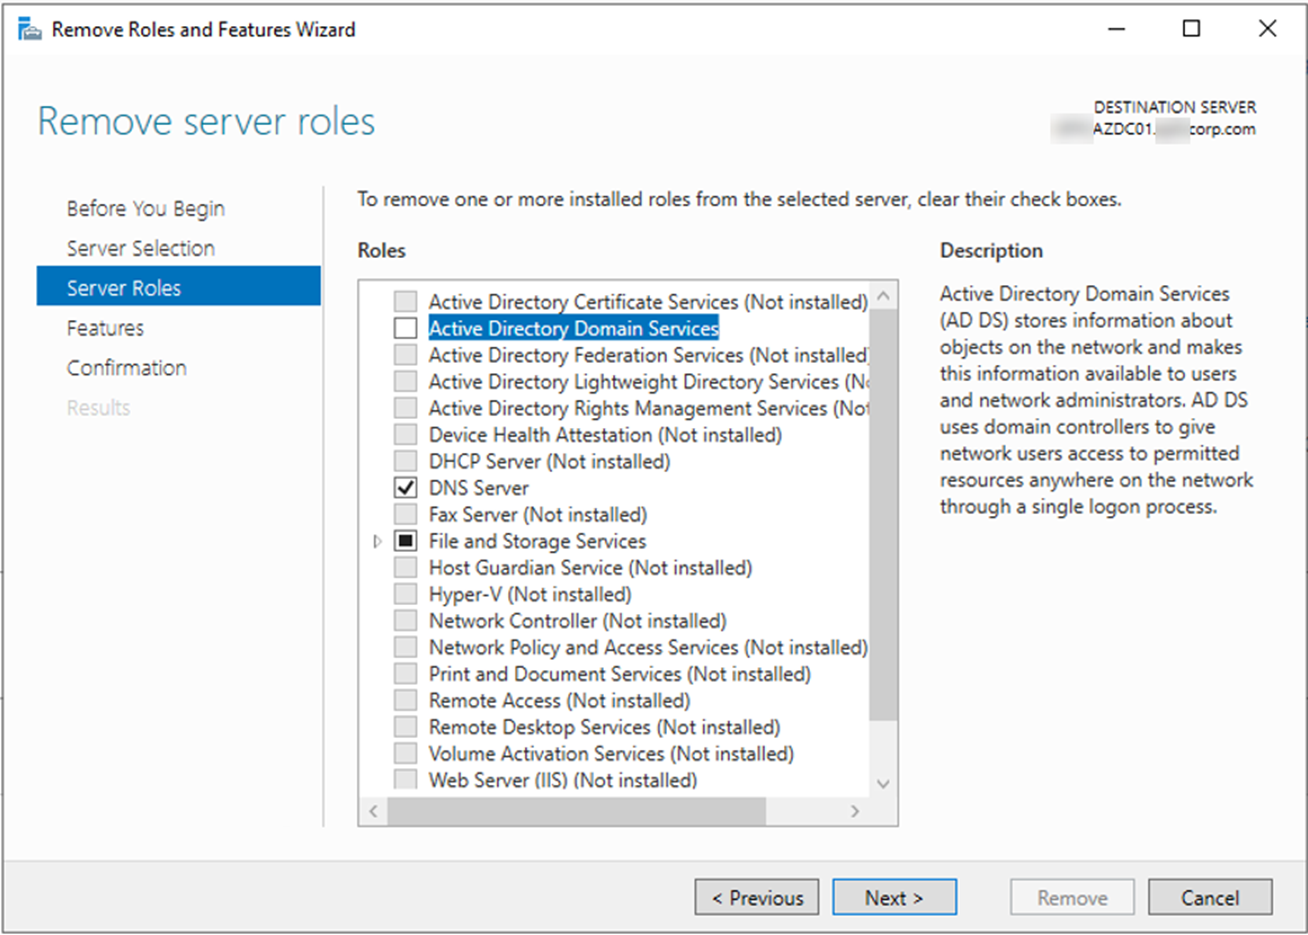
12.On the Remove server roles page, unselect Active Directory Domain Services, click Next.
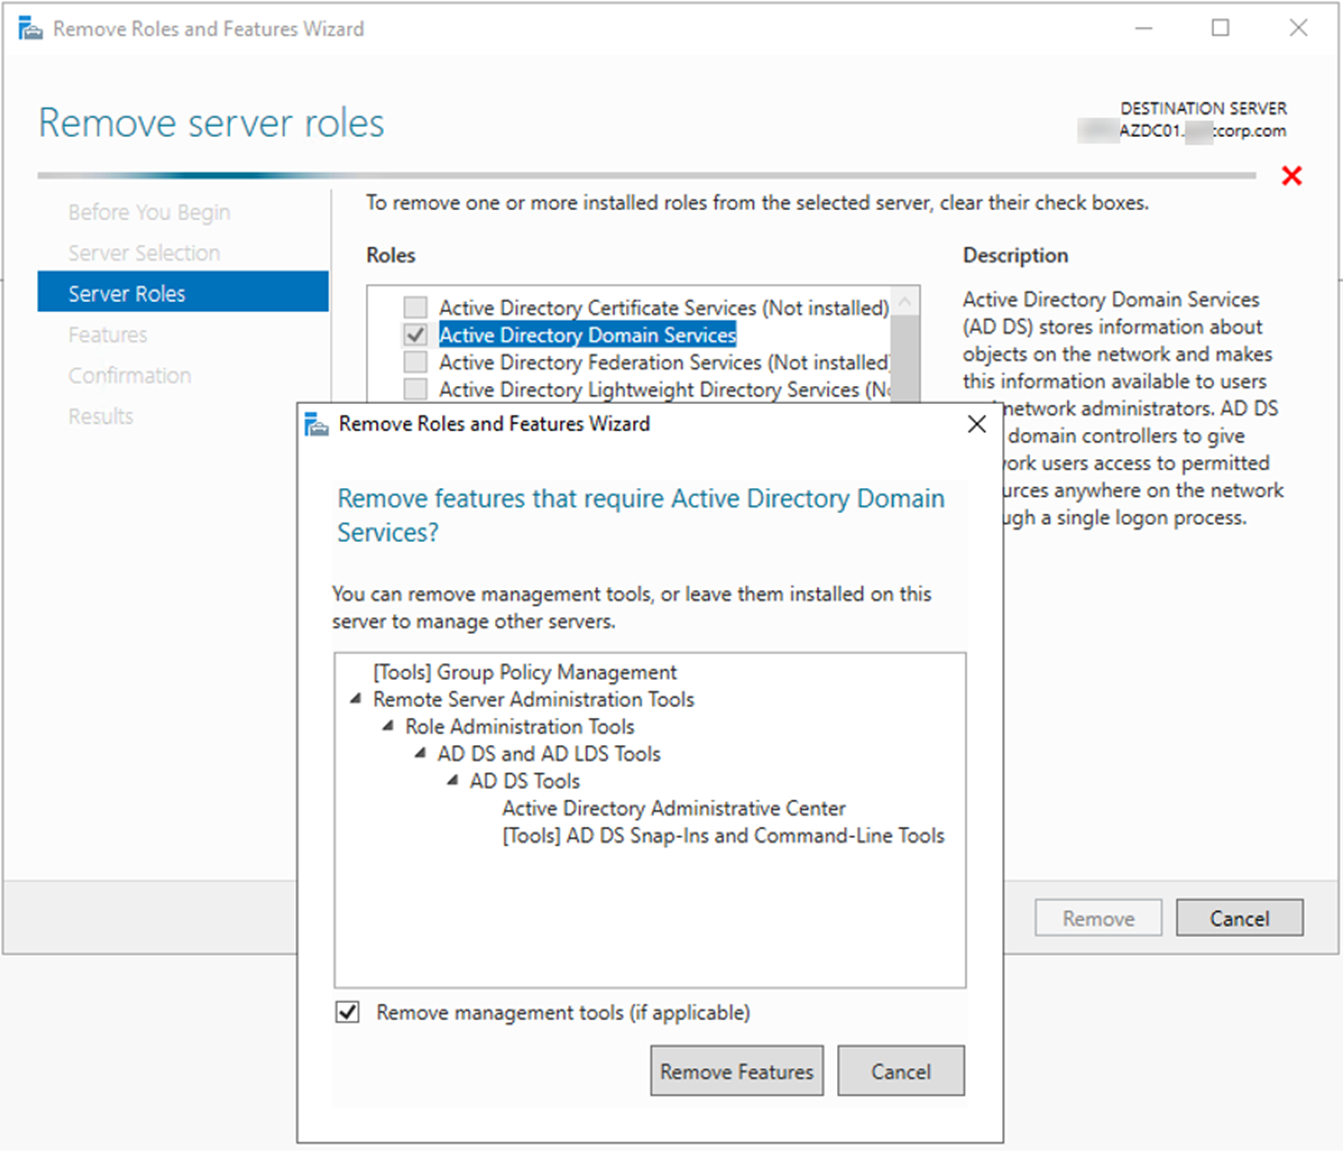
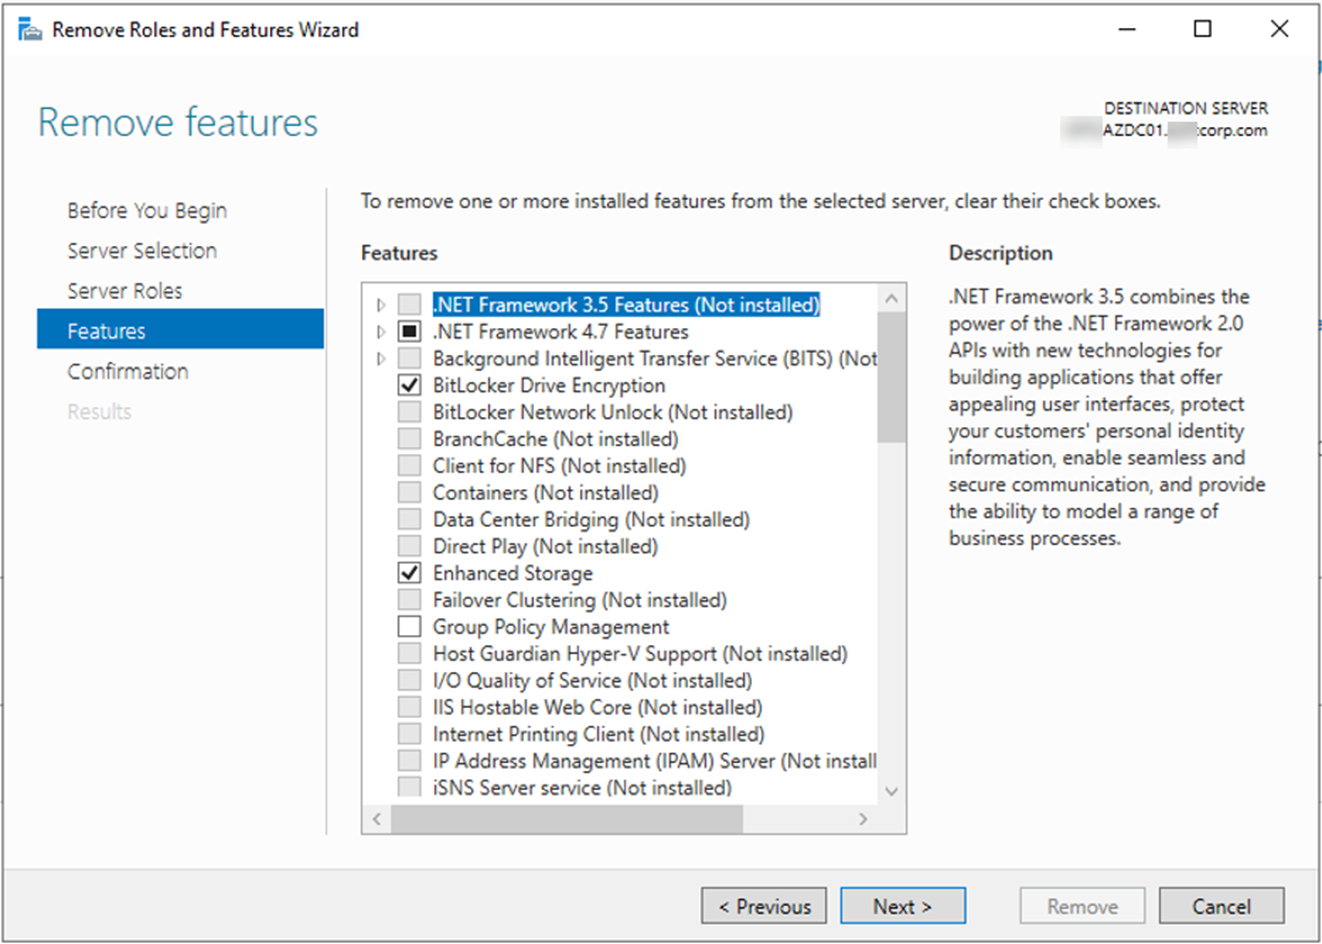
13.On the Remove features page, click Remove Features.
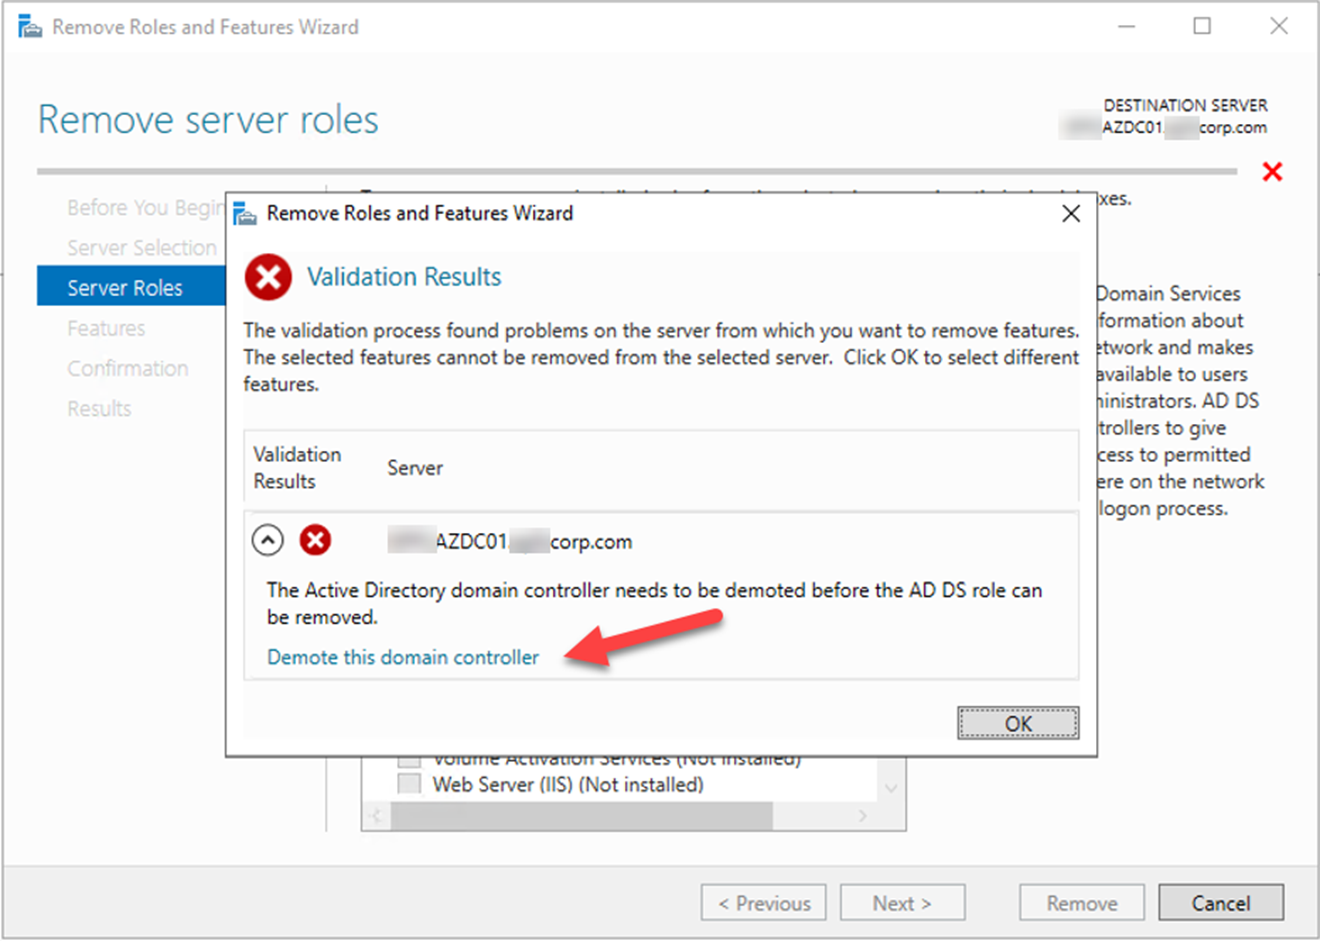
14.You will notice you cannot remove Active Directory Domain Services before demote it, click Demote this domain controller.
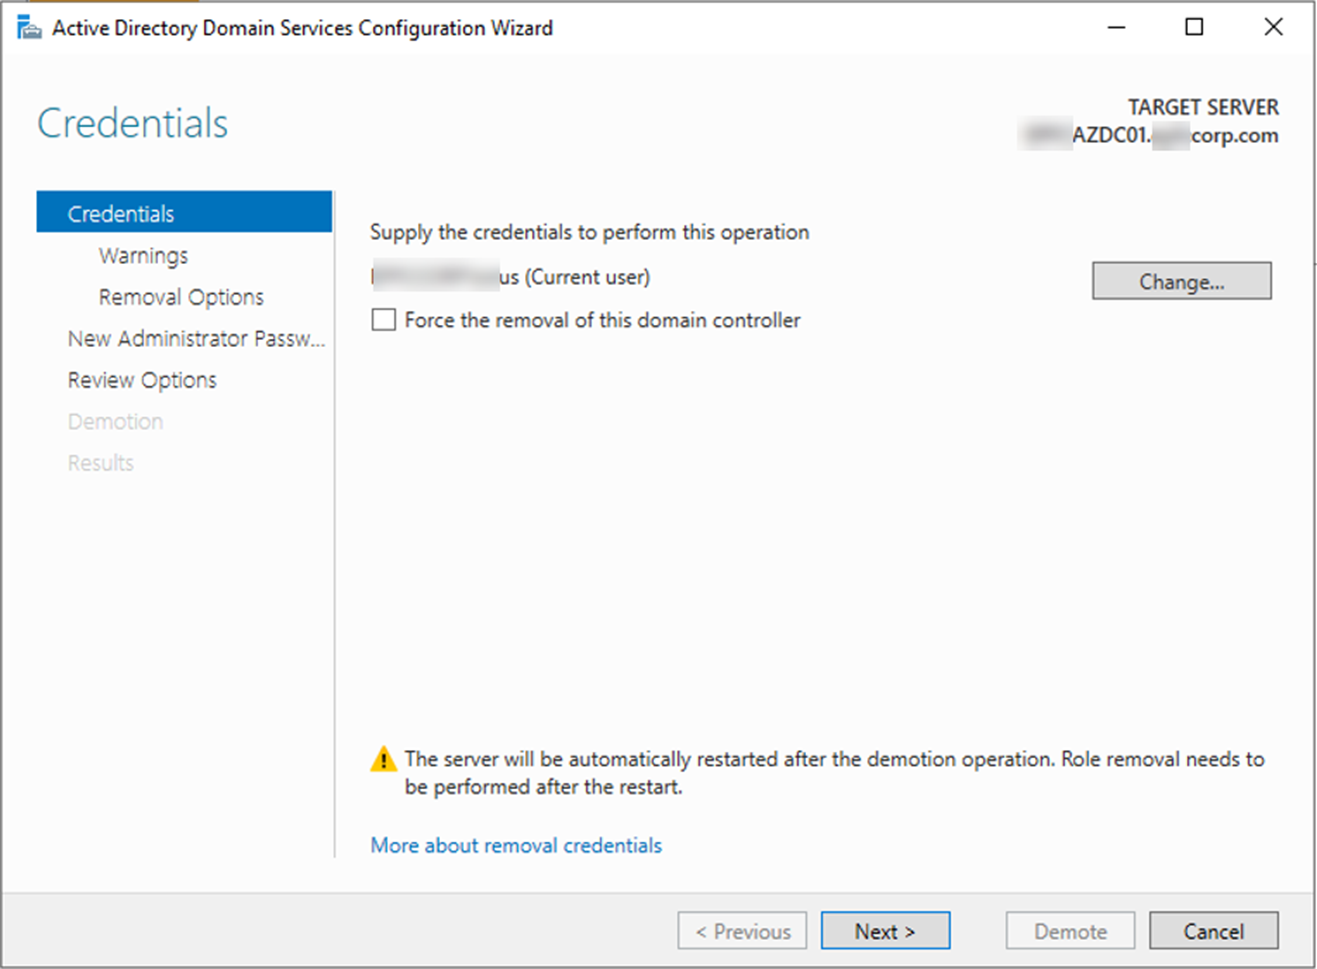
15.On the Credentials page, If you are login with domain admin account, click Next, if not, click Change, enter the domain admin credential, and then click Next.
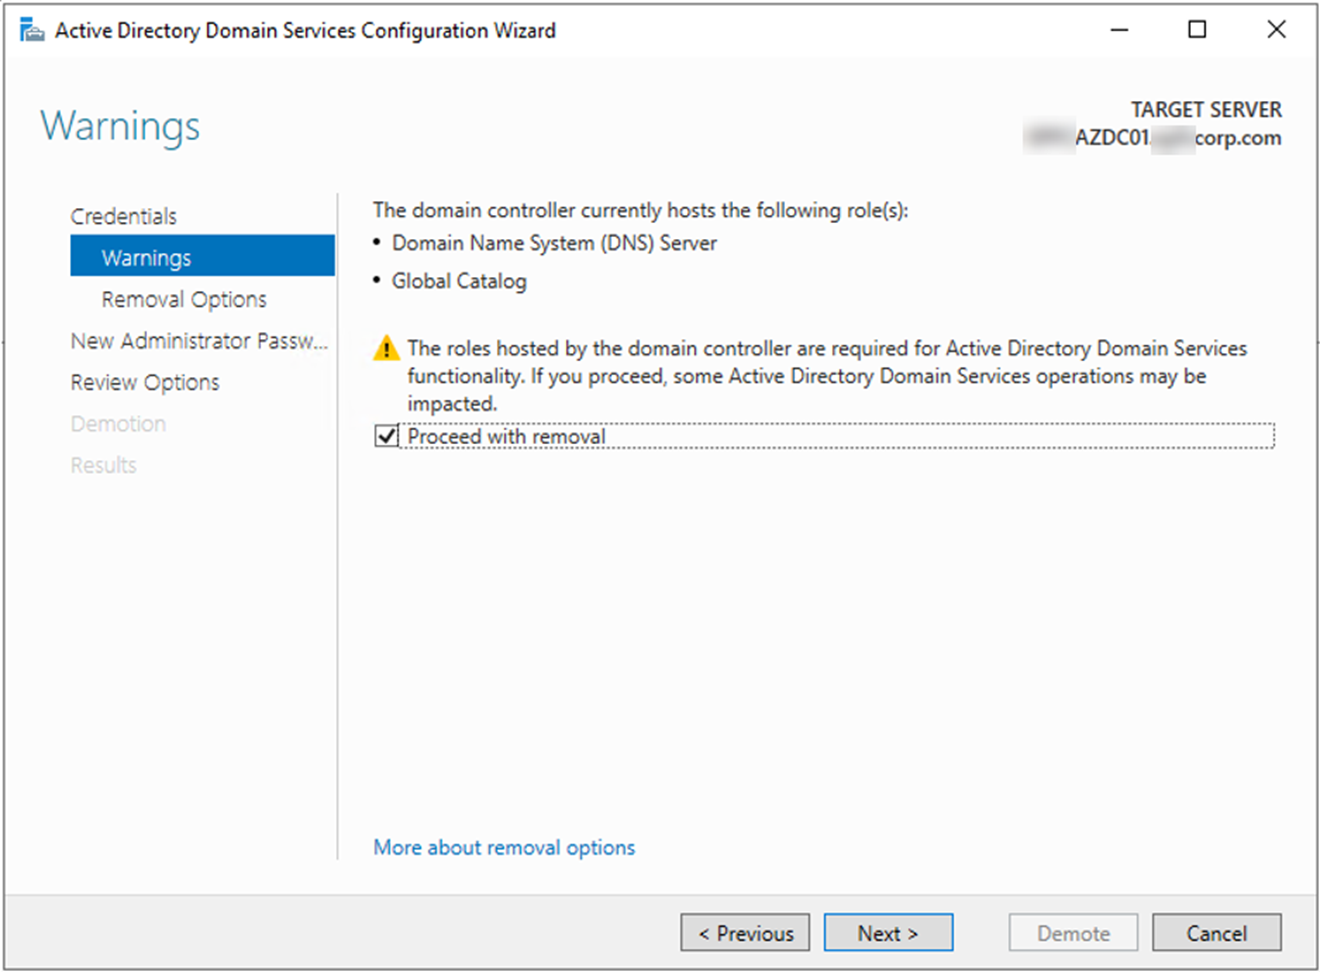
16.On the Warning page, click Next.
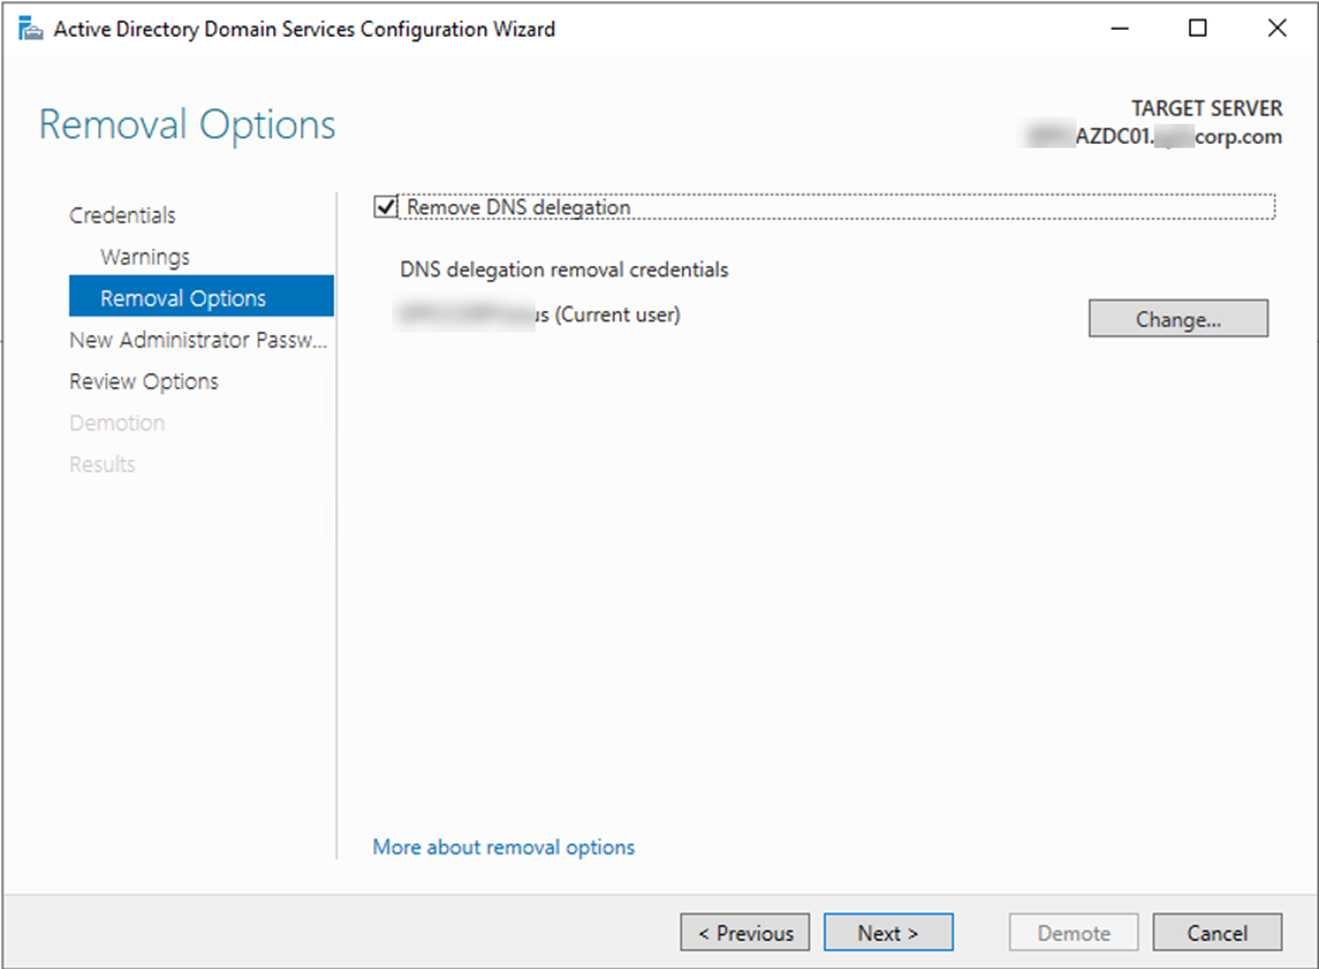
17.On the Removal Options page, select Remove DNS delegation, click Next.
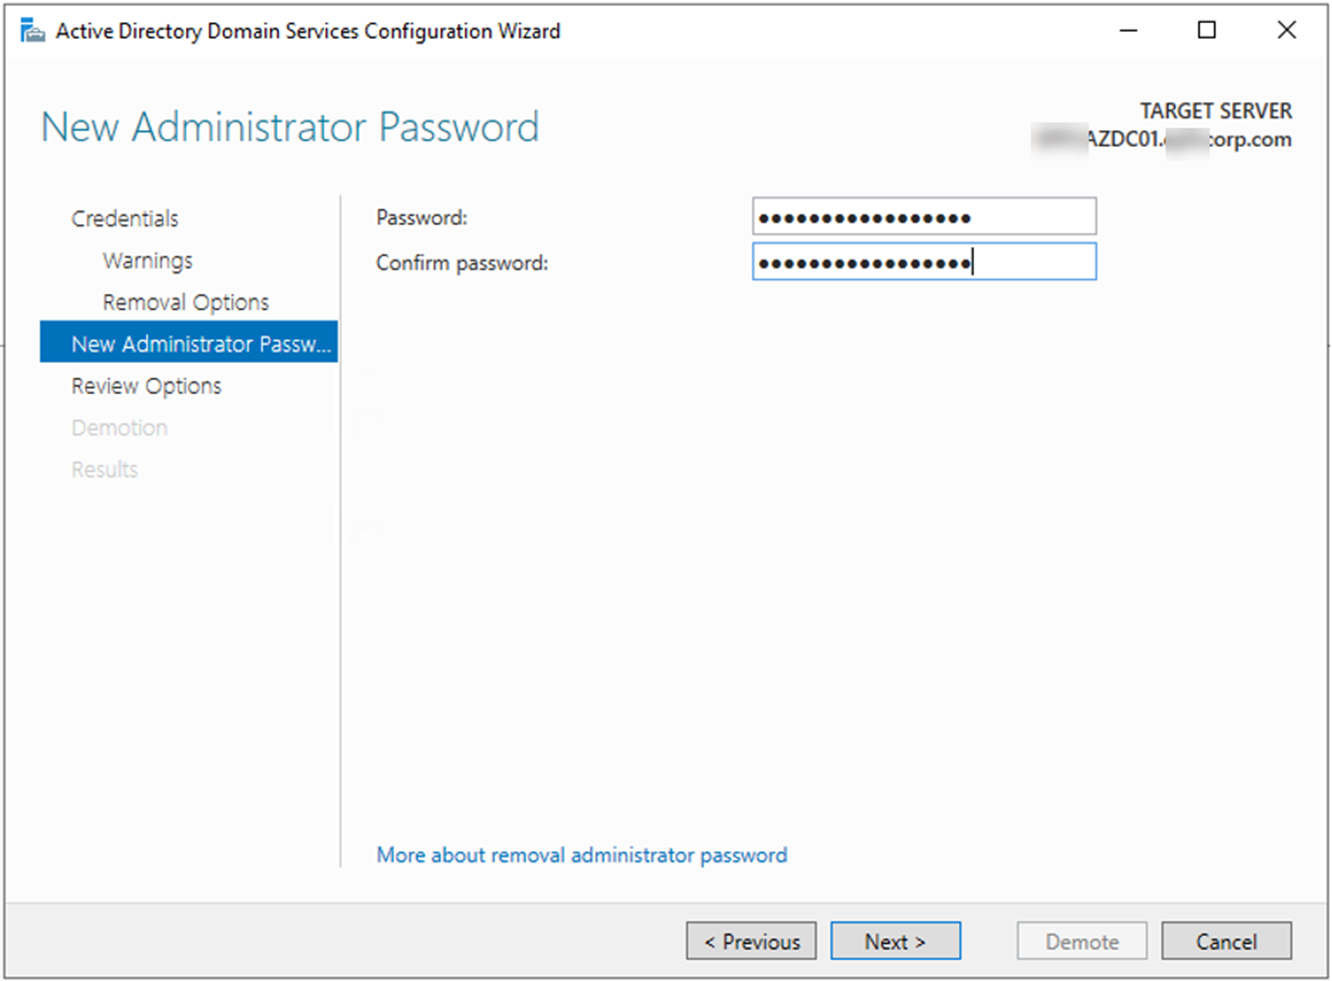
18.On the New Administrator Password page, type the password for local administrator, click Next.
19.On the Review Options page, click Demote.

Note: if you don’t need it anymore, you can disjoint domain and then delete this machine. Also, don’t forget to delete Azure resources of this VM, e.g. public IP and VNet…
But if it still needs to be another features server, you can follow below steps to move Active Directory Domain Services features from this server.
20.On the Server Manager page, select Manager, click Remove Roles and Features.
21.On the Before You begin page, click Next.
22.On the Select Destination server page, click Next.

23.On the Remove server roles page, unselect Active Directory Domain Services, click Next.

24.On the Remove features page, click Remove Features.

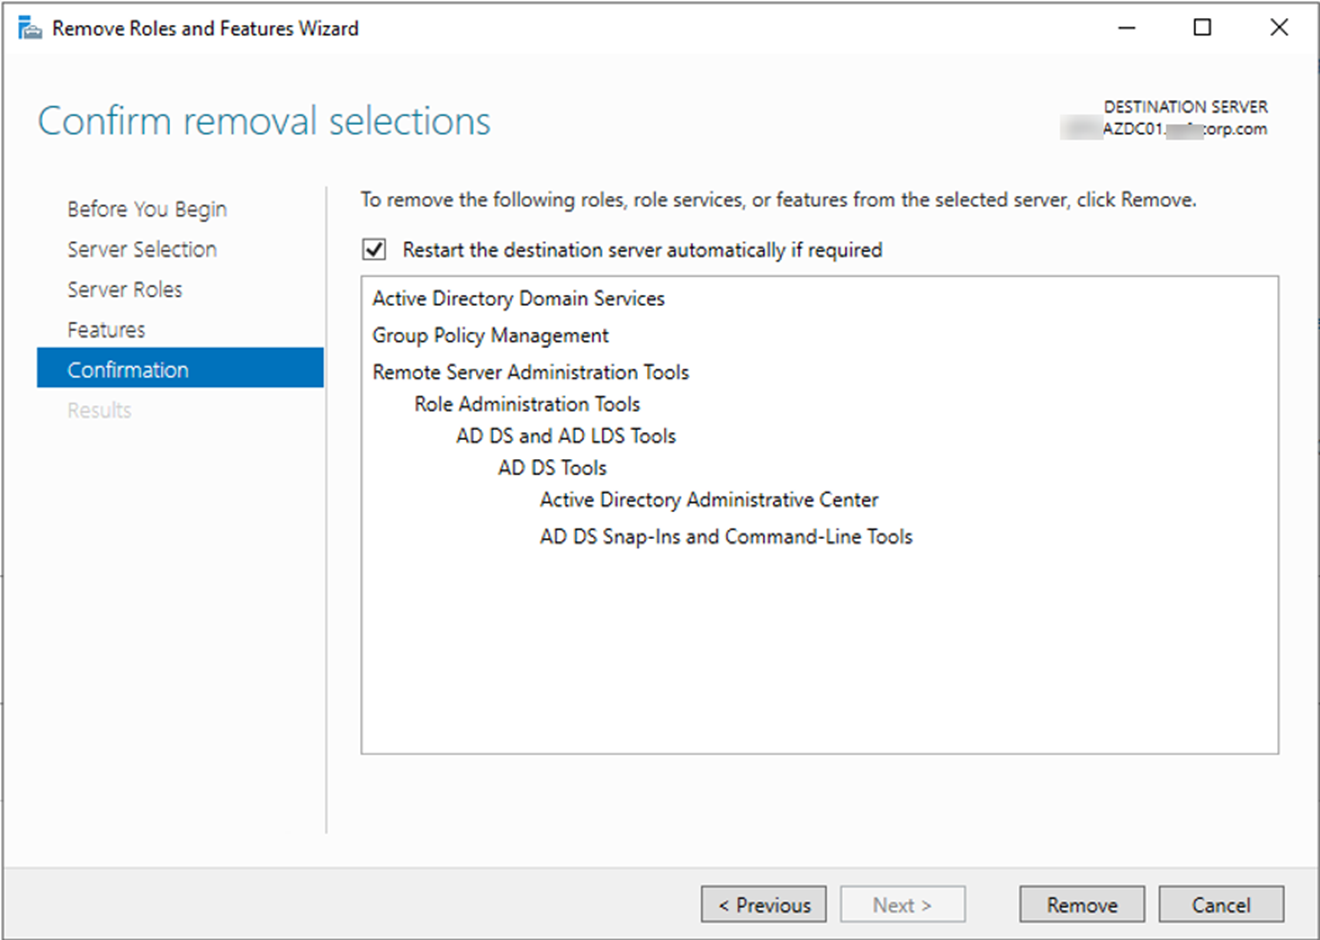
25.On the Server Roles page, it’s unchecked successfully this time, click Next.
26.On the Features page, click Next.
27.On the Confirmation page, select Restart the destination server atomically if required, click yes on the warning message.
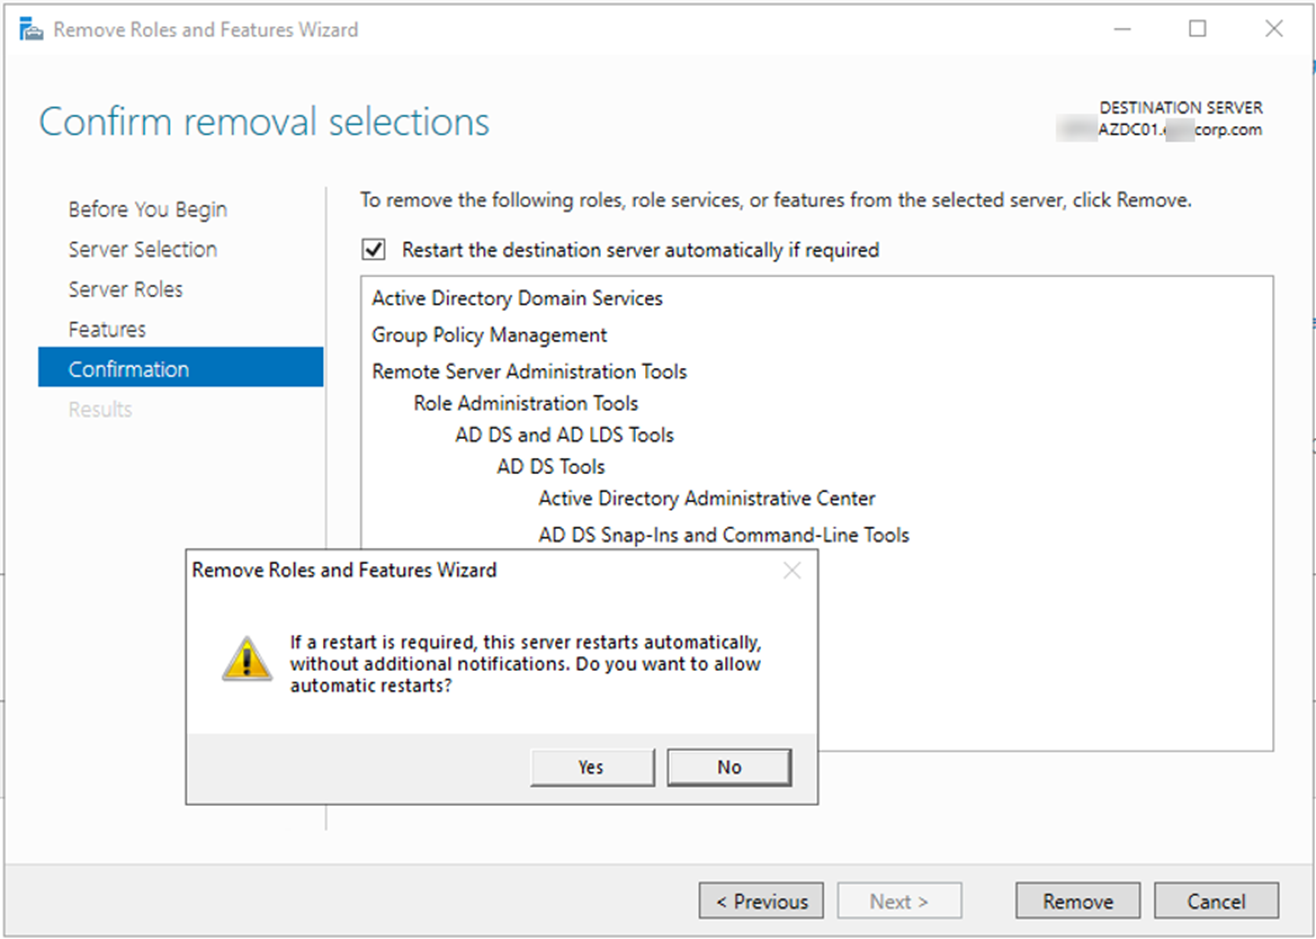
28.On the Confirmation page, click Remove. The server will reboot.
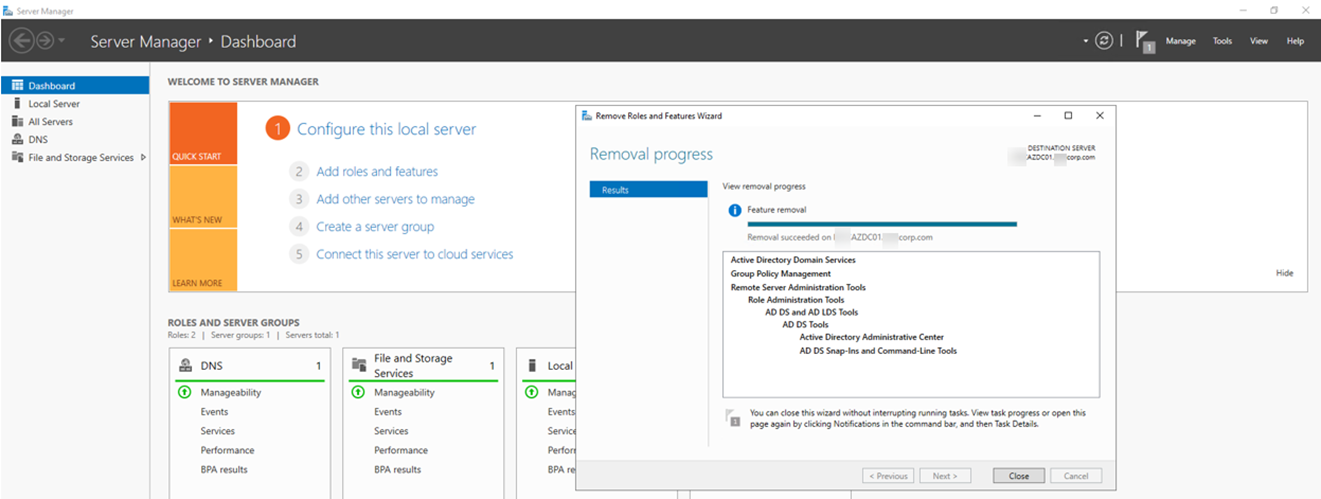
29.login to server, verify the removal progress succeeded, click Close.
Hope you enjoy this post.
Cary Sun
Twitter: @SifuSun
Web Site: carysun.com
Blog Site: checkyourlogs.net
Blog Site: gooddealmart.com