
There are some reasons why your website should invariably have a SSL certificate, e.g. SSL certificates help to ensure your website security, website visitors will see it as a trustworthy Brand, also it will enhance the search engine ranking for your website. Today, I am going to show you how to enable SSL certificate at the website of Azure, let follow the step by step to complete it and make your website better at azure.
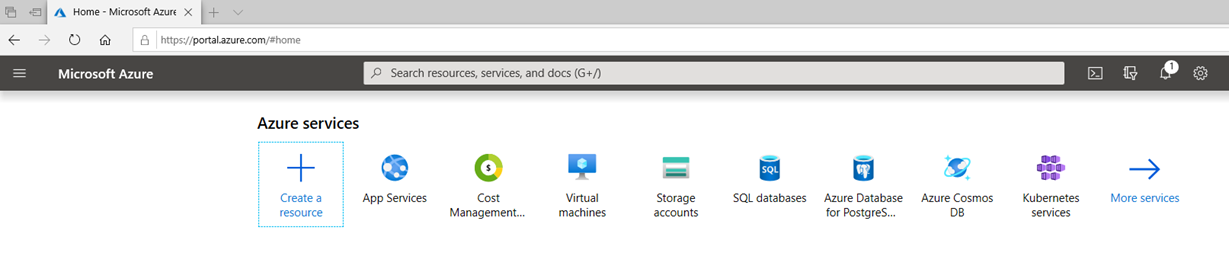
- Login your account at Azure portal.
-
On the Azure Services page, select APP Services.
-
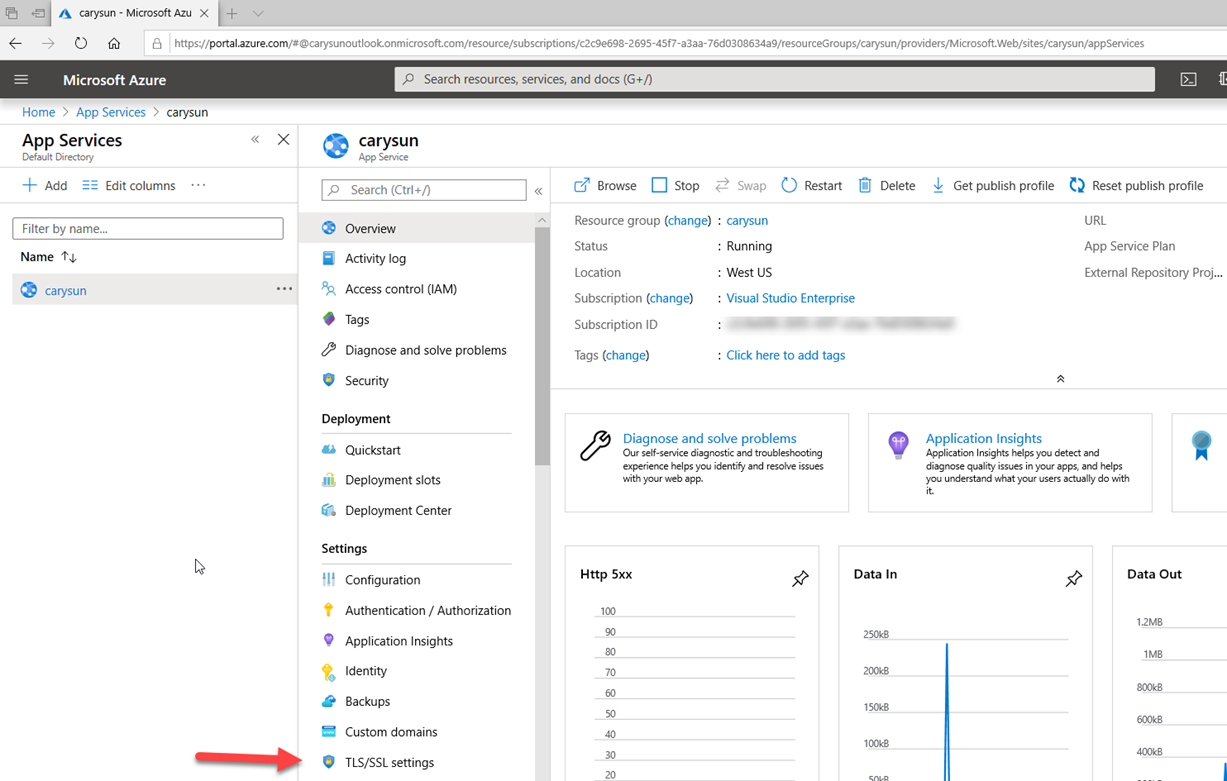
On the App Services page, click your website name.

-
On the website App Service page, select TLS/SSL settings.
-
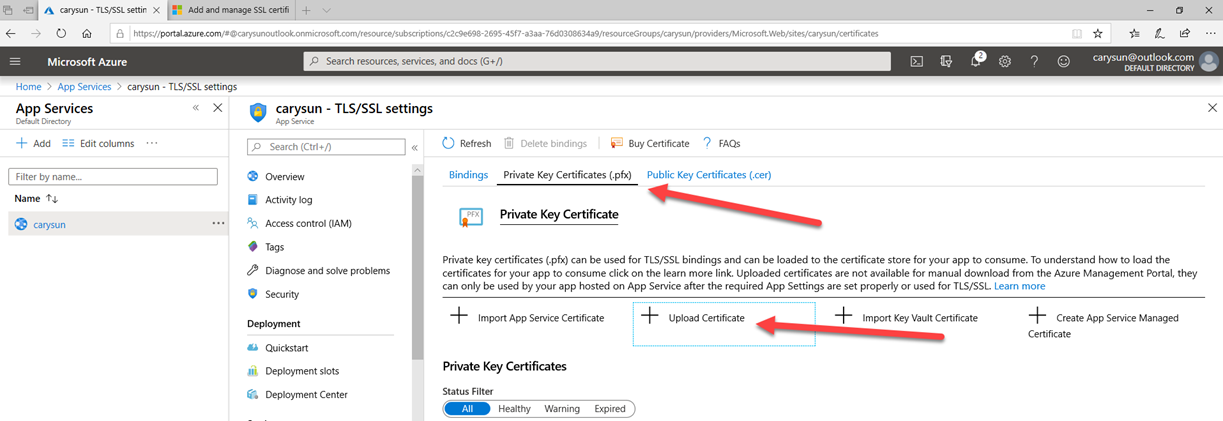
On the TLS/SSL settings page, select Private Key Certificate (.pfx) and then click +Upload Certificate. (here is assume you have purchased SSL certificate and owned the .pfx file already)
-
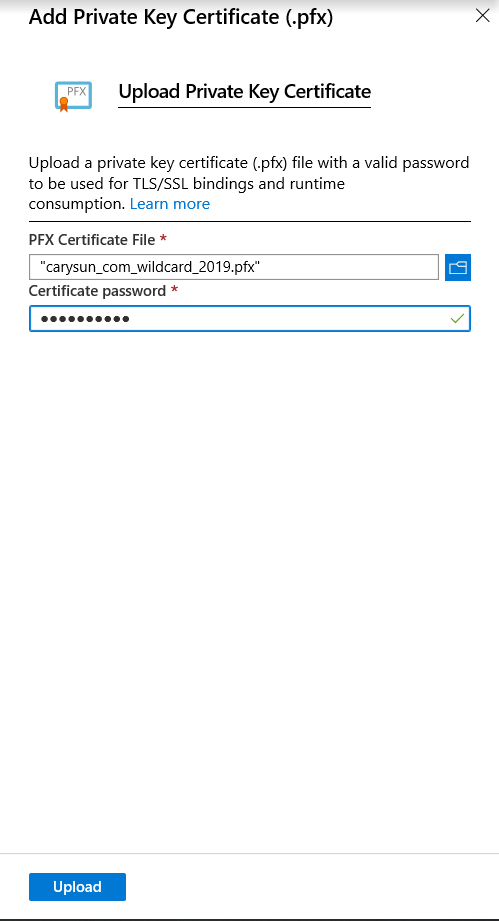
On the Upload Private Key Certificate page, select the .pfx file and enter the certificate password and then click Upload.
-
Double check the certificate health status and make sure it’s healthy. And then select Bindings.
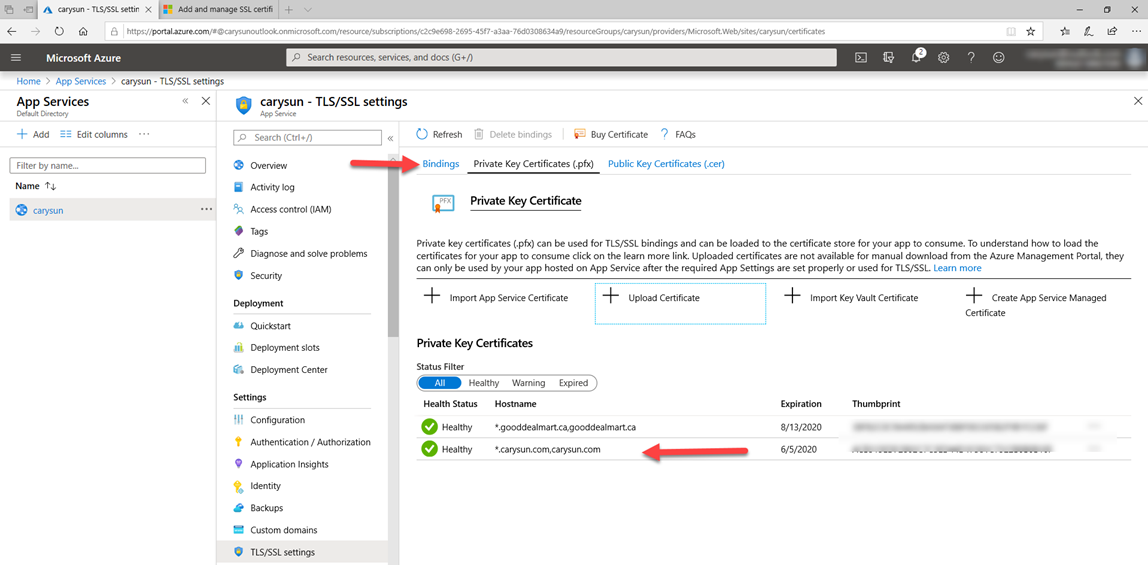
-
On the Bindings page click +Add TLS/SSL Binding.

-
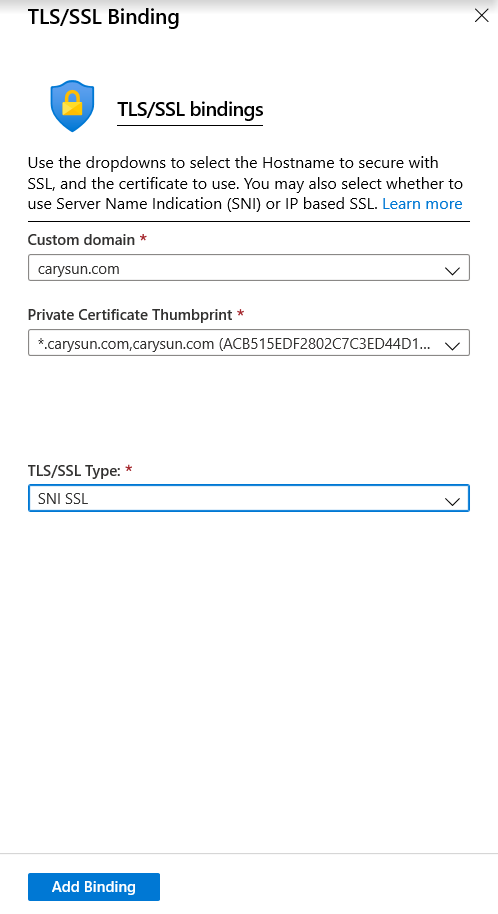
On the TLS/SSL bindings page, select the website domain as the Custom domain, and select the new upload certificate thumbprint as the Private Certificate Thumbprint and select SNI SSL as TLS/SSL Type and then click Add Binding.
- If you have other custom domains at the same website, please repeat steps to upload SSL certificates and binding them.
-
On the Protocol Settings page, change HTTPS Only from Off to On.
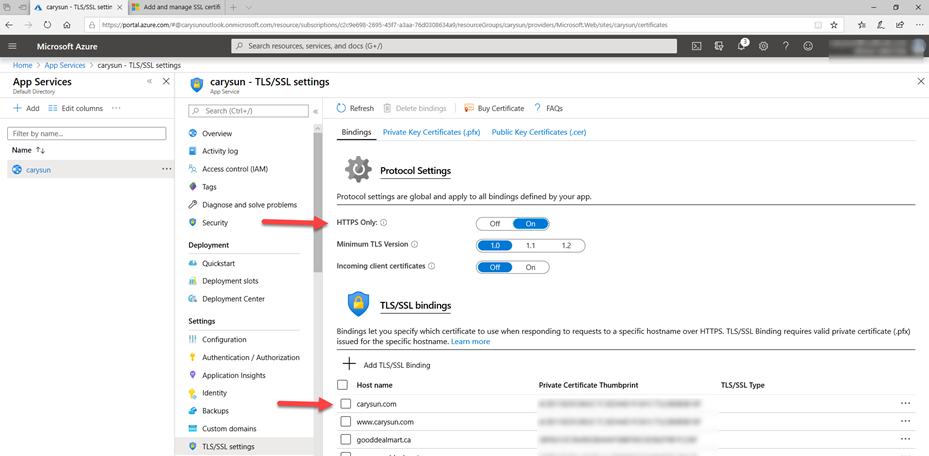
-
The SSL certificates help to ensure your website security now.

Hope you enjoy this post.
Cary Sun
Twitter: @SifuSun