
Cut Over the Client Access namespace to Windows 2016
- Login to Domain Controller Server and make DNS change for internal clients
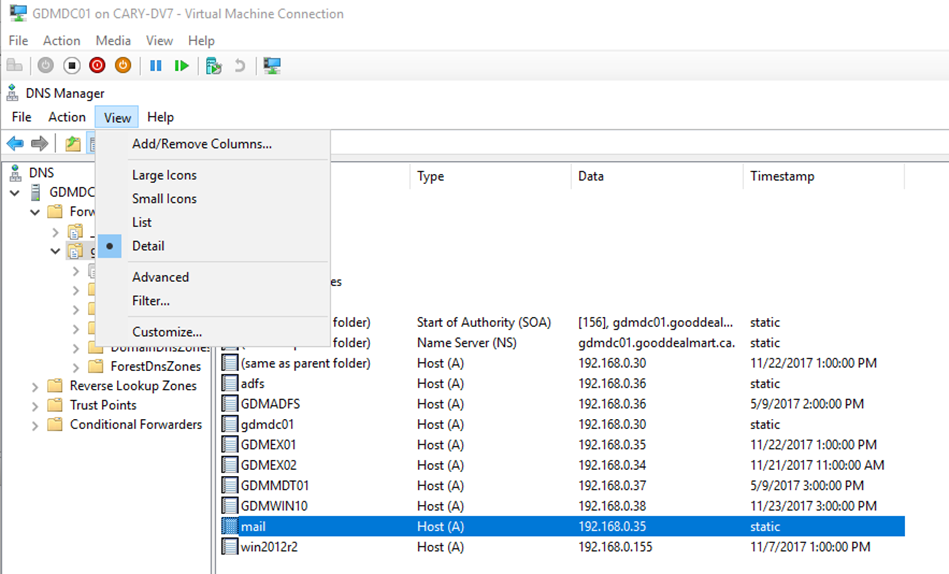
- Open DNS Manager tool
-
Select View and click Advanced
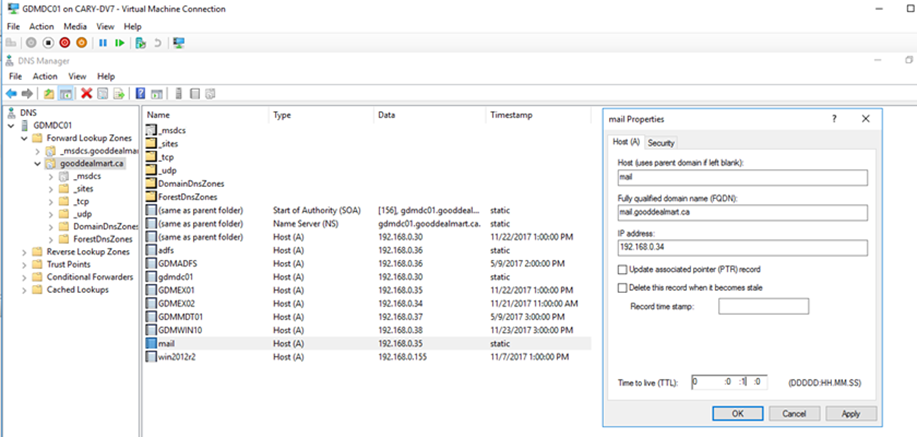
- Change mail.gooddealmart.ca IP address to the same as Exchange 2016 server.
-
Change the TTL from 1 HH to 1 MM and then click OK
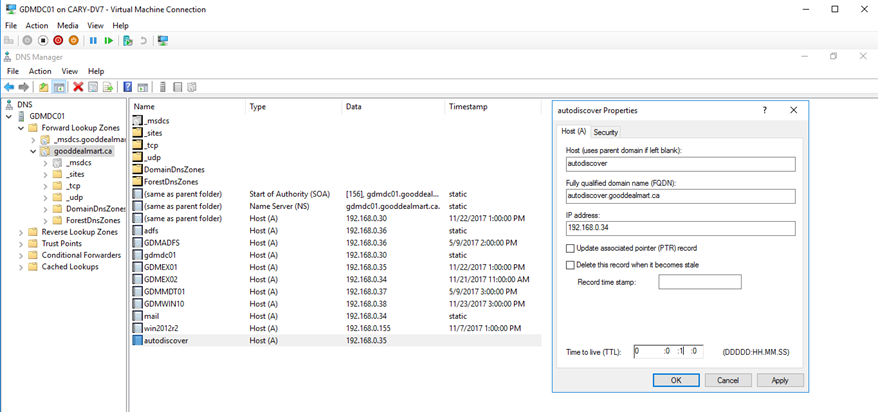
- Change autodiscover.gooddealmart.ca IP address to the same as Exchange 2016 server
-
Change the TTL from 1 HH to 1 MM and then click OK
- Change firewall NAT settings for external clients, make sure change the NAT map form exchange 2010 to exchange 2016 server
Configuring New Offline Address Book for Exchange 2016 Server
- Login to Exchange 2016 Server
- Open Exchange Management Shell
-
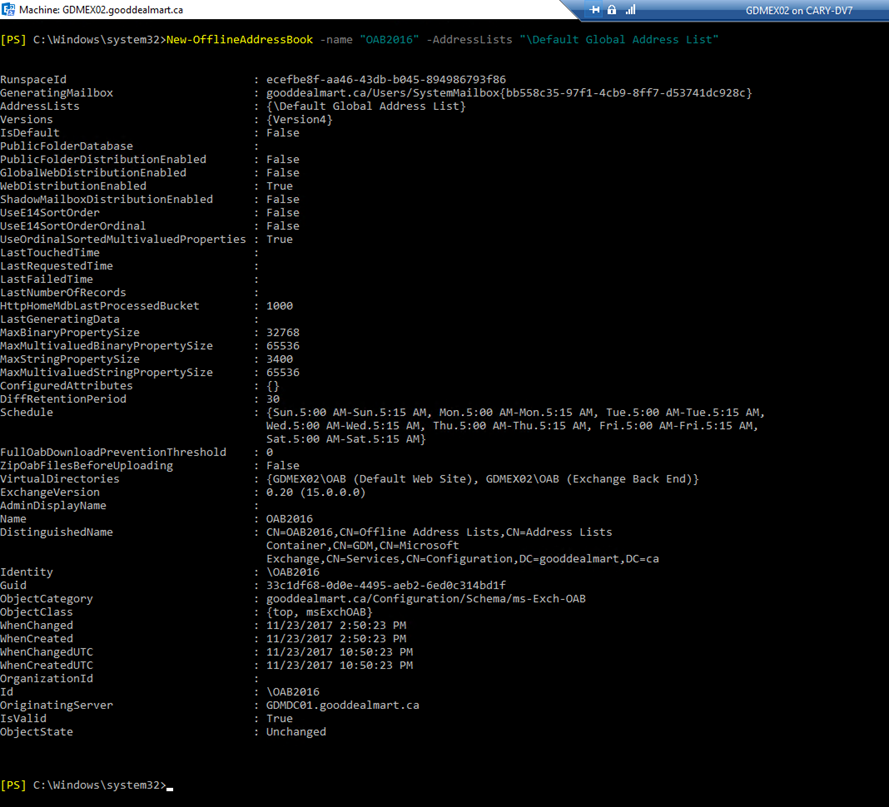
Run follow cmdlet to create a new Offline Address Book and set it as Default
New-OfflineAddressBook -Name "OAB2016" -AddressLists "\Default Global Address List"
-
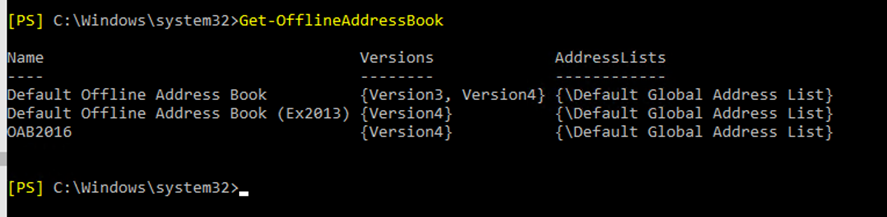
Run follow cmdlet to check OAB Status
Get-OfflineAddressBook
Configuring Receive Connectors for Exchange 2016 server
We need to check the existing Receive Connectors of exchange 2010 server, and then create them at exchange 2016 server.
- Login to exchange 2016 server
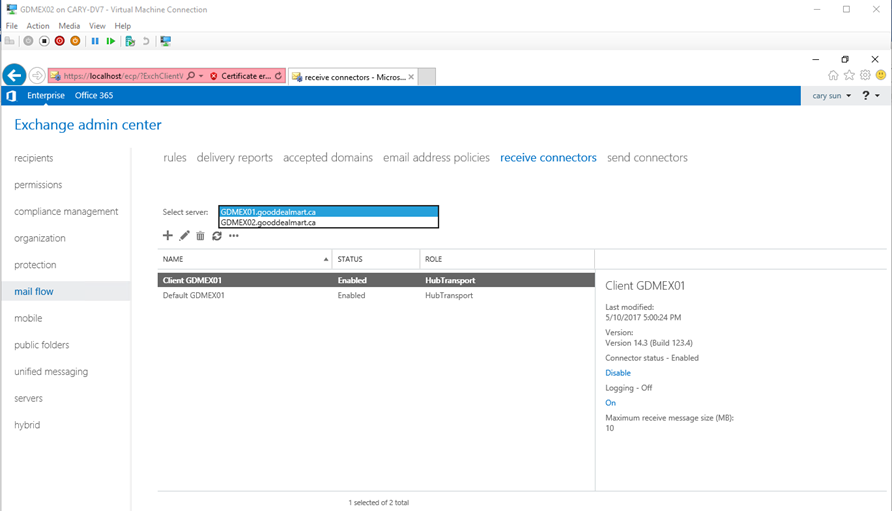
- Open Exchange Administrative Center
- On the Exchange admin center, select mail flow and then click receive connectors.
-
Select Exchange 2016 server from Select server:
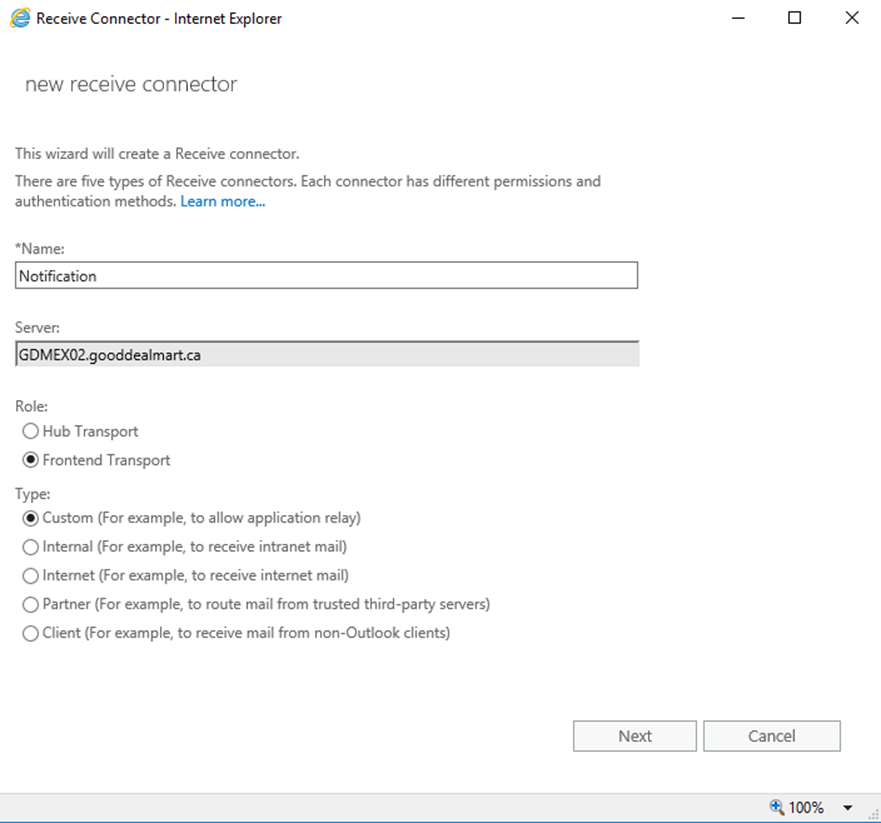
- Click + and give the name of the receive connector.
-
Select Frontend Transport Role and select Customize as type and then click Next.
-
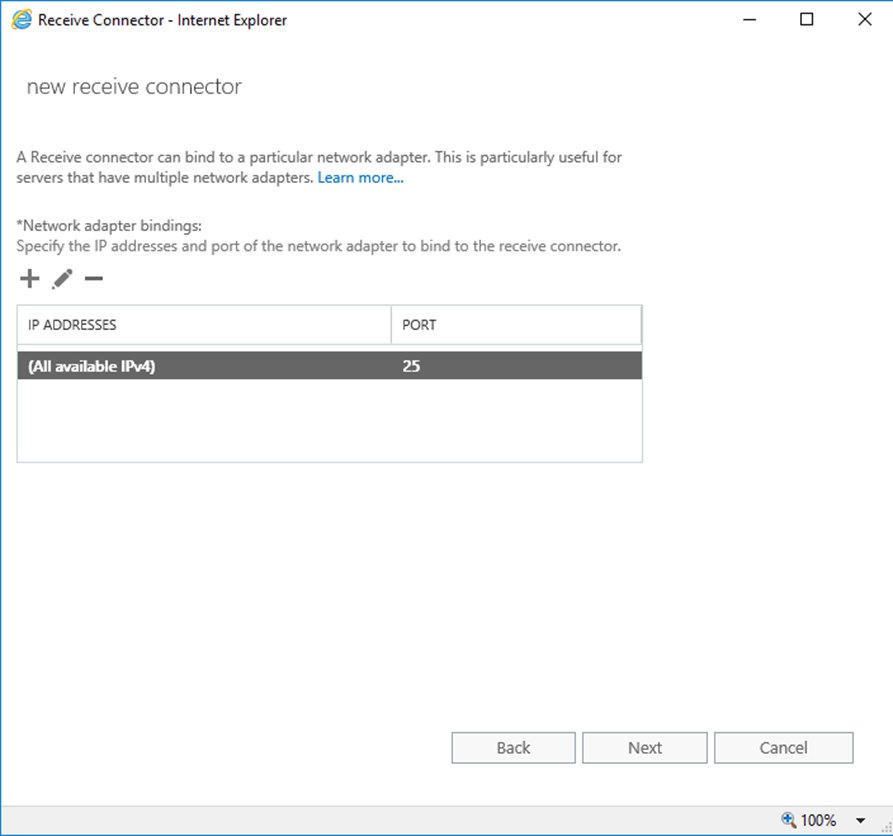
On the Network adapter binding, keep the default IP ADDRESS and port 25 settings, click Next.
-
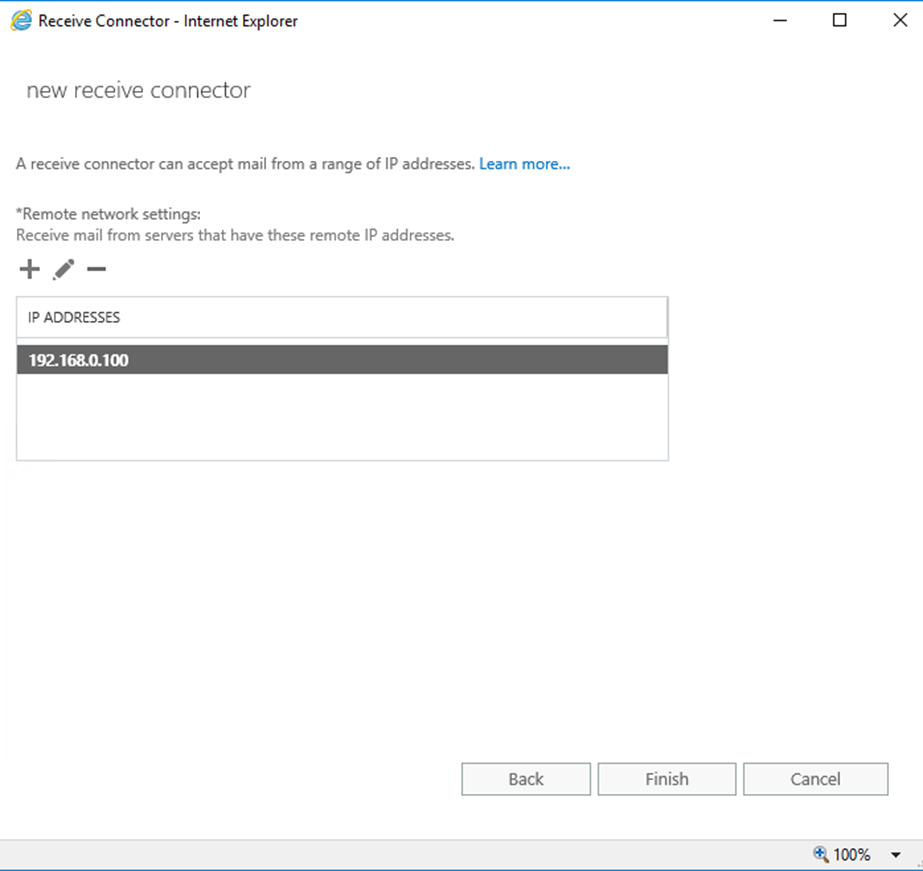
On the Remote network settings, click – to remove the default IP ADDRESS and click + to add IP address that the receive connector will accept mail and then click Finish.
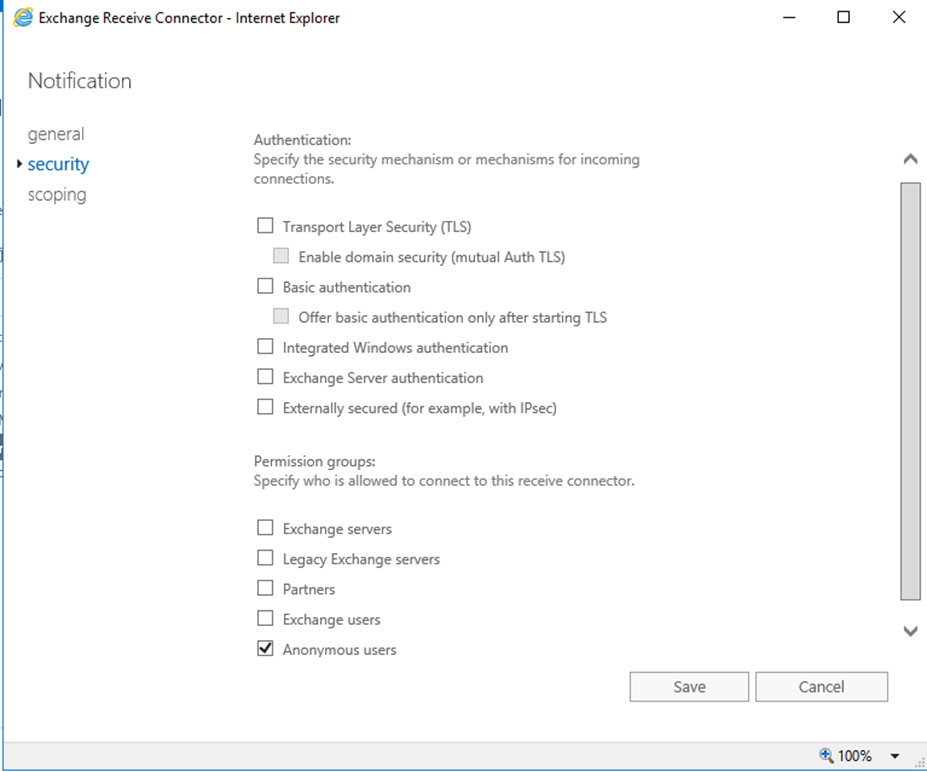
- Double-click the new receive connector, select security.
-
Check the existing receive connector settings and select the same settings at Authentication and Permission groups and then click Save.
- Repeat steps to create all existing receive connectors.
Change Outbound Mail Flow Routing (Send Connectors)
We will change the SMTP out bound email flow from the old exchange 2010 server to exchange 2016 server.
- Login to Exchange 2016 Server.
- Open Exchange Administrative Center.
-
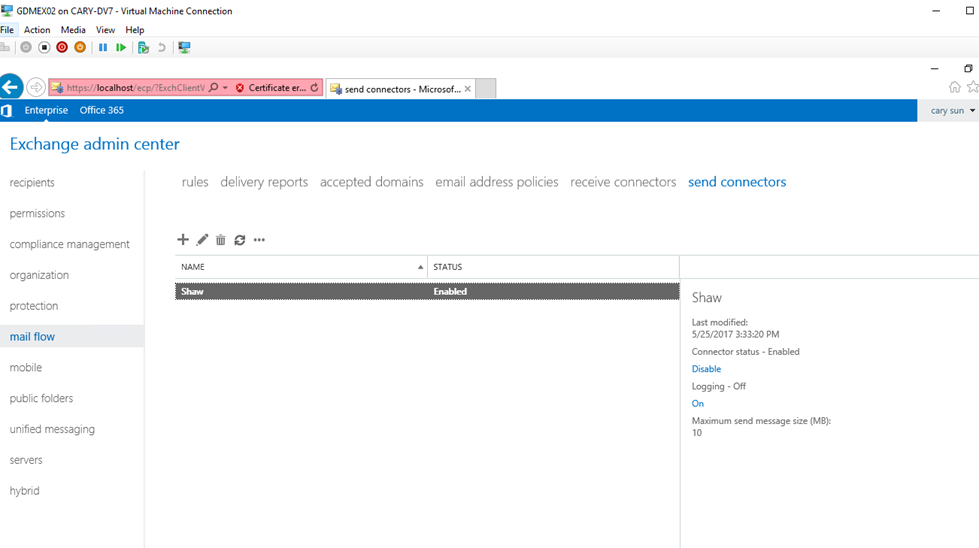
On the Exchange admin center, select mail flow and then click send connectors.
-
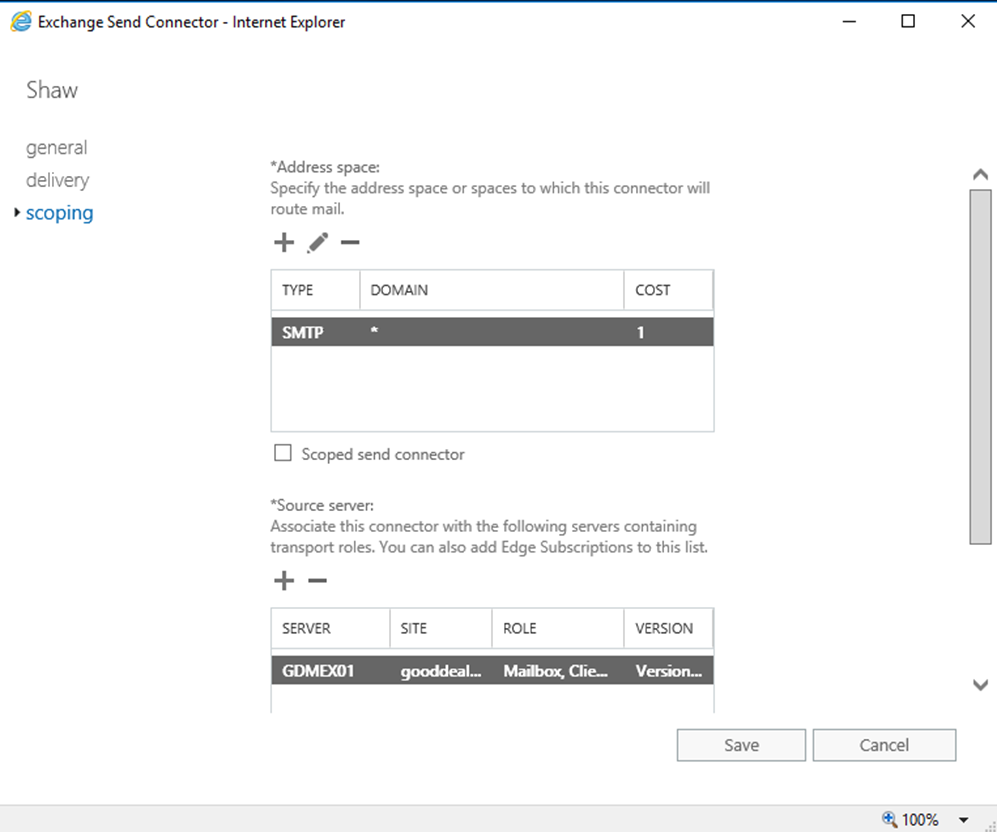
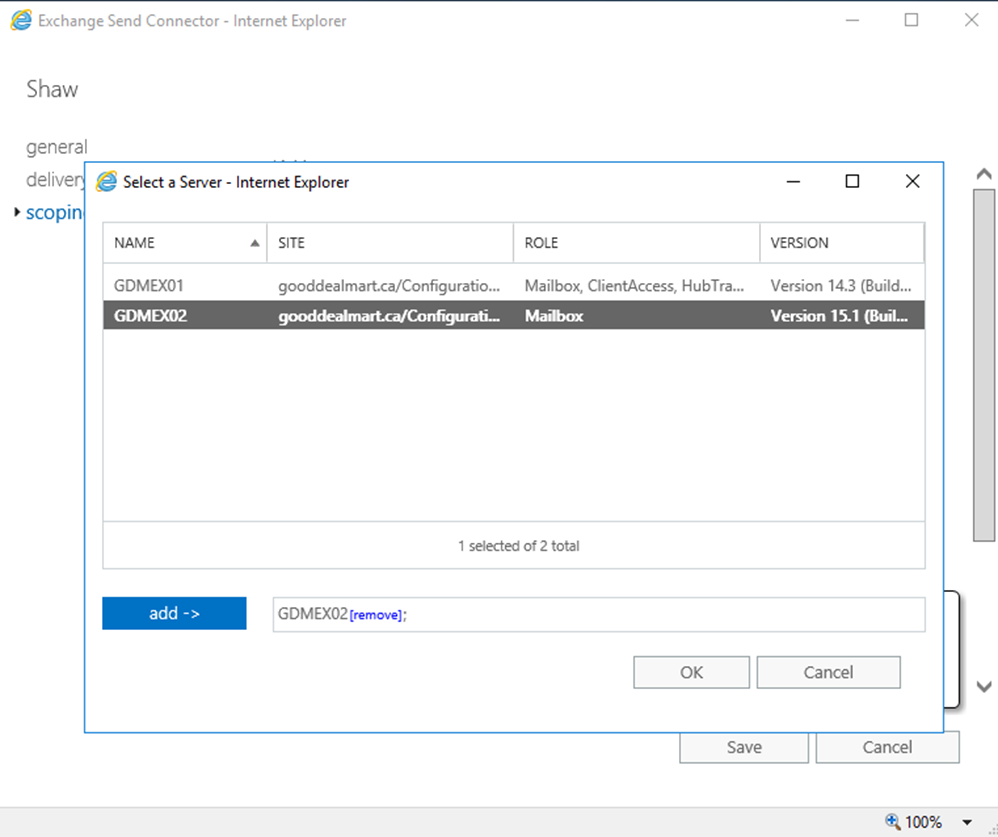
Double-click the existing send connector and select scoping.
-
On the Source server: click – to remove exchange 2010 server and click + to add exchange 2016 server and then click Save.
To be continue……
Hope you enjoy this post.
Cary Sun
Twitter: @SifuSun