
Veeam released the Backup & Replication V10 on Feb 18, Veeam Backup & Replication V10 with more than 150 new features and enhancements – including modern NAS support, Multi-VM Instant Recovery and heightened ransomware protection – v10 includes data protection capabilities that increase availability, portability, and extensibility for Cloud Data Management.
The detail Information as following links:
https://www.veeam.com/veeam_backup_10_0_whats_new_wn.pdf
https://www.veeam.com/veeam_backup_10_0_release_notes_rn.pdf
Today, I am going to show you how to Install (upgrade) Veeam Backup and Replication V10, Veeam Backup & Replication 10 supports automated in-place upgrade from version 9.5 Update 3 or later which preserves all products settings and configuration.
- Login to your Veeam Backup Management Server.
-
Download the latest version of Veeam Backup & Replication ISO from: https://www.veeam.com/backup-replication-download.html , You need to sign in your Veeam account.

- Open Veeam Backup and Replication management console.
-
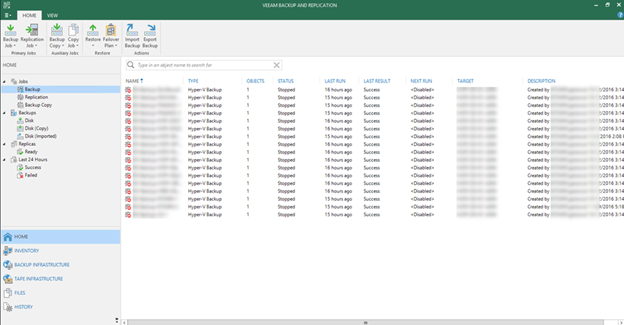
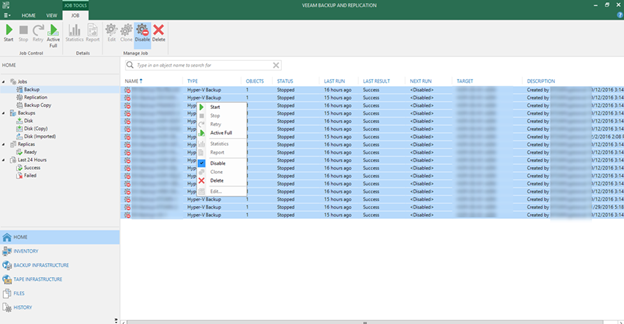
Make sure all jobs are successfully, and then disable them.
-
Check the existing Veeam Backup & Replication version from Veeam Backup & Replication console (Help |Abut) and make sure that the version matches the installation requirements. You also can download the V10 is file via click Upgrade.

-
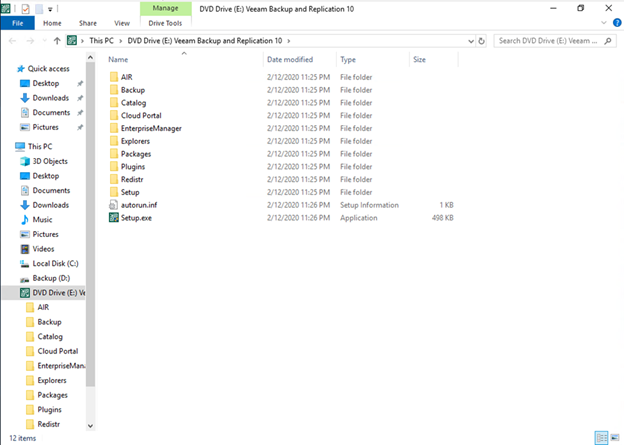
Mount VBR V10 ISO image and double-click Setup.exe.
-
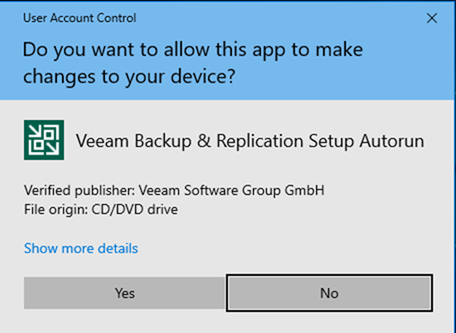
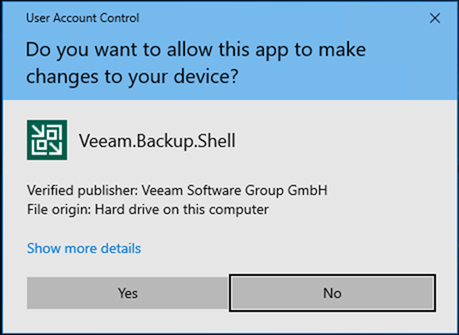
Click Yes on the User Access Control page.
-
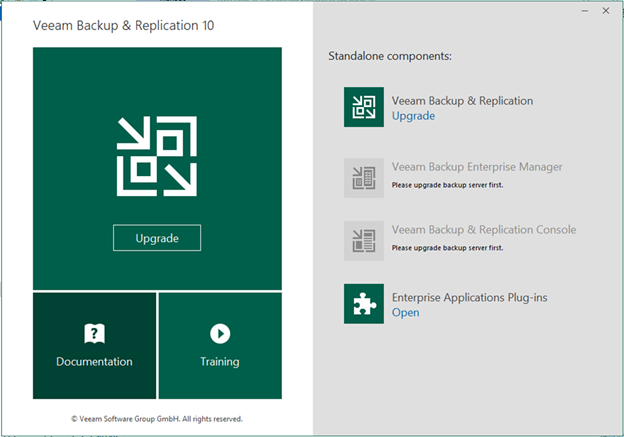
Click Veeam Backup & Replication 10 Upgrade (Install).
-
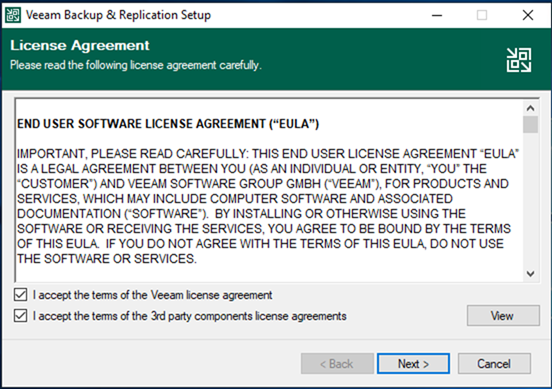
On the License Agreement page, select I accept the terms of the Veeam license agreement, and I accept the terms of the 3rd party components license agreements, click Next.
-
On the Upgrade page, click Next.

-
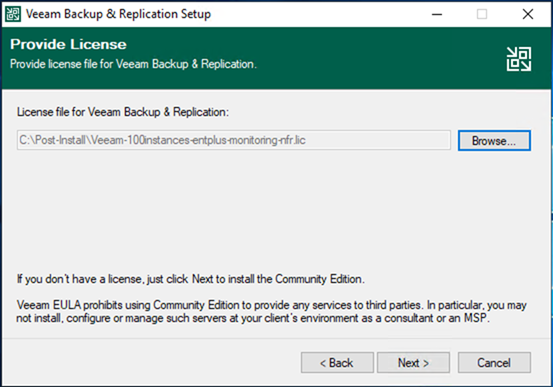
On the Provide License page, click Browse and select your existing license file, click Next.
-
If your existing license file is for a previously version, click Yes, Veeam will update the license atomically.

-
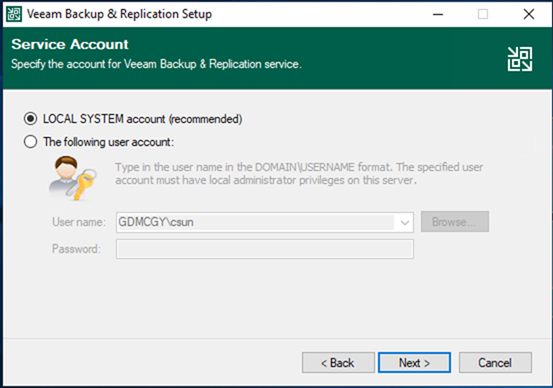
On the Service Account page, select your service account, click Next. In my case, I keep the default settings to use LOCAL SYSTEM account (recommended).
-
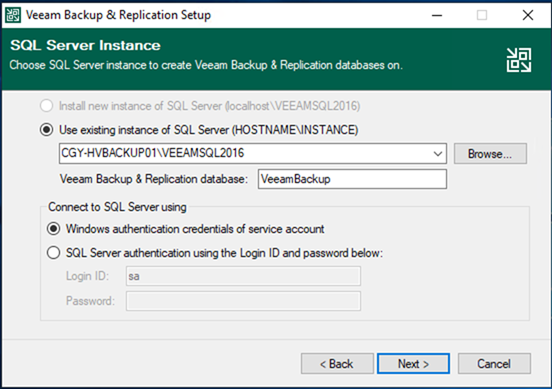
On the SQL Server Instance page, keep the default settings, click Next.
-
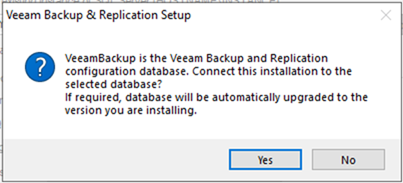
Click Yes on the question pop up message, Veeam will be automatically upgrade database to the version you are installing.
-
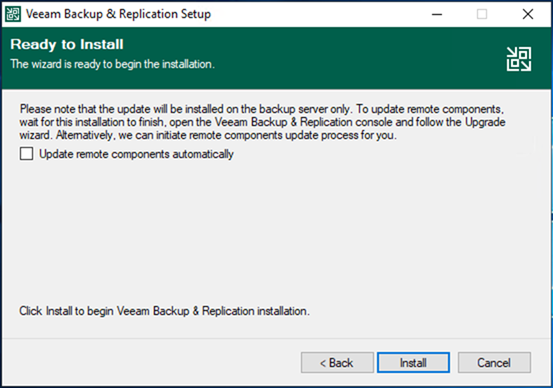
On the Ready to Install page, click Install.
-
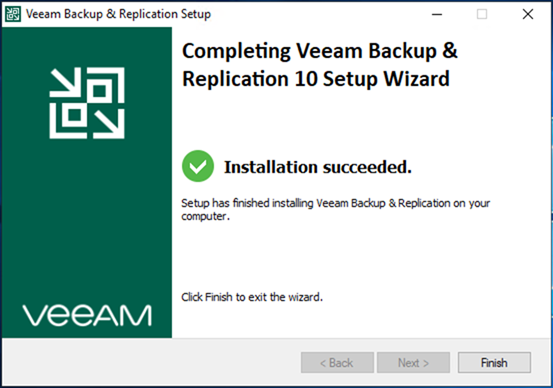
On the Completing Veeam Backup & Replication 10 Setup Wizard page, make sure installation succeeded, click Finish.
-
Open Veeam Backup and Replication management console.
-
Click Yes on the User Account Control page.
-
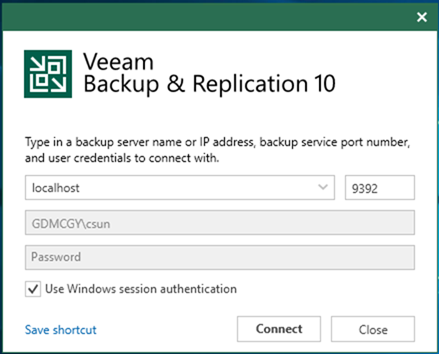
Click Connect on the Veeam Backup & Replication 10 page.
-
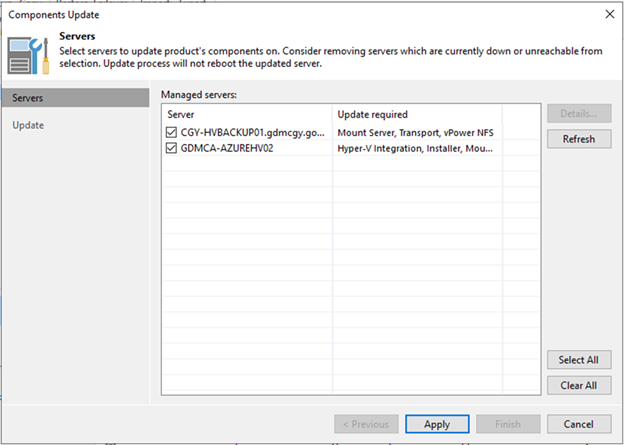
On the Components Update page, select the servers and click Apply.
-
Make sure components update succeed for selected servers, click Finish.

-
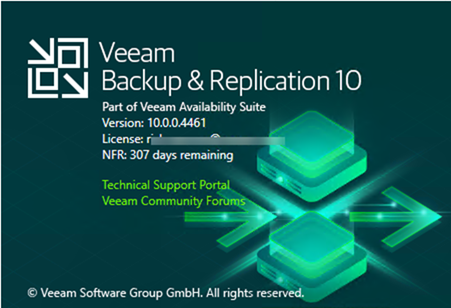
Check Veeam Backup & Replication version from Veeam Backup & Replication console (Help |Abut).

-
Make sure Veeam Backup & Replication 10 Version is 10.0.0.4461.
-
Don’t forget to uncheck Disable for all jobs to reenable them.
Hope you enjoy this post.
Cary Sun
Twitter: @SifuSun