
Today, my client asked me to provide MOP (Method of Procedure) to them, the MOP will help to migrate their exchange services to Office 365. I am going to do multi-post and let you know how to migrate your exchange services to Office 365 via step by step.
The process described mainly focuses on a typical transition of Exchange services to Office 365 environment, converting the Exchange servers to Office 365 CAS role, HUB role and MBX role. Additional role options such as the Unified Messaging Server role and Edge Transport role, are out-of-scope within this document.
Let’s start on part 1 for pre-requisites, add on-premises domain to office 365 and deploy certificate to ADFS (optional).

Prerequisites
On-premises Exchange organization
| On-premises environment |
Exchange 2016-based hybrid deployment | Exchange 2013-based hybrid deployment | Exchange 2010-based hybrid deployment |
| Exchange 2016 | Supported | Not supported | Not supported |
| Exchange 2013 | Supported | Supported | Not supported |
| Exchange 2010 | Supported | Supported | Supported |
| Exchange 2007 | Not supported | Supported | Supported |
On-premises Exchange releases
Hybrid deployments require the latest cumulative update or update rollup available for the version of Exchange you have installed in your on-premises organization. If you can’t install the latest cumulative update or update rollup, the immediately previous release is also supported. Older cumulative updates or update rollups aren’t supported.
On-premises server roles
| On-premises
environment |
Requirement |
| Exchange 2010 | At least one server with the Mailbox, Hub Transport, and Client Access server roles installed. While it’s possible to install the Mailbox, Hub Transport, and Client Access roles on separate servers, we strongly recommend that you install all of the roles on each server to provide additional reliability and improved performance |
| Exchange 2013 | At least one server with the Mailbox and Client Access server roles installed. While it’s possible to install the Mailbox and Client Access roles on separate servers, we strongly recommend that you install both roles on each server to provide additional reliability and improved performance |
| Exchange 2016 and newer | At least one server that has the Mailbox server role installed |
Office 365
Hybrid deployments are supported in all Office 365 plans that support Azure Active Directory synchronization. All Office 365 Enterprise, Government, Academic and Midsize plans support hybrid deployments. Office 365 Business and Home plans don’t support hybrid deployments.
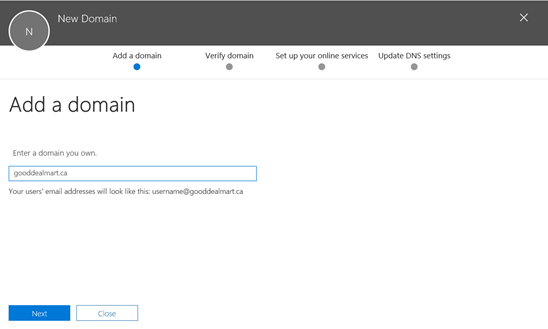
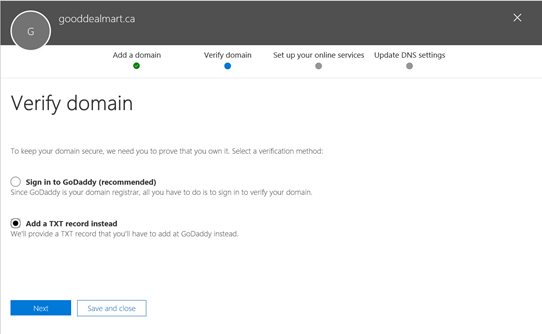
Custom domains
Register any custom domains you want to use in your hybrid deployment with Office 365. You can do this by using the Office 365 Administrative portal, or by optionally configuring Active Directory Federation Services (AD FS) in your on-premises organization.
Active Directory synchronization
Deploy the Azure Active Directory Connect tool to enable Active Directory synchronization with your on-premises organization.
Autodiscover DNS records
Configure the Autodiscover public DNS records for your existing SMTP domains to point to an on-premises Exchange 2010 (2013) Client Access server.
Office 365 organization in the Exchange admin center (EAC)
The Office 365 organization node is included by default in the on-premises EAC, but you must connect the EAC to your Office 365 organization using your Office 365 administrator credentials before you can use the Hybrid Configuration wizard. This also allows you to manage both the on-premises and Exchange Online organizations from a single management console.
Certificates
Install and assign Exchange services to a valid digital certificate purchased from a trusted public certificate authority (CA). Although self-signed certificates should be used for the on-premises federation trust with the Microsoft Federation Gateway, self-signed certificates can’t be used for Exchange services in a hybrid deployment. The Internet Information Services (IIS) instance on the Exchange servers configured in the hybrid deployment must have a valid digital certificate purchased from a trusted CA. Additionally, the EWS external URL and the Autodiscover endpoint specified in your public DNS must be listed in Subject Alternative Name (SAN) of the certificate. The certificate installed on the Exchange servers used for mail transport in the hybrid deployment must all use the same certificate (that is, they are issued by the same CA and have the same subject).
Hybrid deployment protocols, ports, and endpoints
Hybrid deployment features and components require certain incoming protocols, ports and connection endpoints to be accessible to Office 365 in order to work correctly. Before configuring your hybrid deployment, verify that your on-premises network and security configuration can support the features and components in the table below.
| Transport Protocol | Upper Level Protocol | Feature/Component | On-premises Endpoint | On-premises Path | Authentication Provider | Authorization Method |
| TCP 25 (SMTP) | SMTP/TLS | Mail flow between Office 365 and on-premises | Exchange 2016 Mailbox/Edge Exchange 2013 CAS/Edge Exchange 2010 HUB/Edge |
N/A | N/A | Certificate-based |
| TCP 443 (HTTPS) | Autodiscover | Autodiscover | Exchange 2016 Mailbox Exchange 2013/2010 CAS |
/autodiscover/autodiscover.svc/wssecurity /autodiscover/autodiscover.svc |
Azure AD authentication system | WS-Security Authentication |
| TCP 443 (HTTPS) | EWS | Free/busy, MailTips, Message Tracking | Exchange 2016 Mailbox Exchange 2013/2010 CAS |
/ews/exchange.asmx/wssecurity | Azure AD authentication system | WS-Security Authentication |
| TCP 443 (HTTPS) | EWS | Multi-mailbox search | Exchange 2016 Mailbox Exchange 2013/2010 CAS |
/ews/exchange.asmx/wssecurity /autodiscover/autodiscover.svc/wssecurity /autodiscover/autodiscover.svc |
Auth Server | WS-Security Authentication |
| TCP 443 (HTTPS) | EWS | Mailbox migrations | Exchange 2016 Mailbox Exchange 2013/2010 CAS |
/ews/mrsproxy.svc | Basic | Basic |
| TCP 443 (HTTPS) | Autodiscover EWS |
OAuth | Exchange 2016 Mailbox Exchange 2013/2010 CAS |
/ews/exchange.asmx/wssecurity /autodiscover/autodiscover.svc/wssecurity /autodiscover/autodiscover.svc |
Auth Server | WS-Security Authentication |
| TCP 443 (HTTPS) | N/A | AD FS (included with Windows) | Windows 2008/2012 Server | /adfs/* | Azure AD authentication system | Varies per config. |
On-premises Active Directory
- The AD schema version and forest functional level must be Windows Server 2003 or later. The domain controllers can run any version as long as the schema and forest level requirements are met.
- If you plan to use the feature password writeback, then the Domain Controllers must be on Windows Server 2008 (with latest SP) or later. If your DCs are on 2008 (pre-R2), then you must also apply hotfix KB2386717
- The domain controller used by Azure AD must be writable. It is not supported to use a RODC (read-only domain controller) and Azure AD Connect does not follow any write redirects.
- It is not supported to use on-premises forests/domains using SLDs (Single Label Domains).
- It is not supported to use on-premises forests/domains using “dotted” (name contains a period “.”) NetBios names.
- It is recommended to enable the Active Directory recycle bin
Hybrid Identity Required Ports and Protocols
| Protocol | Ports | Description |
| HTTP | 80 (TCP/UDP) | Used to download CRLs (Certificate Revocation Lists) to verify SSL certificates. |
| HTTPS | 443(TCP/UDP) | Used to synchronize with Azure AD. |
| Azure Service Bus | 5671 (TCP/UDP) | Outbound |
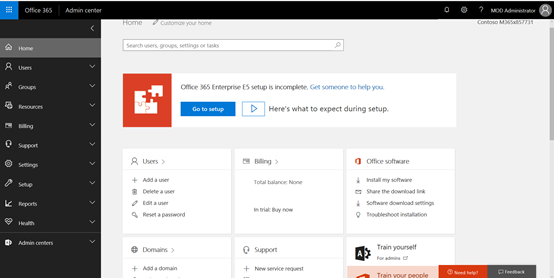
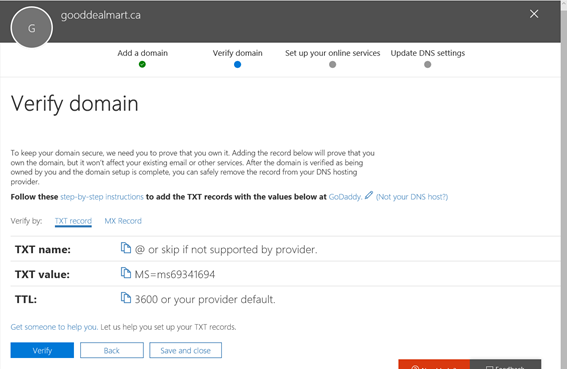
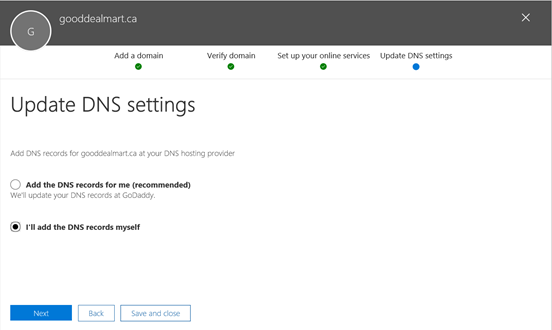
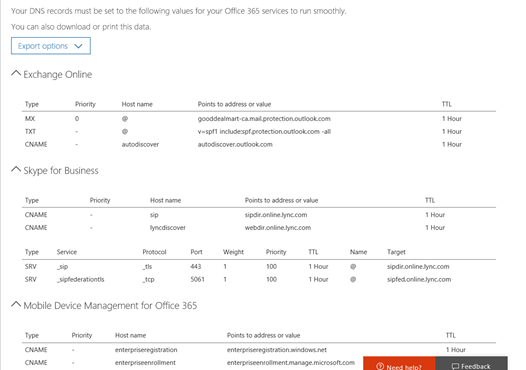
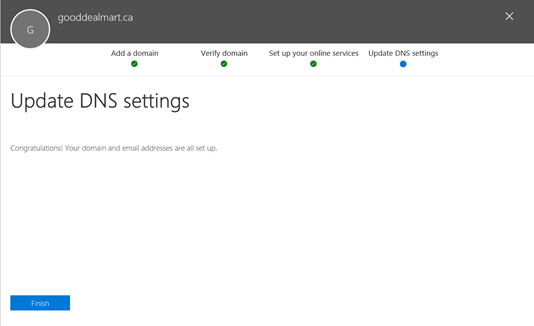
Add and verify the on-premise domain in Azure AD (Office 365)
We need to connect on-premise domain with office 365.
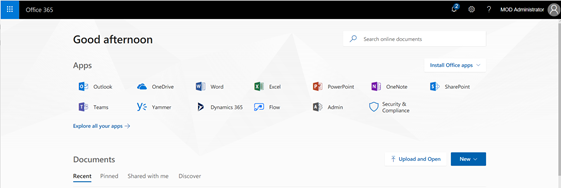
- Login to office 365 tenant and then click Admin.
Deployment Certificate (If Active Directory Federation Services is being deployed, ADFS is optional)
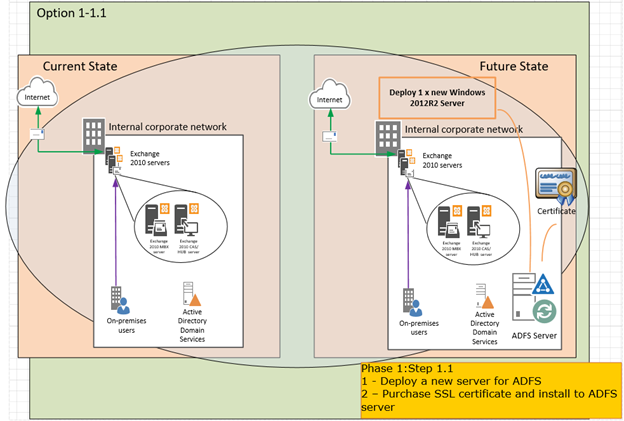
We need certificate for ADFS to configure DirSync and Single Sign-On.
- Logon to ADFS Server.
- In the Windows start menu, type Internet Information Services (IIS) Manager and open it.
- In the Connections menu tree (left pane), locate and click the server name.
- On the server name Home page (center pane), in the IIS section, double-click Server Certificates.
- On the Server Certificates page (center pane), in the Actions menu (right pane), click the Create Certificate Request… link.
- In the Request Certificate wizard, on the Distinguished Name Properties page, provide the information and then click Next.
- On the Cryptographic Service Provider Properties page, provide the information below and then click Next.
- Cryptographic service provider – In the drop-down list, select Microsoft RSA SChannel…, unless you have a specific cryptographic provider.
- Bit length – In the drop-down list, select 2048 (or higher).
- On the File Name page, under Specify a file name for the certificate request, click the … box to browse to a location where you want to save your CSR and then click Finish.
- Use a text editor (such as Notepad) to open the file. Then, copy the text, including the —–BEGIN NEW CERTIFICATE REQUEST—– and —–END NEW CERTIFICATE REQUEST—– tags, and paste it into the third-party certificate providers order form.
- After you receive your SSL Certificate from third-party providers, you can install it.
- Use certificate you’ve purchased from third-party to import onto the ADFS server virtual machine.
- Click Complete Certificate Request from the Actions panel.
- Locate to your certificate, and enter Friendly name. Select Personal.
- Verify the certificate you just installed.
- On the Start menu click Run and then type mmc.
- Click File, select Add/Remove Snap-in.
- Click Certificates and then select Add.
- Select Computer Account and then click Next.
- Select Local Computer and then click Finish.
- Click the + to expand the certificates (local computer) console tree and look for the personal directory/folder. Expand the certificates folder.
- Right-click on the certificate you want to backup and select ALL TASKS and then click Export.
- Choose Yes, export the private key and include all certificates in certificate path if possible.
- Leave the default settings and then enter your password if required and then click Finish.
- Imported certificates to all virtual machines which are required to connect to Microsoft Office 365.
Configure UPN suffix
You need to configure UPN suffix if the internal domain name doesn’t match the domain to federate with office 365. Membership in Domain Admins or Enterprise Admins, or equivalent, is the minimum required to complete this procedure.
- Logon to Domain control server
- From the Start menu, click Administrative Tools, and then click Active Directory Domains and Trusts.
- In the console tree, right-click Active Directory Domains and Trusts, and then click Properties.
- On the UPN Suffixes tab, type an alternative UPN suffix suffixes field the domain name to match the external domain used to federate with Office 365, and then click Add.
- Click OK and close Active Directory Domain and Trust window.
 Note Notea custom UPN suffix must match the external name space, The new UPN suffix must be assigned to the users before performing the authentication with federated domain |
- From the Start menu, click Administrative Tools, and then click Active Directory Users and Computers.
- Select the users, right click the selection and choose Properties option.
- Thick UPN suffix, select the external domain name and click OK.
- Check the user’s Properties, the User logon name field is now set with the UPN suffix just configured.
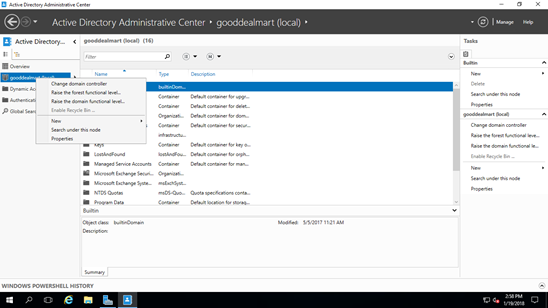
Enable Active Directory Recycle Bin
- Logon Domain control server.
- Open the Active Directory Administrative Center.
- Right-click your domain.
- Select Enable Recycle Bin…..
Hope you enjoy this post.
Cary Sun
Twitter: @SifuSun
Personal Web Site: www.carysun.com
I’m usually to blogging and i really respect your content. The article has actually peaks my interest. I’m going to bookmark your website and hold checking for brand new information.