
There is no more legacy public folder database, public folder mailboxes also knows as modern public folders, if you still need public folders, migrate them to Exchange 2016.
Public folder migration is a one-way process, if something goes wrong, you can roll back but any changes made since the migration will be lost.
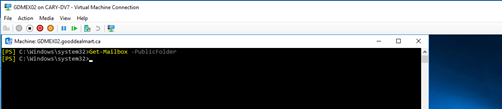
- Login Exchange 2010 Server
-
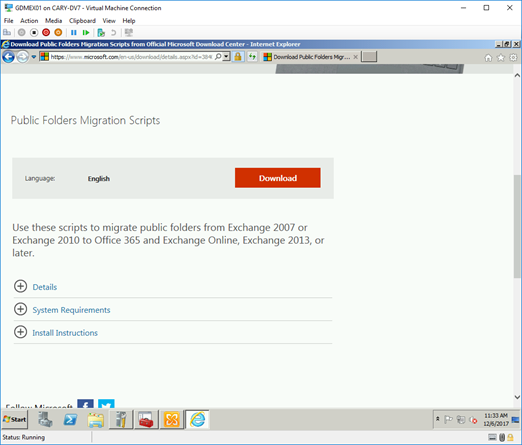
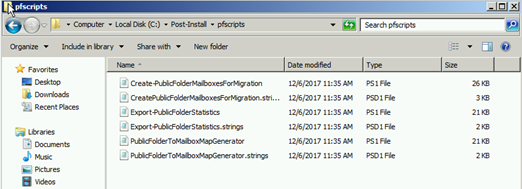
Download all scripts and supporting files from following link and save to c:\post-install\pfscripts.
https://www.microsoft.com/en-us/download/details.aspx?id=38407
- Open Exchange Management Shell.
-
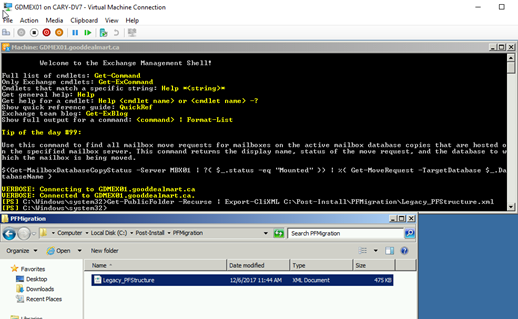
Run the following command to take a snapshot of the original source public folder structure.
Get-PublicFolder -Recurse | Export-CliXML C:\Post-Install\PFMigration\Legacy_PFStructure.xml
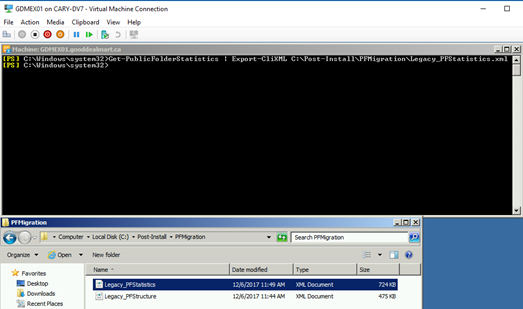
- Run the following command to take a snapshot of public folder statistics such as item count, size, and owner.
Get-PublicFolderStatistics | Export-CliXML C:\Post-Install\PFMigration\Legacy_PFStatistics.xml
Get-PublicFolder -Recurse | Get-PublicFolderClientPermission | Select-Object Identity,User -ExpandProperty AccessRights | Export-CliXML C:\Post-Install\PFMigration\Legacy_PFPerms.xml

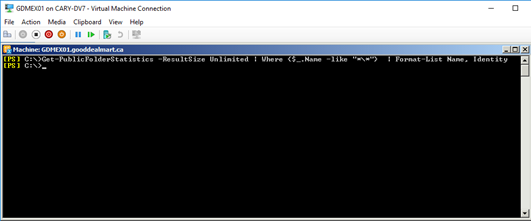
7. If the name of a public folder contains a backslash \, the public folders will be created in the parent public folder when migration occurs. Before you migrate, we recommend that you rename any public folders that have a backslash in the name.
Run the following command to locate public folders that have a backslash in the name.
Get-PublicFolderStatistics -ResultSize Unlimited | Where {$_.Name -like "*\*"} | Format-List Name, Identity
Set-PublicFolder -Identity <public folder identity> -Name <new public folder name>
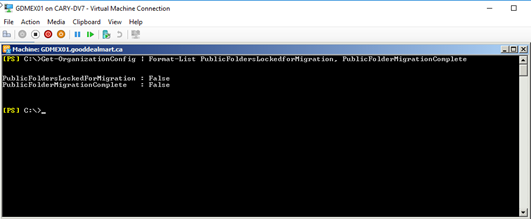
Get-OrganizationConfig | Format-List PublicFoldersLockedforMigration, PublicFolderMigrationComplete
Set-OrganizationConfig -PublicFoldersLockedforMigration:$false -PublicFolderMigrationComplete:$false
11. Login to Exchange 2016 server.
12. Open Exchange Management Shell.
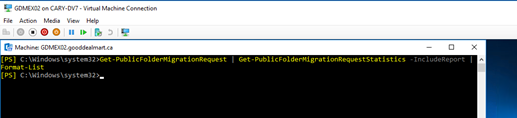
Get-PublicFolderMigrationRequest | Get-PublicFolderMigrationRequestStatistics -IncludeReport | Format-List
Get-PublicFolderMigrationRequest | Remove-PublicFolderMigrationRequest
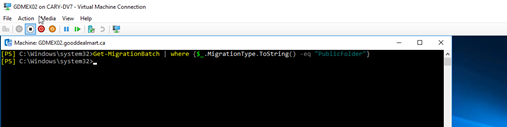
Get-MigrationBatch | where {$_.MigrationType.ToString() -eq "PublicFolder"}
$batch = Get-MigrationBatch | where {$_.MigrationType.ToString() -eq "PublicFolder"}


$batch | Remove-MigrationBatch -Confirm:$false
Get-Mailbox -PublicFolder
Get-PublicFolder
Get-Mailbox -PublicFolder | Where{$_.IsRootPublicFolderMailbox -eq $false} | Remove-Mailbox -PublicFolder -Force -Confirm:$false


Get-Mailbox -PublicFolder | Remove-Mailbox -PublicFolder -Force -Confirm:$false
20. Login to Exchange 2010 Server.
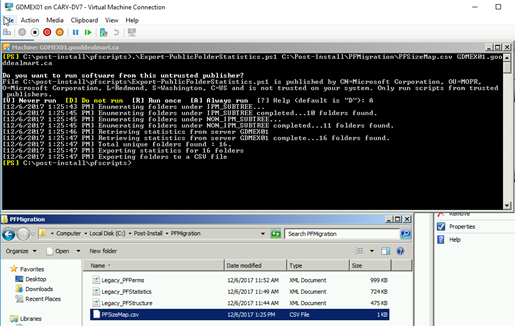
21. Open Exchange Management Shell as local administrator
.\Export-PublicFolderStatistics.ps1 C:\Post-Install\PFMigration\PFSizeMap.csv GDMEX01.gooddealmart.ca
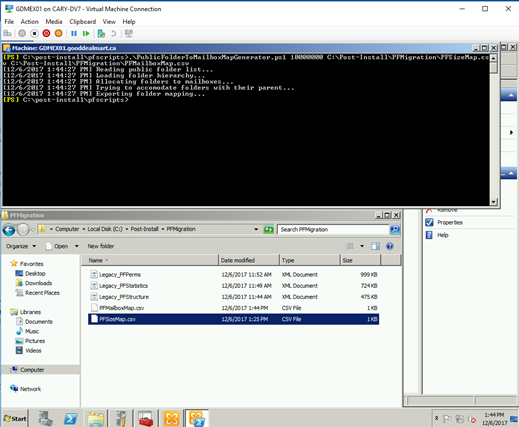
.\PublicFolderToMailboxMapGenerator.ps1 20000000000 C:\Post-Install\PFMigration\PFSizeMap.csv C:\Post-Install\PFMigration\PFMailboxMap.csv
Note:
Maximum mailbox size in bytes = 20000000000, the value 20000000000 is used to represent 20 GB
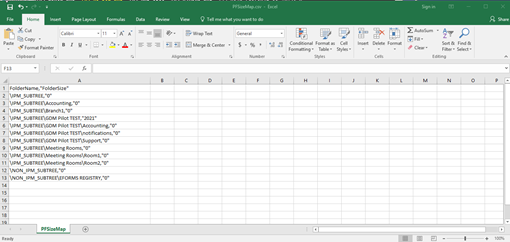
Folder to size map path = C:\Post-Install\PFMigration\PFSizeMap.csv
Folder to mailbox map path = C:\Post-Install\PFMigration\PFMailboxMap.csv
25. Copy C:\Post-Install\pfscripts and C:\Post-Install\PFMigration folders from exchange 2010 server to exchange 2016 server.
26. Login to Exchange 2016 server.
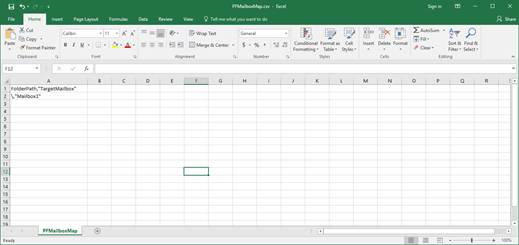
27. Copy PFMailboxMap.csv and PFSizeMap.csv files from C:\Post-Install\PFMigration to C:\Post-Install\pfscripts folder.
28. Open Exchange Management Shell.
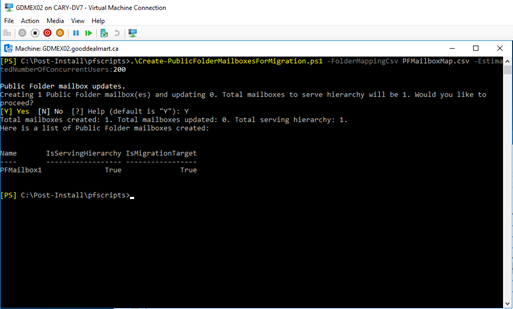
<a name="OLE_LINK39"></a>.\Create-PublicFolderMailboxesForMigration.ps1 -FolderMappingCsv PFMailboxMap.csv -EstimatedNumberOfConcurrentUsers:200
30.
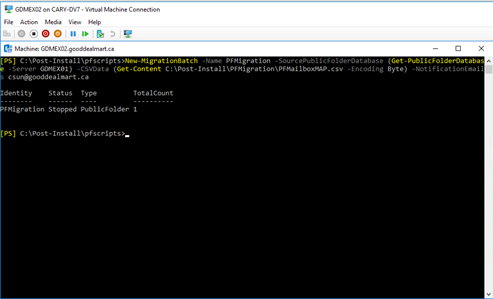
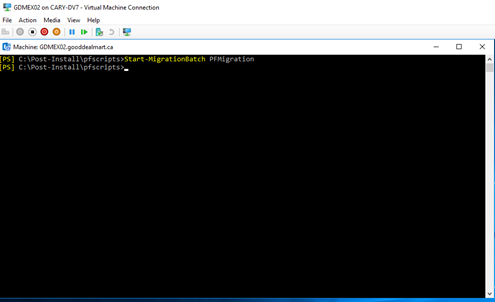
<a name="OLE_LINK51"></a>New-MigrationBatch -Name PFMigration -SourcePublicFolderDatabase (Get-PublicFolderDatabase -Server GDMEX01) -CSVData (Get-Content C:\Post-Install\PFMigration\PFMailboxMAP.csv -Encoding Byte) -NotificationEmails <a href="mailto:csun@gooddealmart.ca"><span style="font-family: Cambria; font-size: 12pt;">csun@gooddealmart.ca</span></a>
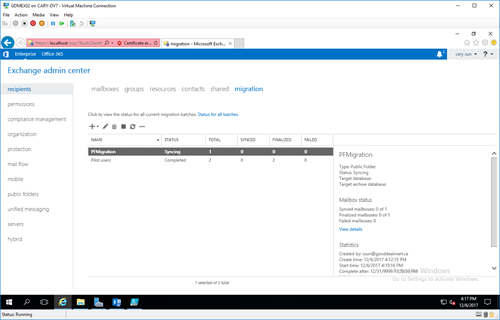
<a name="OLE_LINK55"></a>Start-MigrationBatch PFMigration
34. We are going to lock and complete the public folder for migration (downtime required)
35. Login to Exchange 2010 Server.
36. Open Exchange Management Shell as local administrator
Set-OrganizationConfig -PublicFoldersLockedForMigration:$true

38. Login to Exchange 2016 Server.
39. Open the Exchange Management Shell on your Exchange 2016 server.
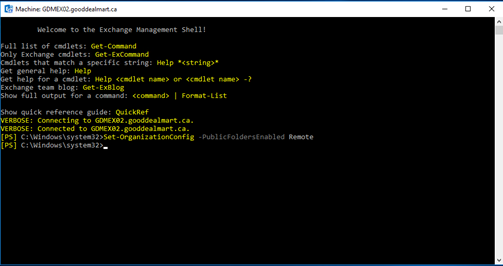
Set-OrganizationConfig -PublicFoldersEnabled Remote
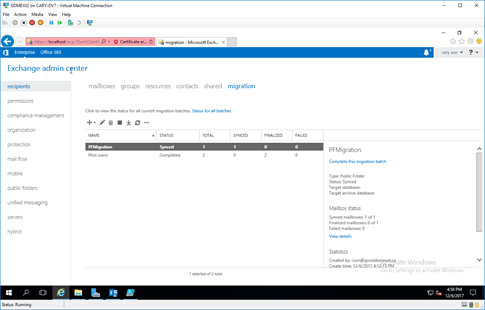
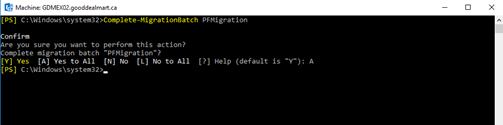
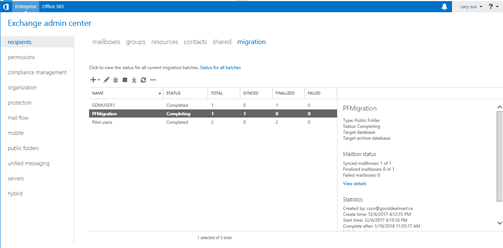
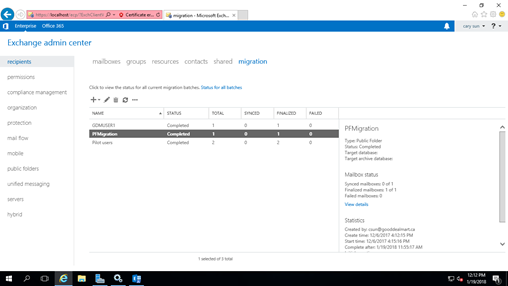
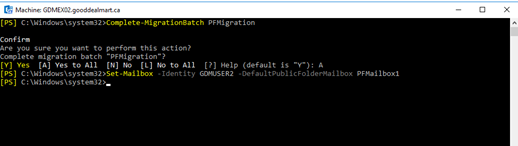
Complete-MigrationBatch PFMigration
Set-Mailbox -Identity GDMUSER2 -DefaultPublicFolderMailbox PFMailbox1
Get-Mailbox -PublicFolder | Set-Mailbox -PublicFolder -IsExcludedFromServingHierarchy $false

45. Login to Exchange 2010 Server.
46. Open Exchange Management Shell as local administrator.
Set-OrganizationConfig -PublicFolderMigrationComplete:$true

48. Login to Exchange 2016 Server.
49. Open the Exchange Management Shell on your Exchange 2016 server.
Set-OrganizationConfig -PublicFoldersEnabled Local

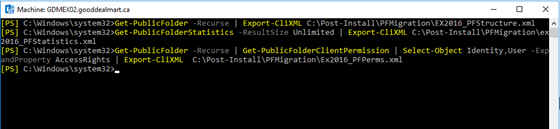
51. Run following command on the Exchange 2016 and compare files contents with previously files and verify success.
Get-PublicFolder -Recurse | Export-CliXML C:\Post-Install\PFMigration\EX2016_PFStructure.xml
Get-PublicFolderStatistics -ResultSize Unlimited | Export-CliXML C:\Post-Install\PFMigration\Ex2016_PFStatistics.xml
Get-PublicFolder -Recurse | Get-PublicFolderClientPermission | Select-Object Identity,User -ExpandProperty AccessRights | Export-CliXML  C:\Post-Install\PFMigration\Ex2016_PFPerms.xml
Hope you enjoy this post.
Cary Sun
Twitter: @SifuSun