
Veeam Backup for Microsoft 365 supports different Azure storage account types for standard and premium performance tiers. Tables in this section list the supported storage account types.
Standard Performance Tier
The following table lists supported storage account types for the Standard Performance Tier.
| Storage Type | Services | Access Tiers | |
| General-purpose V2 | Blob | Hot, Cool, Archive | |
| General-purpose V1 | Blob | N/A | |
| Blob Storage | Blob (block blobs and append blobs only) | Hot, Cool, Archive | |
| NOTE | |||
| Veeam Backup for Microsoft 365 uses Azure Blob Storage Archive access tier as a target for backup copy jobs. | |||
Premium Performance Tier
The following table lists supported storage account types for Premium Performance Tier.
| Storage Account Type | Services | Access Tiers |
| Block Blob Storage | Blob (block blobs and append blobs only) | N/A |
The detailed information as the following link.
https://helpcenter.veeam.com/docs/vbo365/guide/supported_storage_account_types.html?ver=60
1. Sign in Azure portal with a global admin account.
https://azure.microsoft.com/en-us/features/azure-portal/

2. On the Azure services page, select +Create resource.

3. On the Create a resource page, search and select storage account.

4. On the Storage account page, click Create.

5. On the Create storage account page, select Basics and configure as following and then click Next: Advanced.

In my case settings as below

6. On the Advanced page, configure as follow and then click Next: Networking.

In my case settings are as below.

7. On the Networking page, configure as follow and then click Next: Data protection.

In my case settings are as below.

8. On the Data protection page, configure as follow and then click Next: Encryption.

In my case settings are as below.

9. On the Encryption page, configure as follow and then click Next: Tags.

In my case settings are as below.

10. On the Tags page, configure as the following and then click Next: Review + create.
On the Tags tab, you can specify Resource Manager tags to help organize your Azure resources.

11. On the Review + create page, click Create.

12. It may need a few mins to create the new storage account, click Go to resource.

13. On the new created Storage account page, select Access keys.

14. On the Access keys page, select Show keys, and copy the Storage account name and key of key1, we need them for Veeam storage repository settings later.

15. On the new created Storage account page, select Containers.

16. On the Containers page, click +Container.

17. On the new container page, enter a name for your new container, select Private (no anonymous access) as Public access level and then click Create.

18. Verify the new container created.

19. Login to Veeam Backup for Microsoft 365 Manager server.
20. Open Veeam Backup for Microsoft Office 365 console.
21. On the Veeam Backup for Microsoft Office 365 console page, select Backup Infrastructure.

22. On the BACKUP INFRASTRUCTURE page, select Object Storage Repositories.

23. Right-Click Object Storage Repositories and click Add object storage.

24. On the Object storage repository name and description page, type Azure Blob Archive Tier as the Object storage repository name and click Next.

25. On the Object storage type page, select Microsoft Azure Blob Storage and click Next.

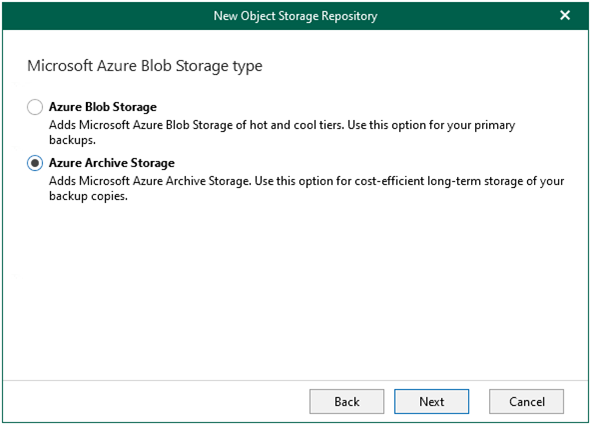
26. On the Microsoft Azure Blob Storage type page, select Azure Archive Storage and click Next.
27. On the Microsoft Azure storage Account page, click Add on Specify account credentials to connect to Microsoft blob storage.

28. Paste Azure storage account name as Account and paste key1 as Shared key (you copied them when you created Azure storage account), click OK.

29. On the Microsoft Azure storage Account page, select specify the region (in my case is Azure Global (Standard) ) as Region and click Next.

30. On the Microsoft Azure Blob container page, select an Azure Blob container (you created it previously when you create the Azure Storage Account and settings) and click Browse on Folder.

30. On the Select the folder page, click New Folder.

31. Type the name as the new folder name, and click OK.

32. On the Microsoft Azure Blob container page, click Advanced.

33. On the ADVANCED SETTINGS page, if you would like to control the storage spend, select Limit object storage consumption and put the storage size for it, and click OK.

34. On the Microsoft Azure Blob container page, click Finish.

36. If you do not want to use the Azure archiver appliance, skip this step and click Finish.

37. Verify the Azure archive storage repository created.

38. On the BACKUP INFRASTRUCTURE page, select Backup Repositories.

39. Right-click Backup Repositories, and select Add backup repository.

40. On the Specify details for backup repository page, type Azure Blob Archive Tier Repository as repository Name and click Next.

41. On the Specify location for backup repository page, select your Backup proxy server and click Browse for Path.

42. On the select folder page, click New folder.

43. Type your folder name and click OK.

44. On the Specify location for backup repository page, click Get free space.

45. On the Specify location for the backup repository page, click Next.

46. On the Specify if you want to extend your backup repository to the object storage page, select offload backup data to object storage and select Azure Blob Archive Tier (you just created it).

47. Select Encrypt data uploaded to object storage, you can choose the existing Password or click Add for Password.
48. Click Next on the Object storage backup repository page.

49. On the Specify retention policy settings page, from the Retention policy drop-down list, choose how long your data should be stored in a backup repository.

50. On the Specify retention policy settings page, select retention type, and click Advance. There are two types as below.
•Snapshot-based retention: Select this type if you want to keep an item until the restore point of an item’s version is within the retention coverage.
•Item-level retention: Select this type if you want to keep an item until its creation time or last modification time is within the retention coverage.

51. On the Apply retention policy page, select retention policy, and click OK. There are two policies as below.
•Daily at: Select this option if you want a retention policy to be applied daily and choose the time and day.
•Monthly at: Select this option if you want a retention policy to be applied every month and choose the time and day which can be the first, second, third, fourth or even the last one in the month.

52. On the Specify retention policy settings page, click Finish.

53. Verify the new Azure Blob Archive Tier Repository had been added.

Hope you enjoy this post.
Cary Sun
Twitter: @SifuSun
Web Site: carysun.com
Blog Site: checkyourlogs.net
Blog Site: gooddealmart.com