
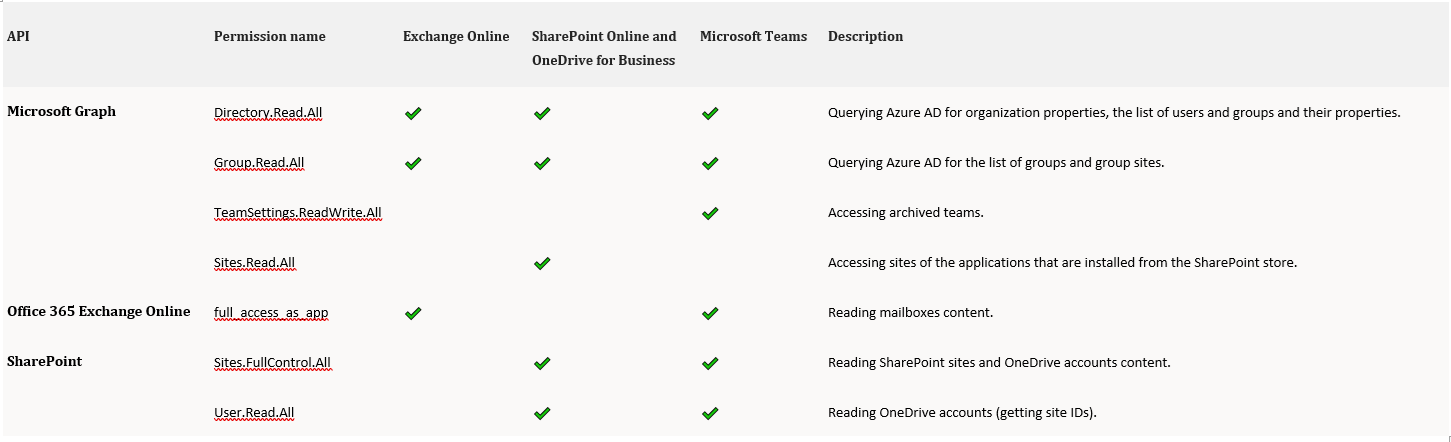
Veeam Backup for Microsoft 365 Modern Authentication and Legacy Protocols Authentication requires that you grant permissions to Azure AD applications to back up and restore data from/to your Microsoft 365 organizations.
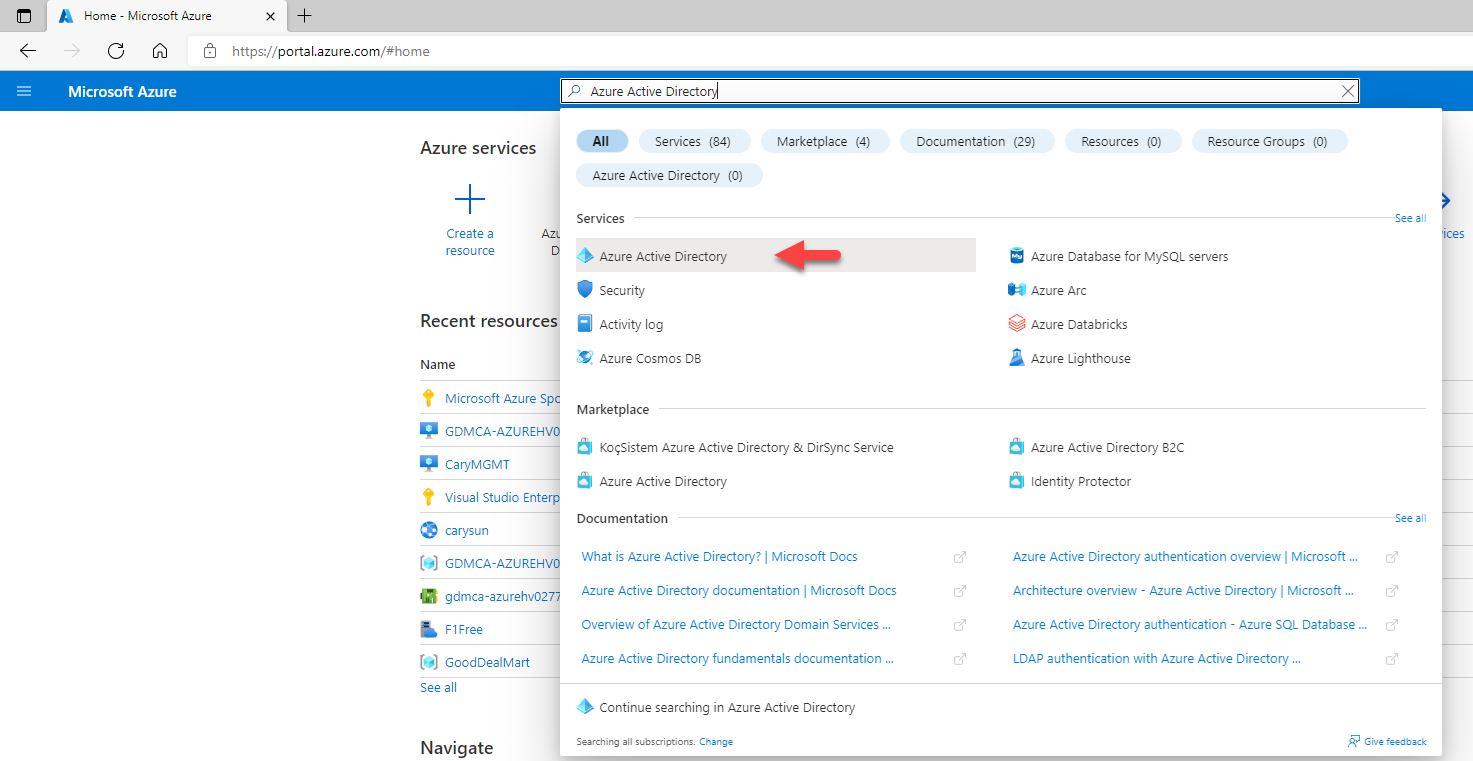
1.Sign in Azure portal with Global Admin account.
2.Search for and select Azure Active Directory.
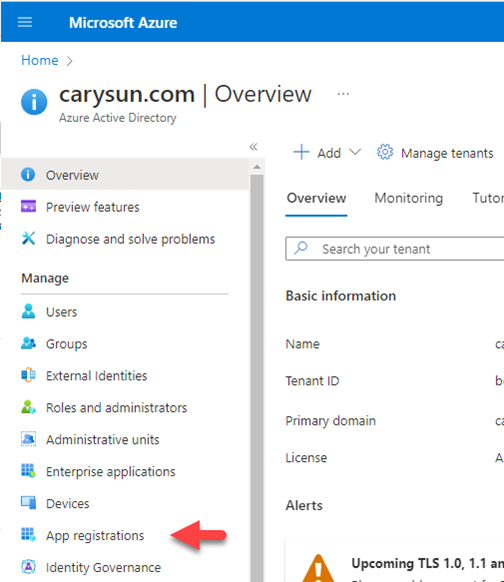
3.Under Manage, select App registrations.
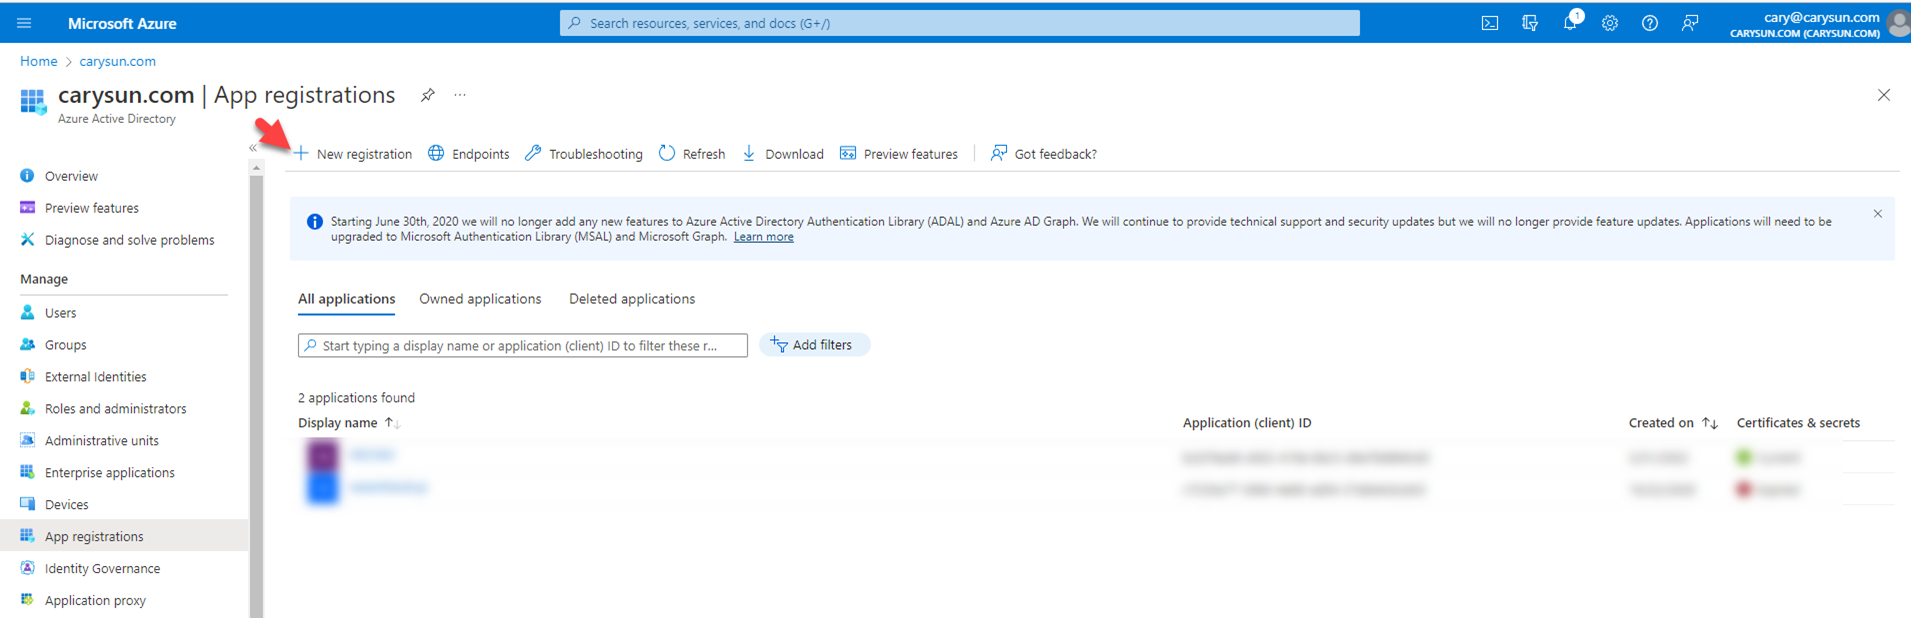
4.On the App registrations page, select +New registration.
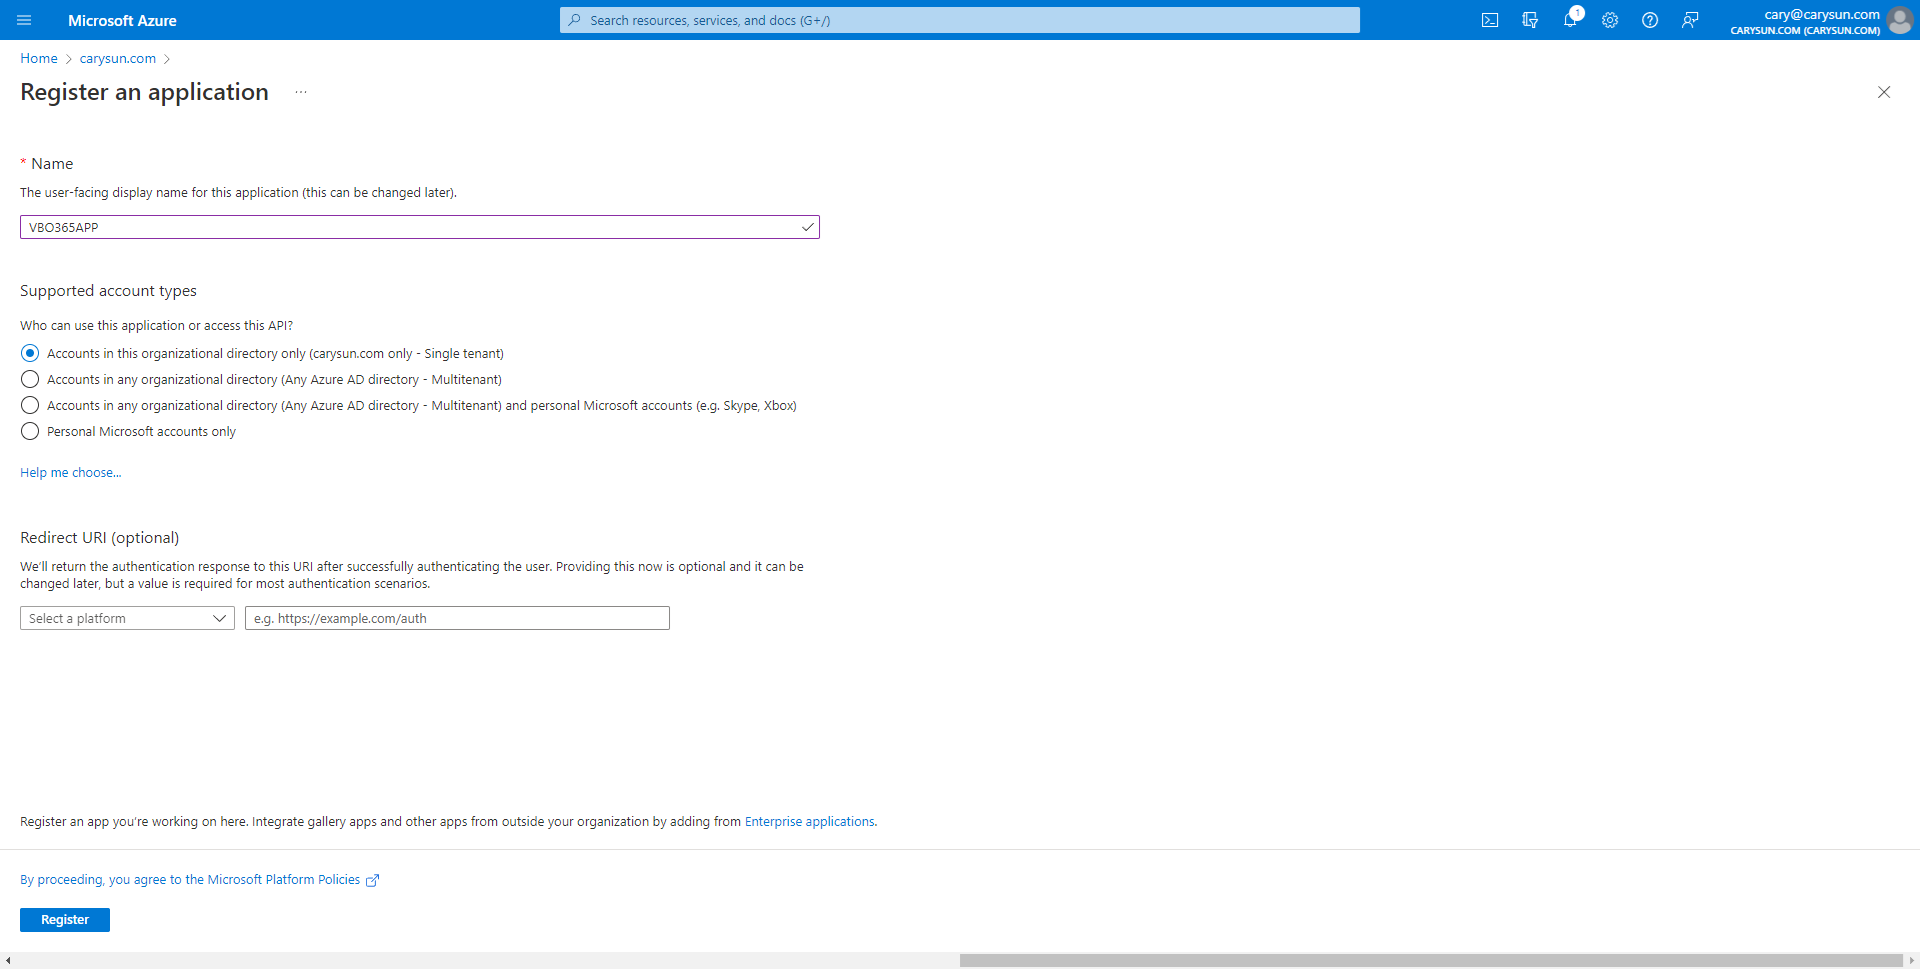
5.On the Register an application page, type VBO365APP as application Name, select Accounts in this organization directory only, click Register.
6.When registration finishes, the Azure portal displays the app registration’s Overview pane. You see the Application (client) ID. Also called the client ID, this value uniquely identifies your application in the Microsoft identity platform, select API permissions.

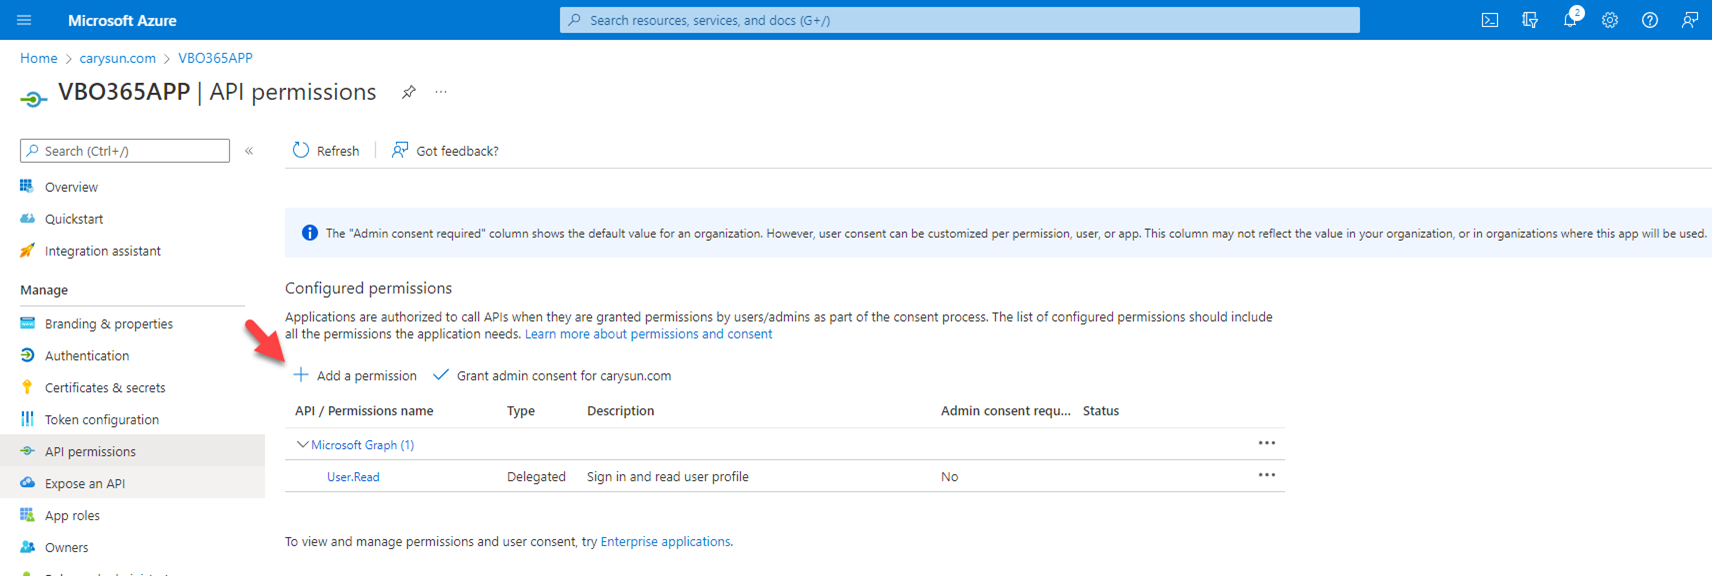
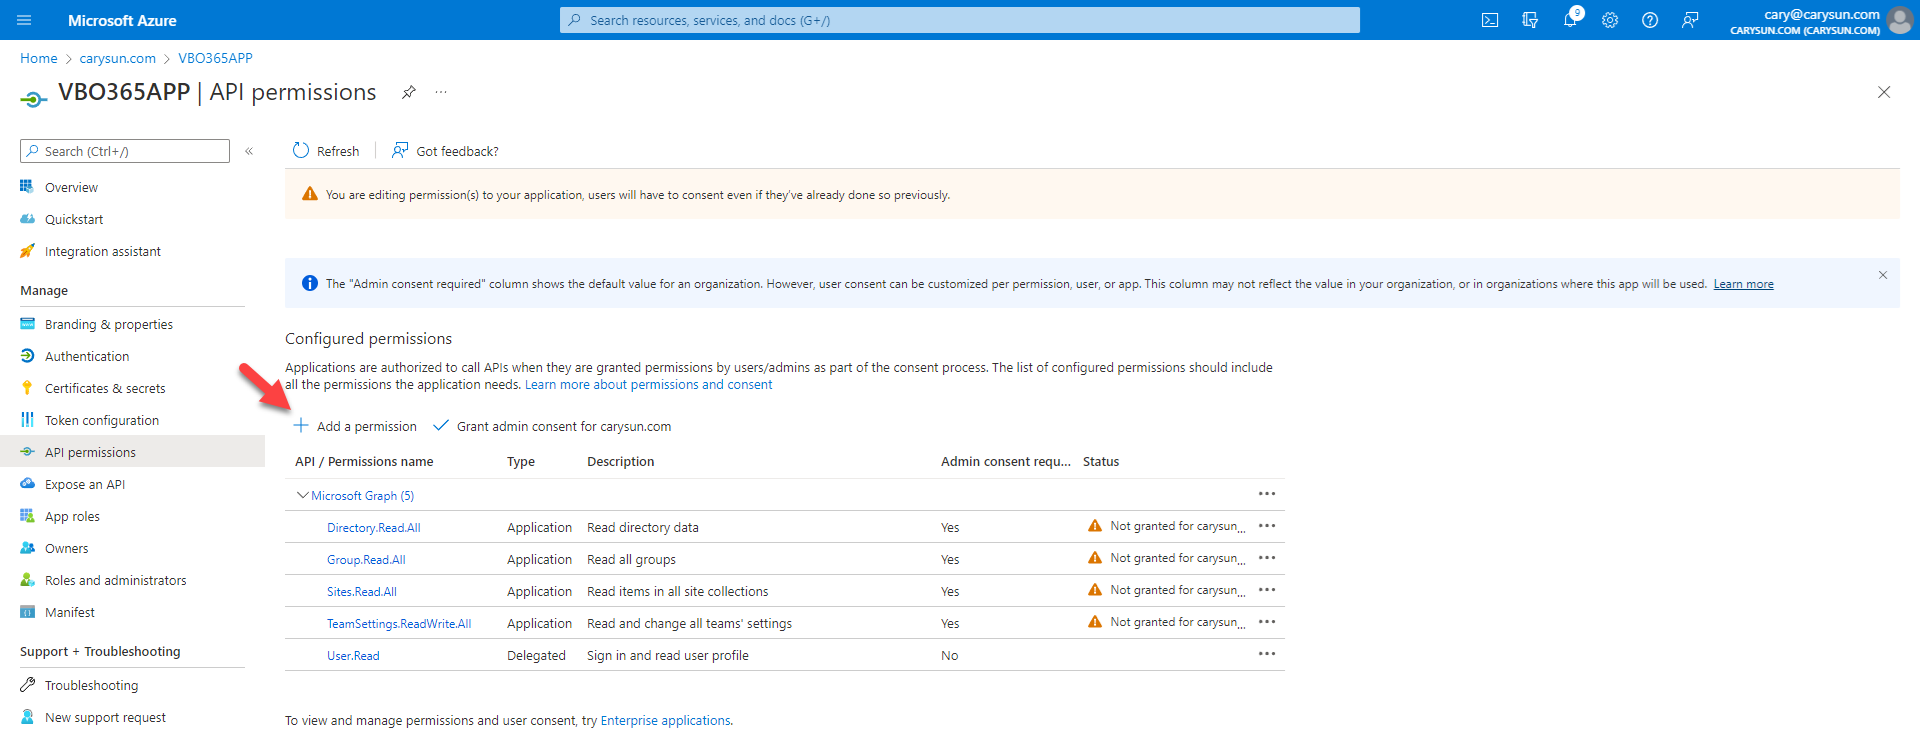
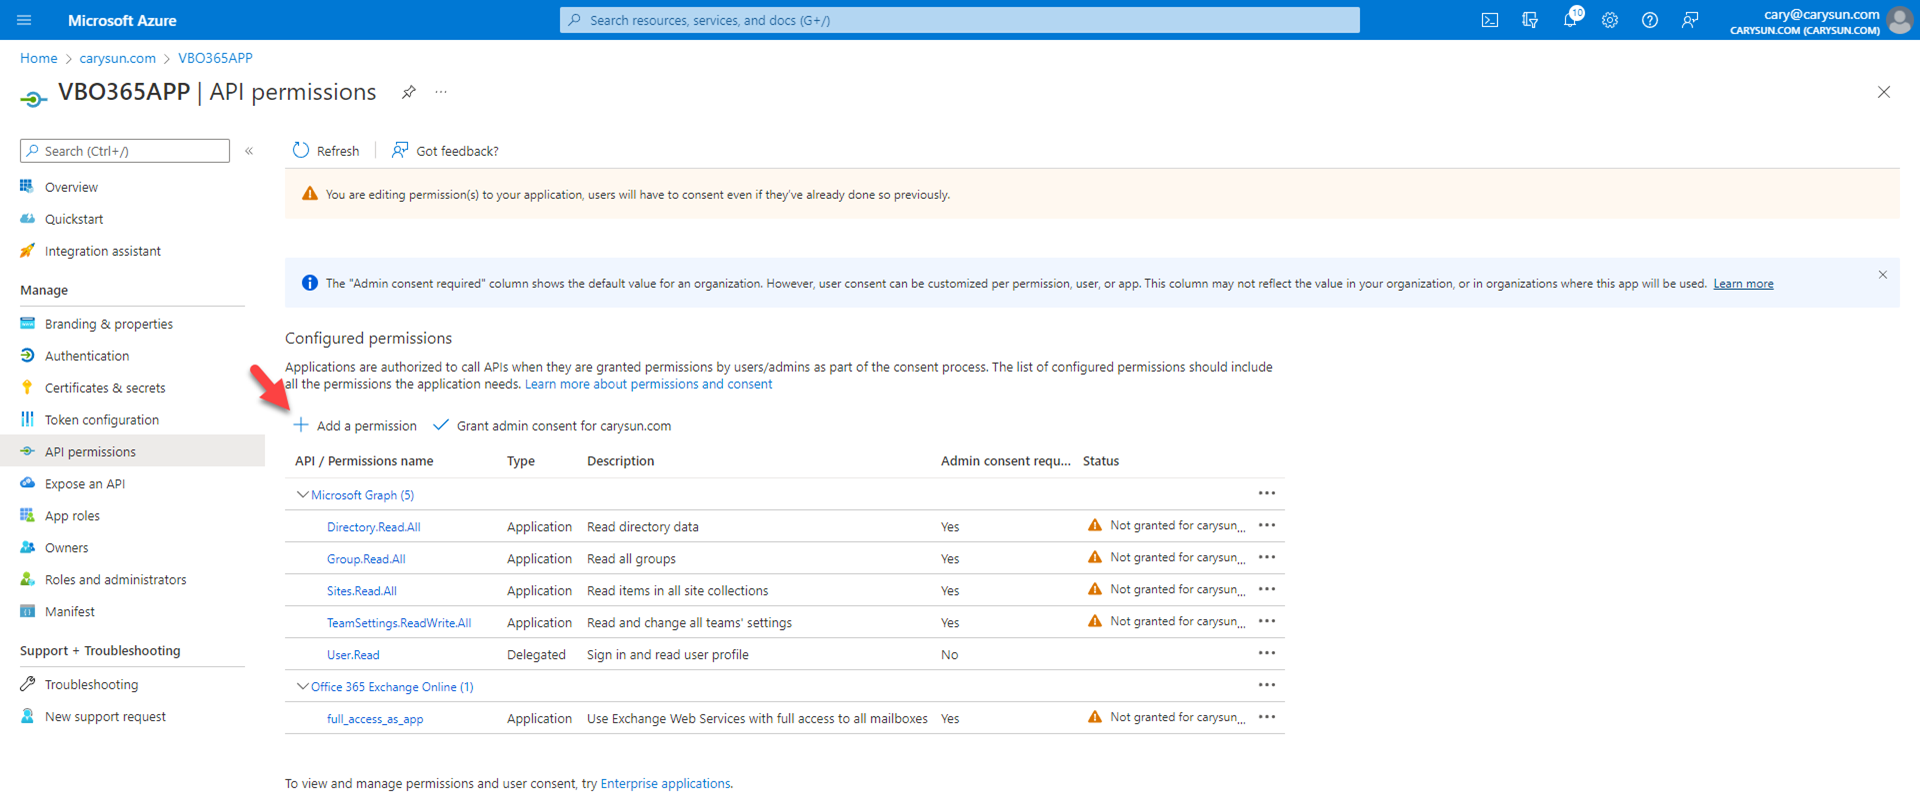
7.On the Configured permissions page, select +Add permission.
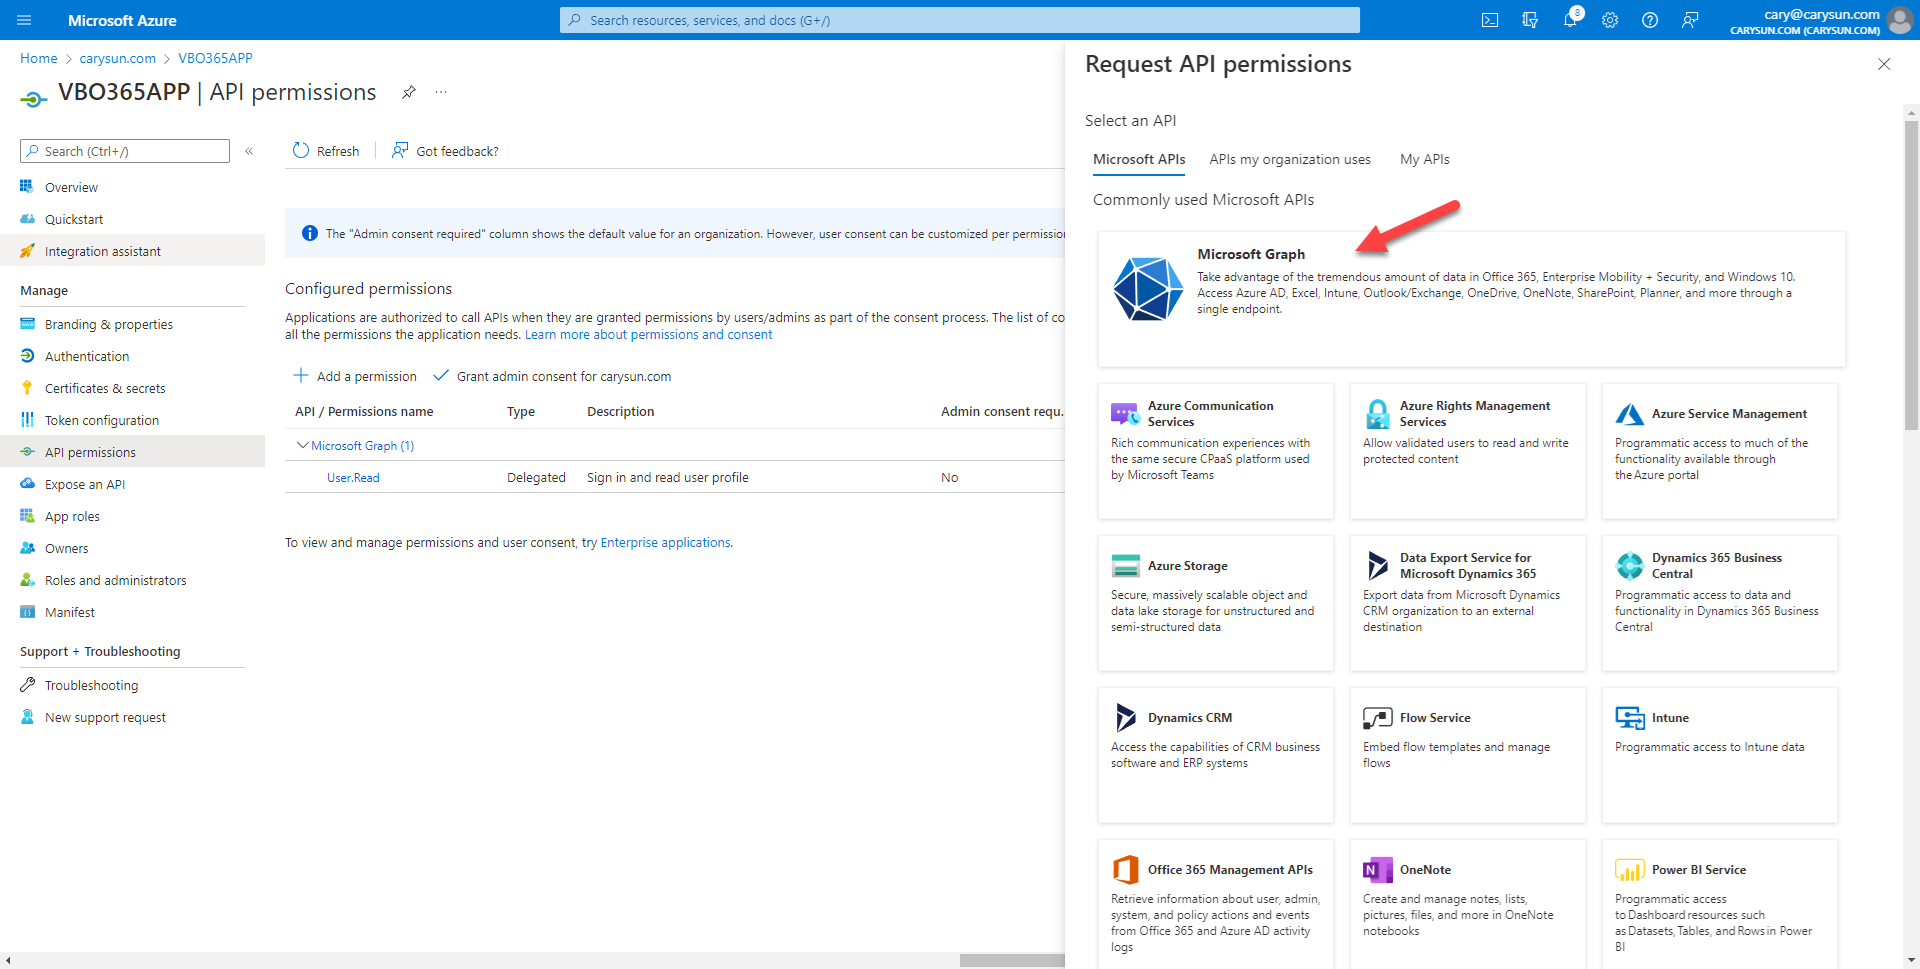
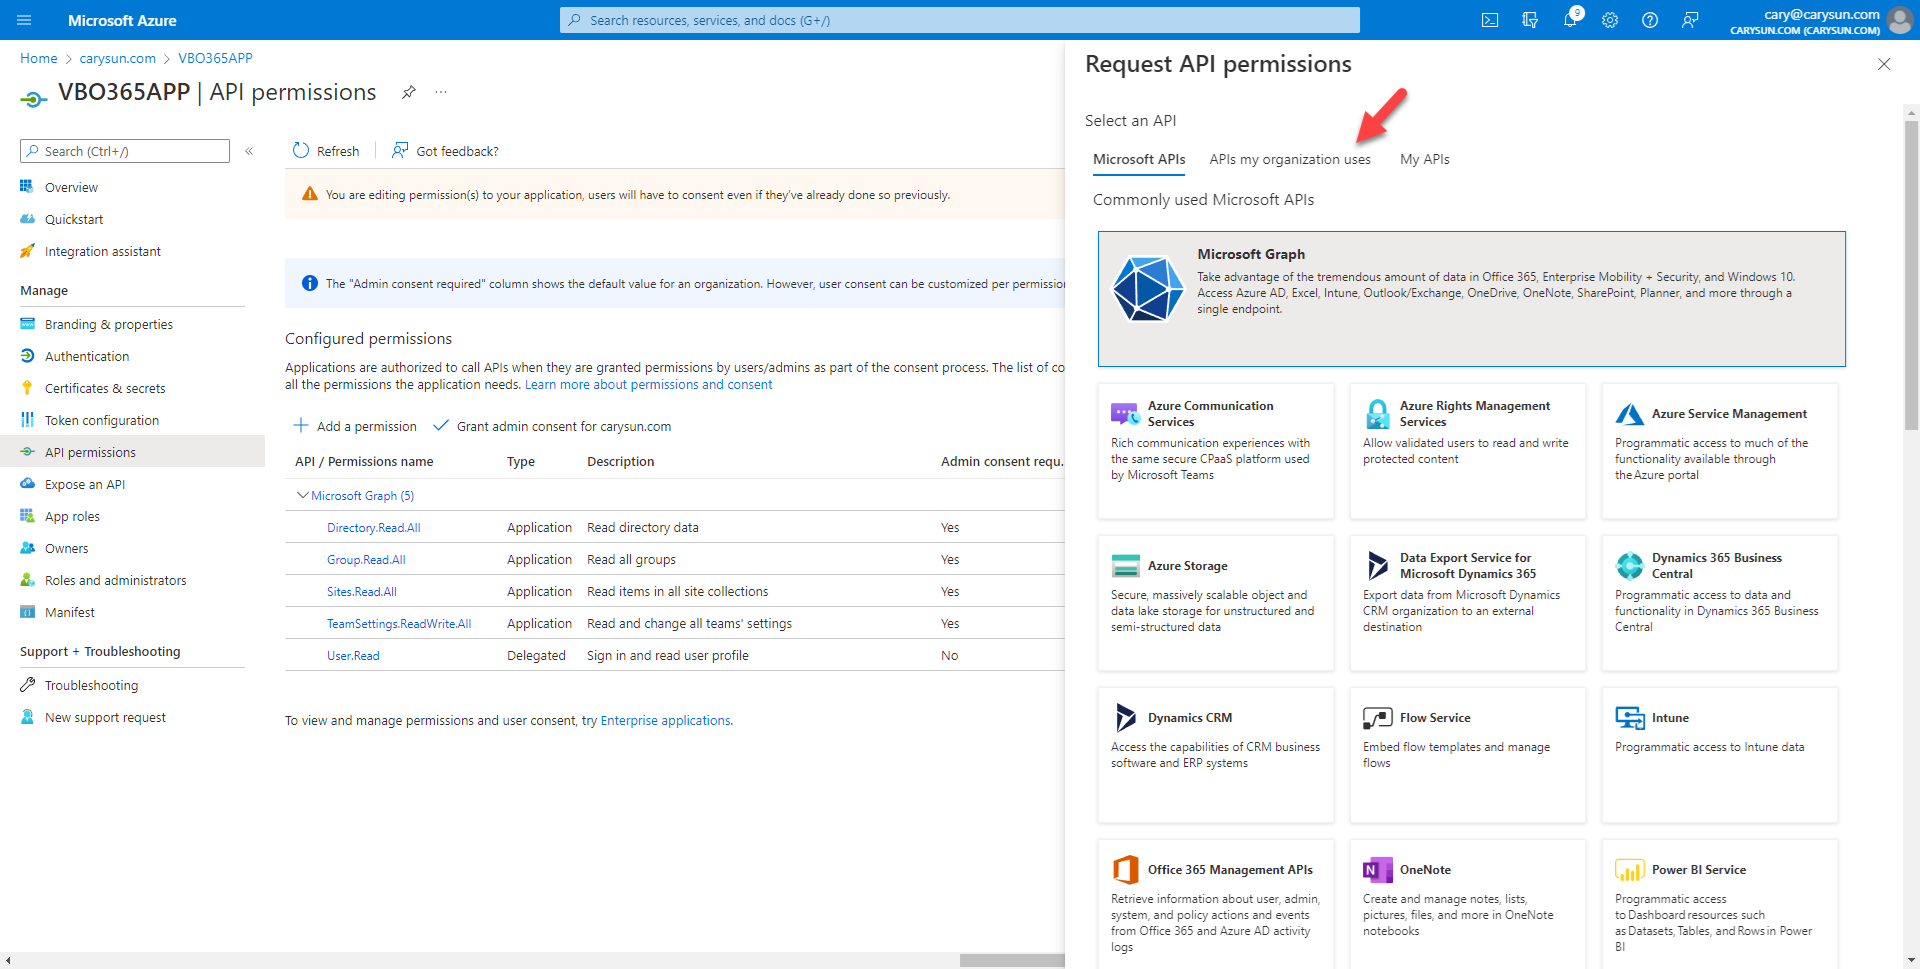
8.On the Request API permissions page, select Microsoft Graph.
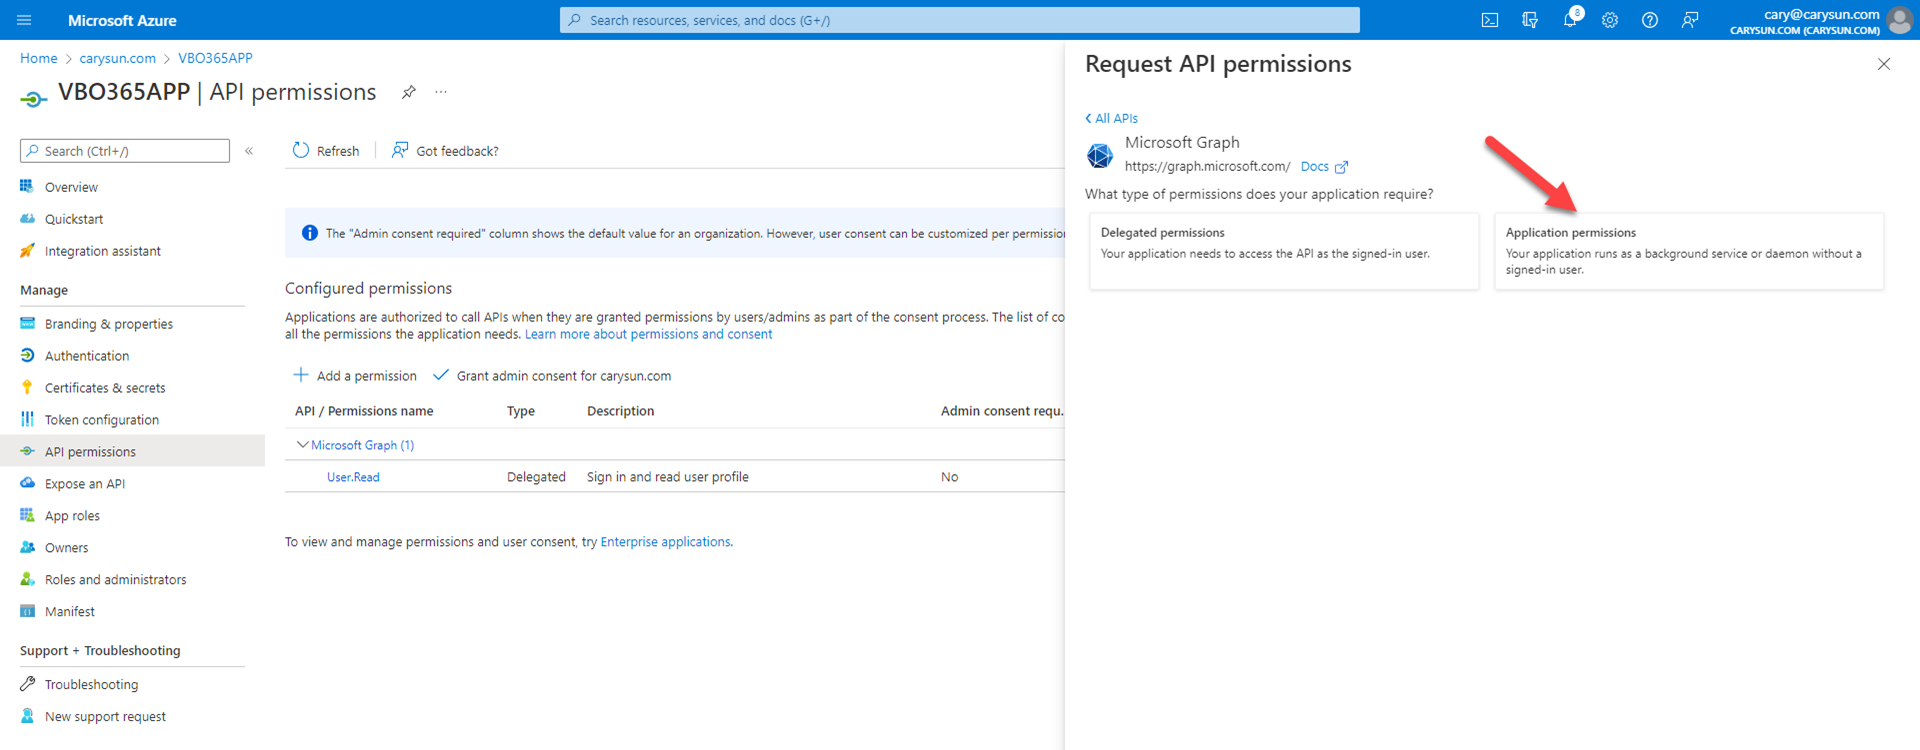
9.On the Microsoft Graph page, select Application permissions.
10.On the Select permission page, expend Directory, select Directory.Read.All.

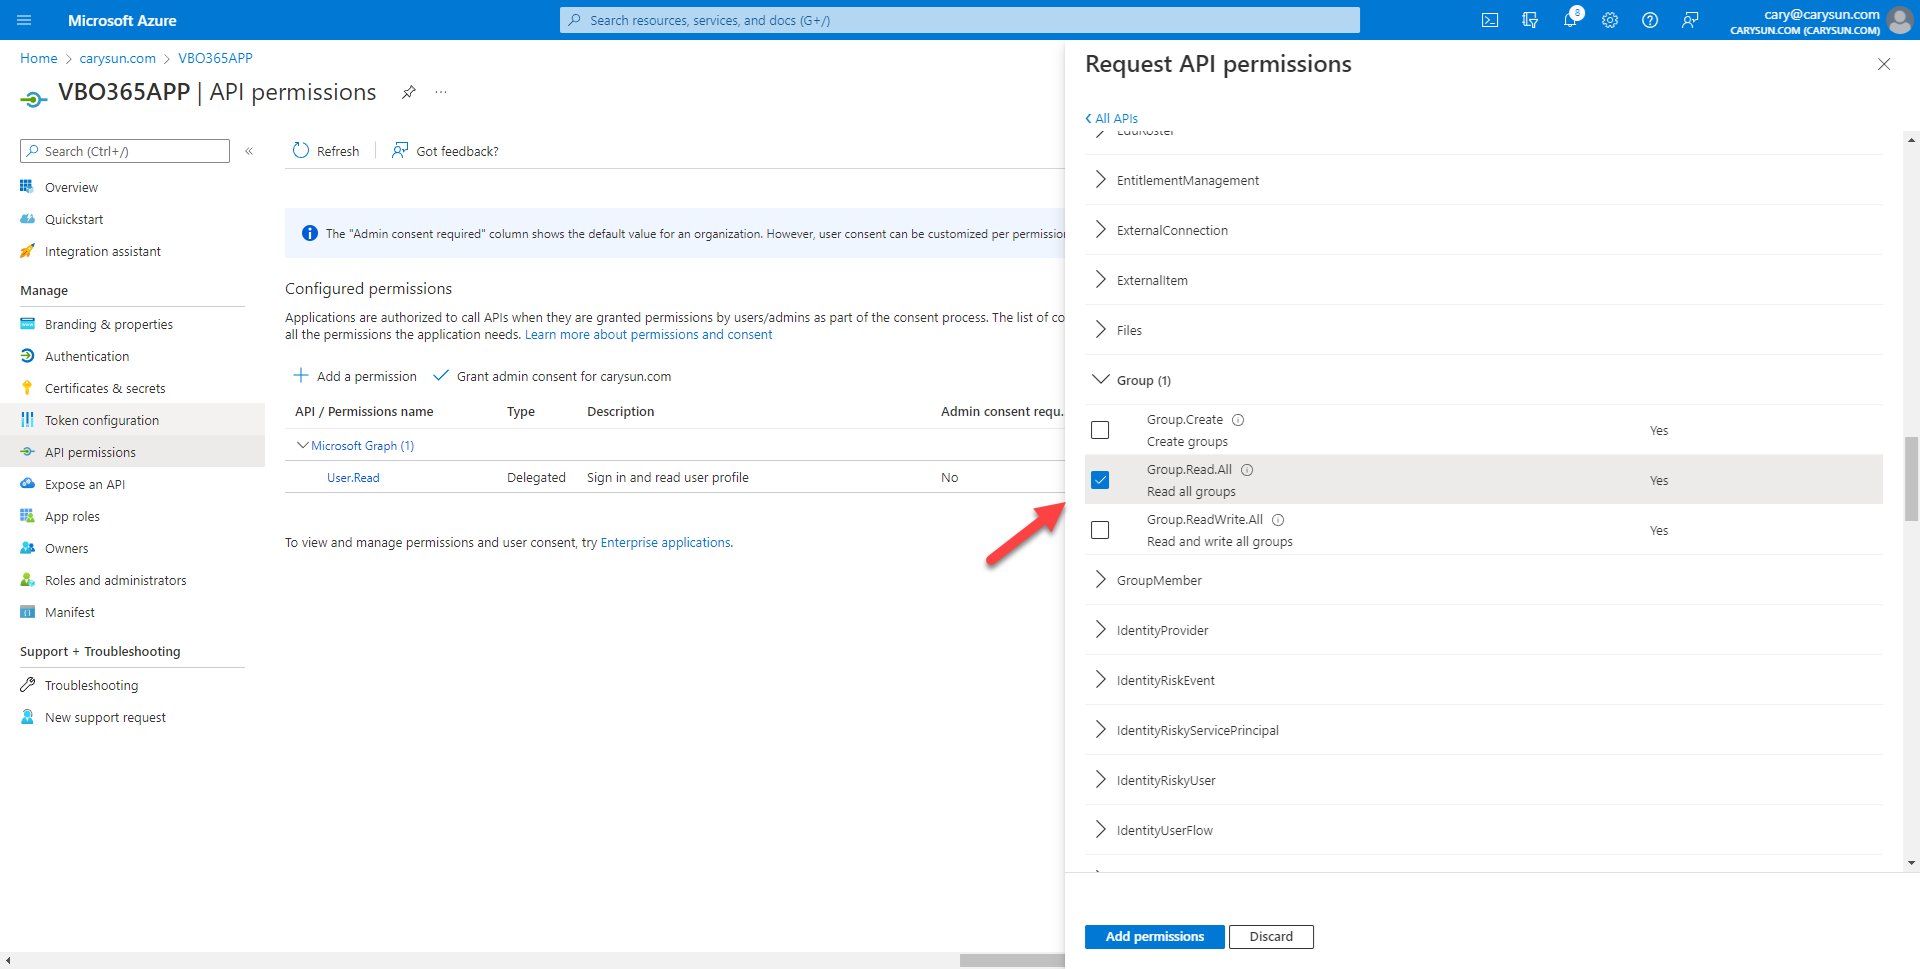
11.On the Select permission page, expend Group, select Group.Read.All.
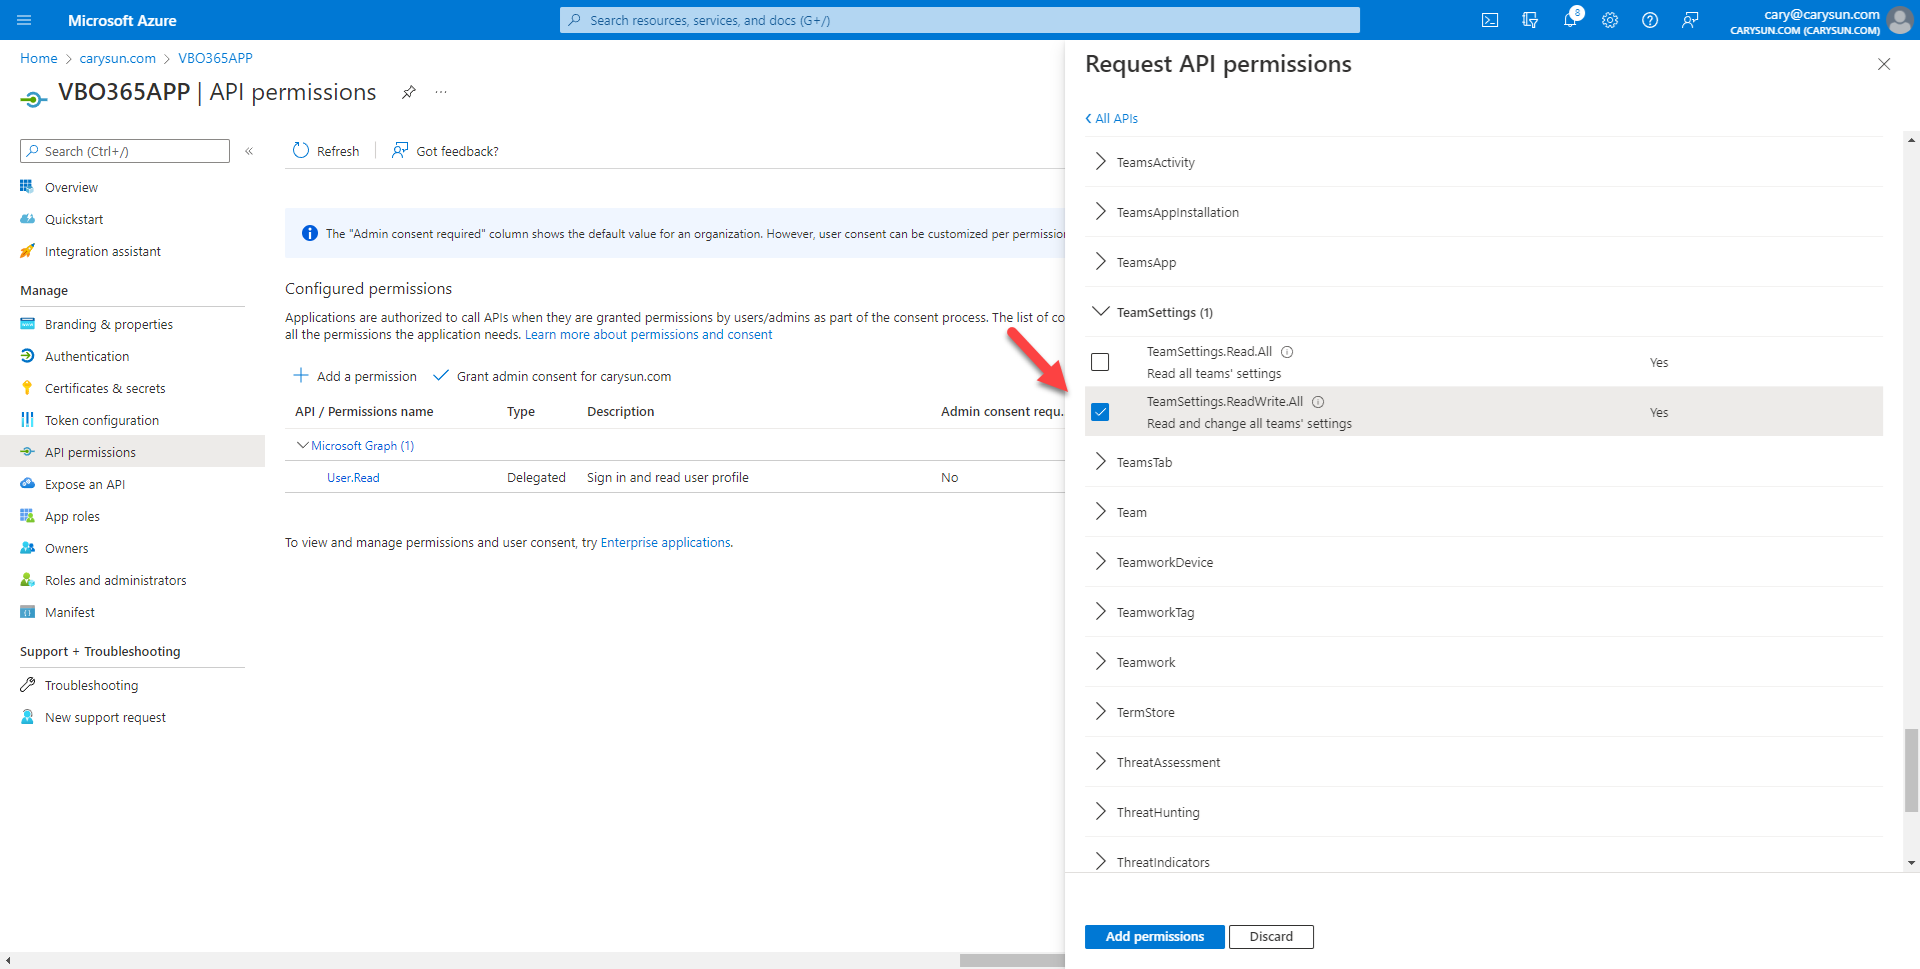
12.On the Select permission page, expend TeamSettings, select TeamSettings.ReadWrite.All.
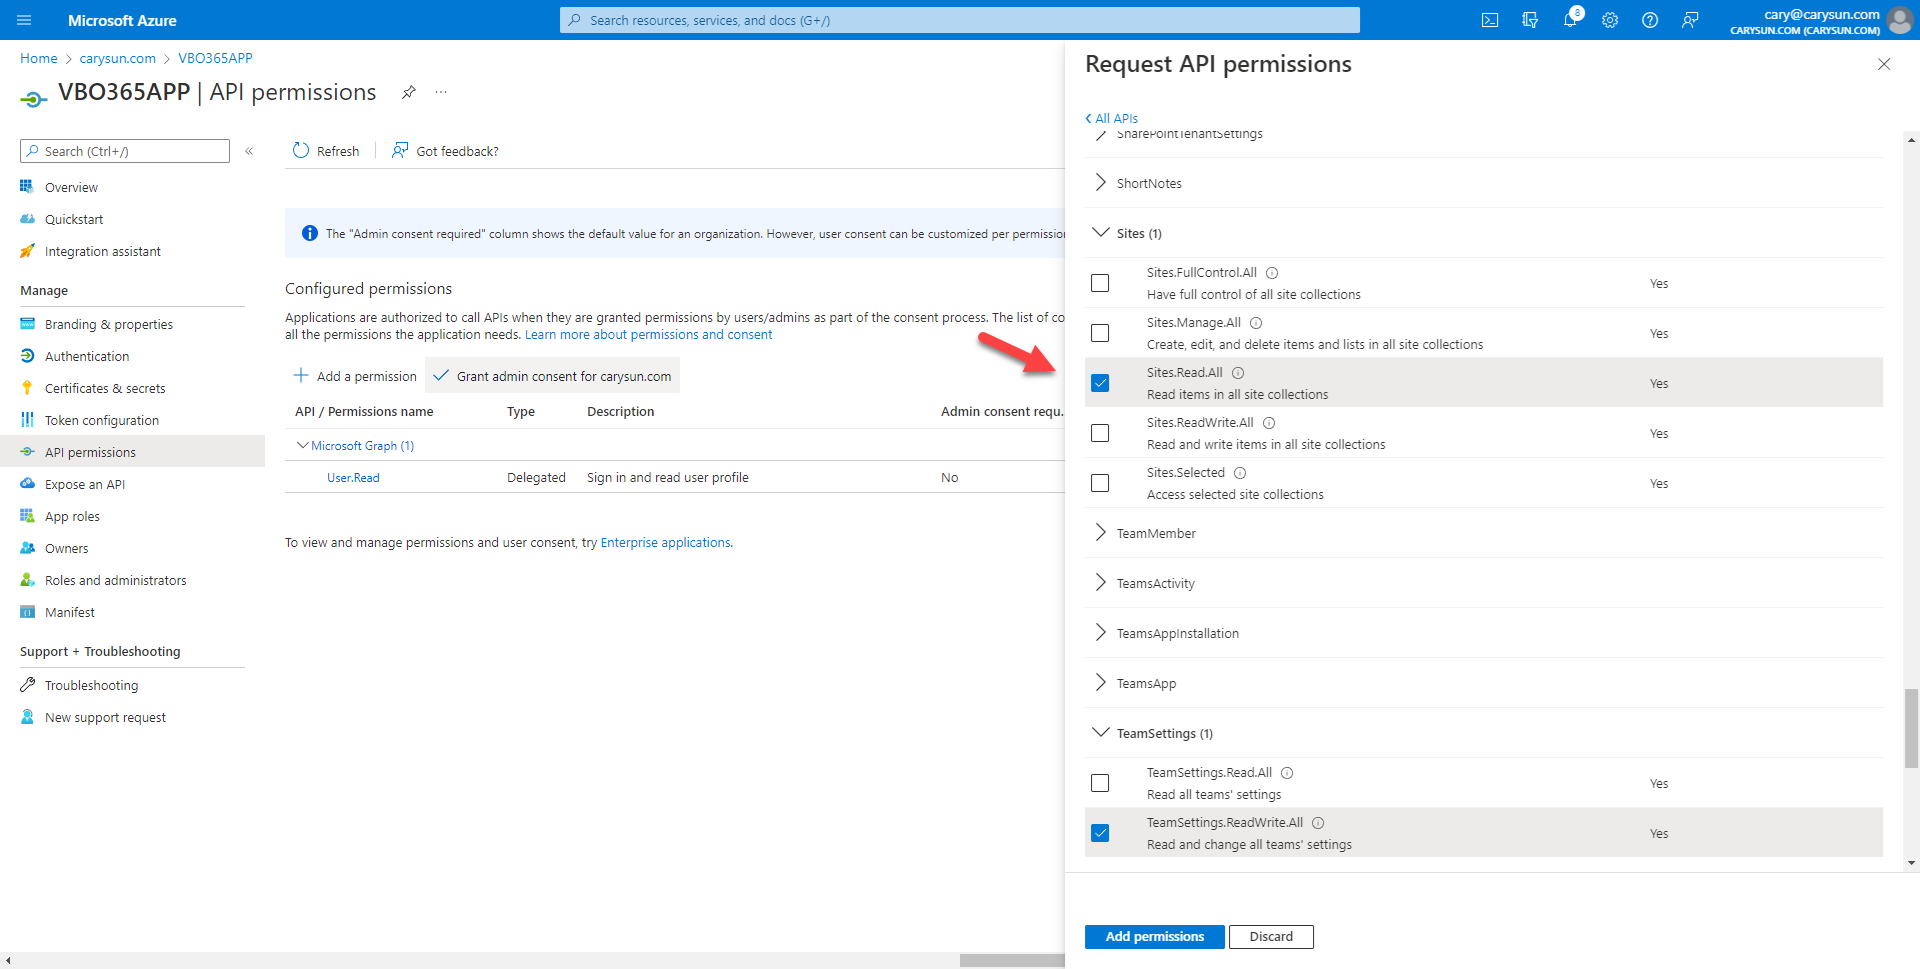
13.On the Select permission page, expand Sites, select Sites.Read.All, click Add permissions.
14.On the Configured permissions page, select +Add permission.
15.On the Request API permissions page, select APIs my organization uses.
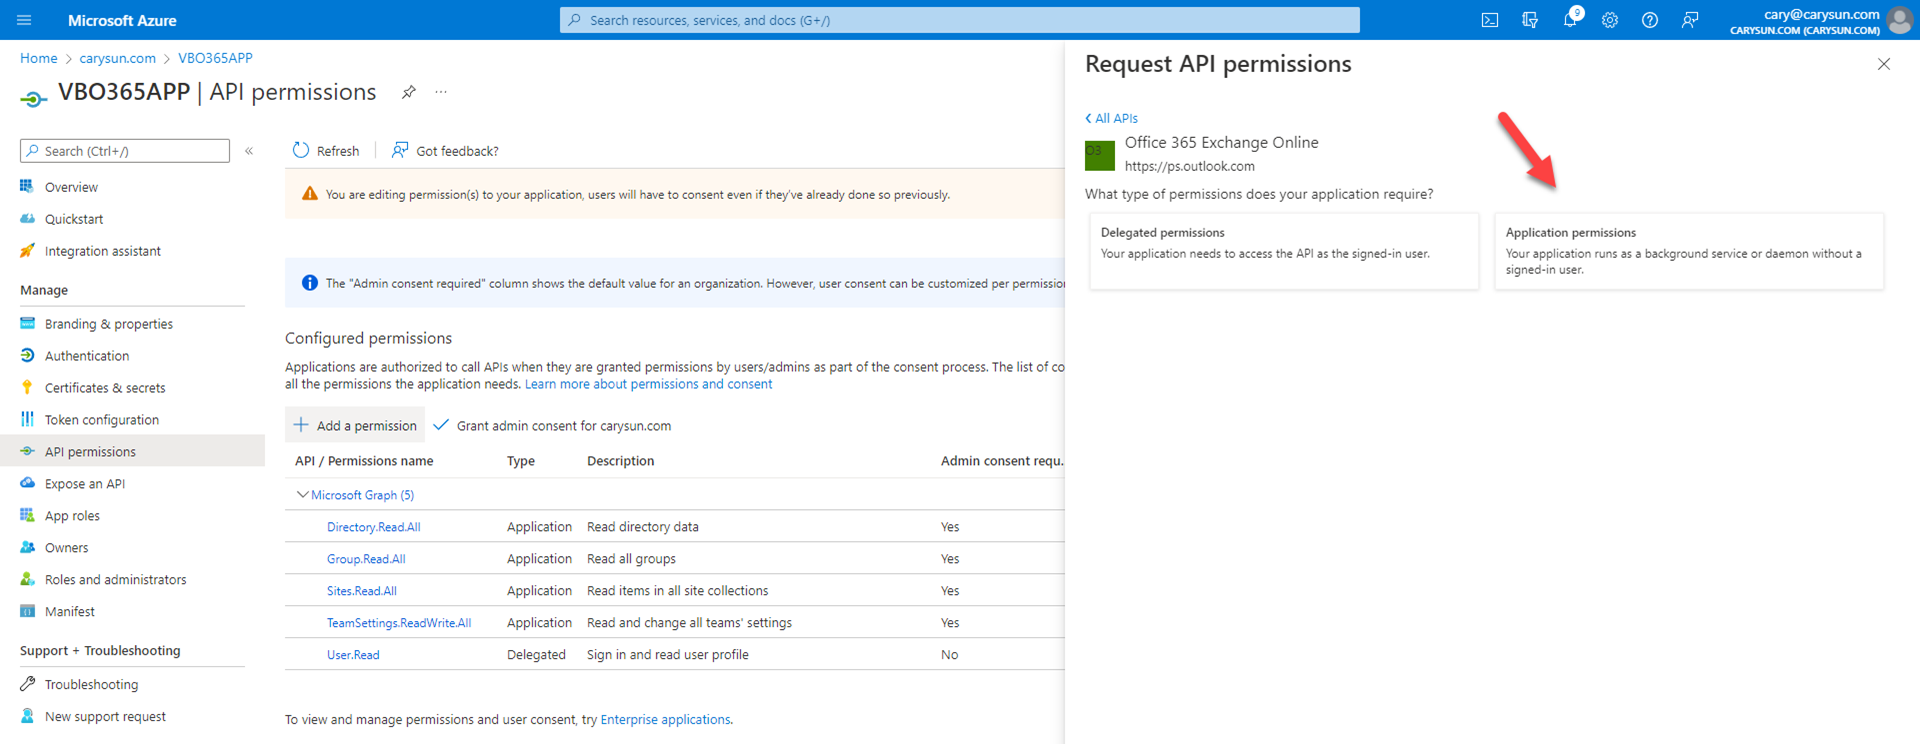
16.On the API my organization uses page, search and select Office 365 Exchange Online.

17.On the Office 365 Exchange Online page, select Application permissions.
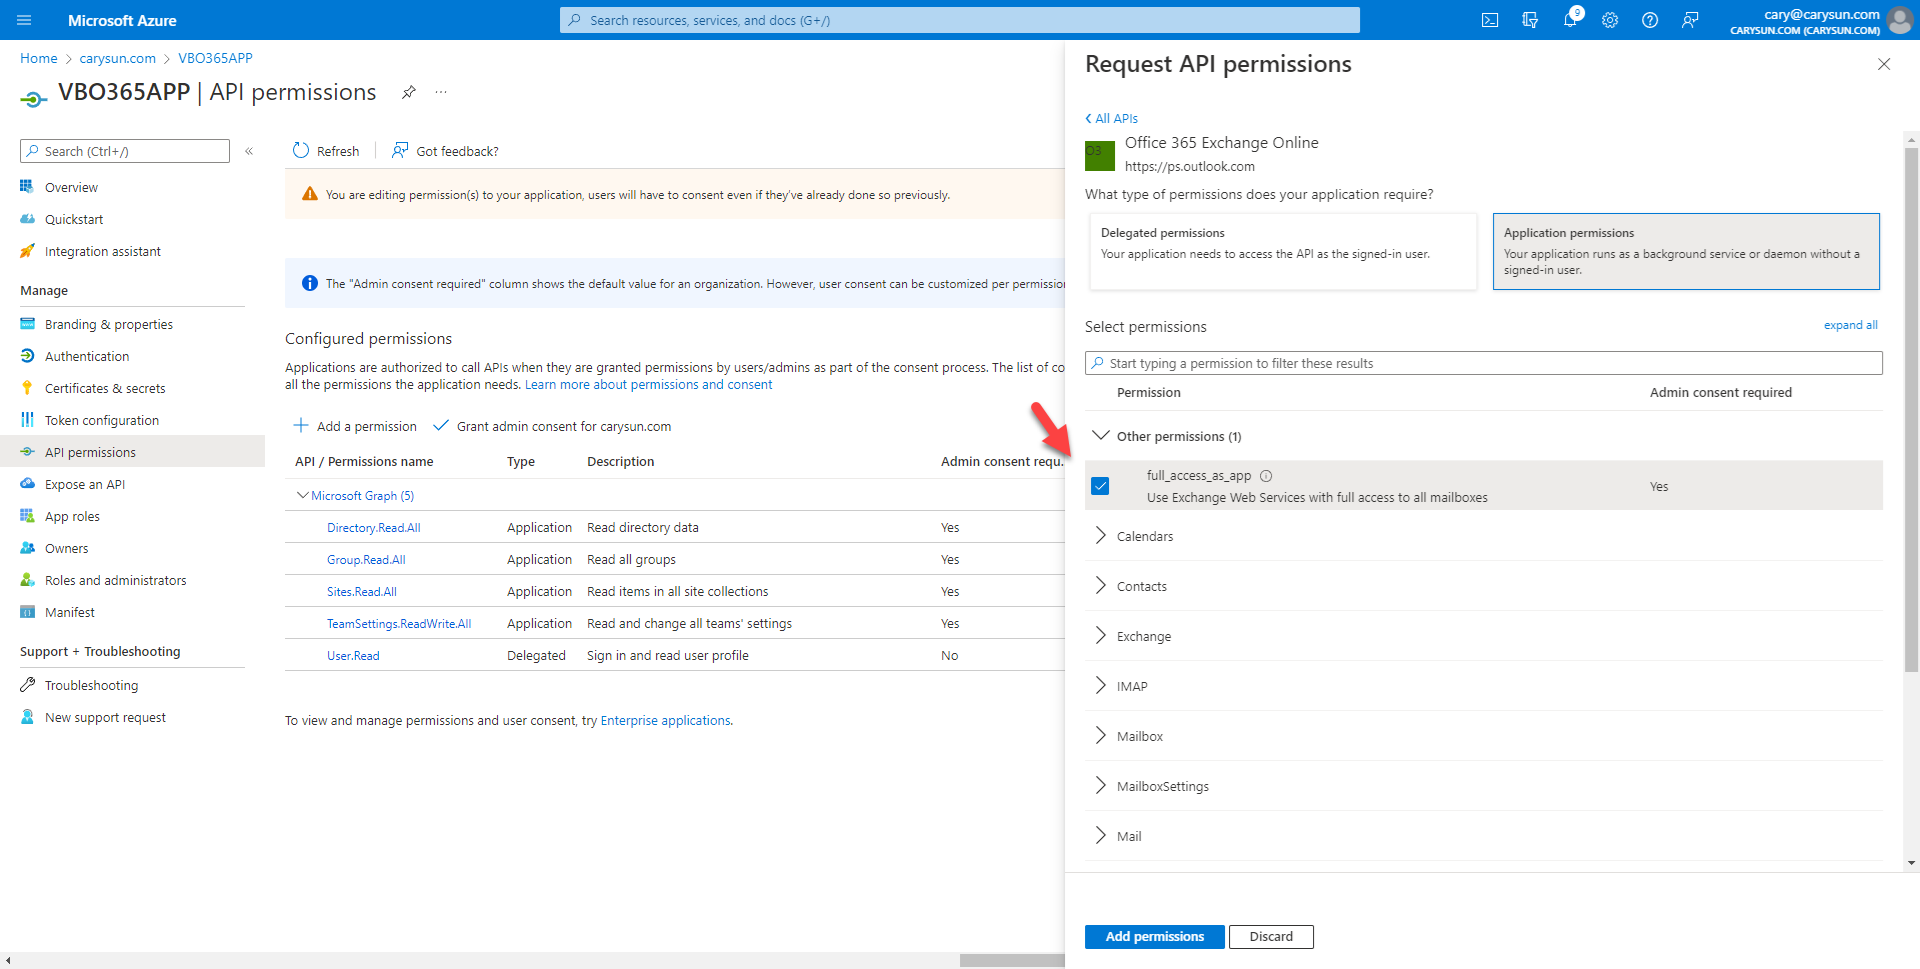
18.On the Select permission page, select full_access_as_app, click Add permissions.
19.On the Configured permissions page, select +Add permission.
20.On the Request API permissions page, select Microsoft APIs, click SharePoint

21.On the SharePoint page, select Application permissions.

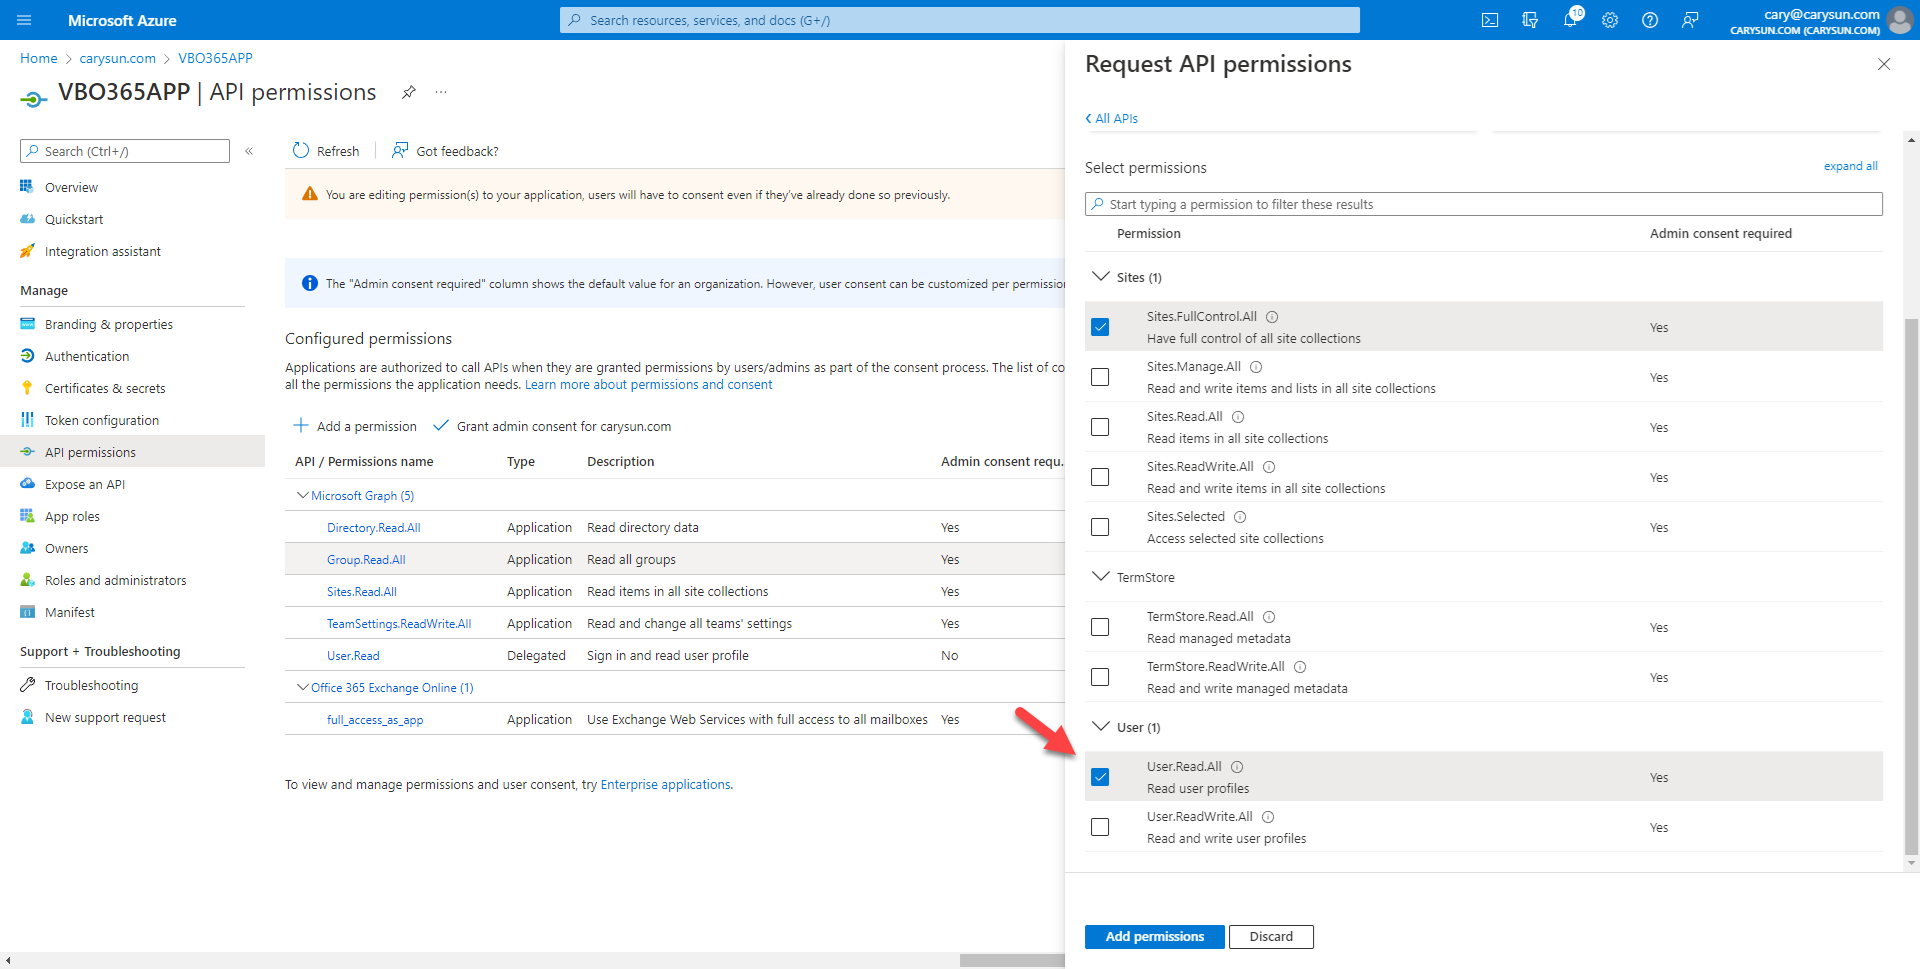
22.On the Select permission page, expand Sites, select Sites.FullControl.All.

23.On the Select permission page, expand Users, select User.Read.All, click Add permissions.
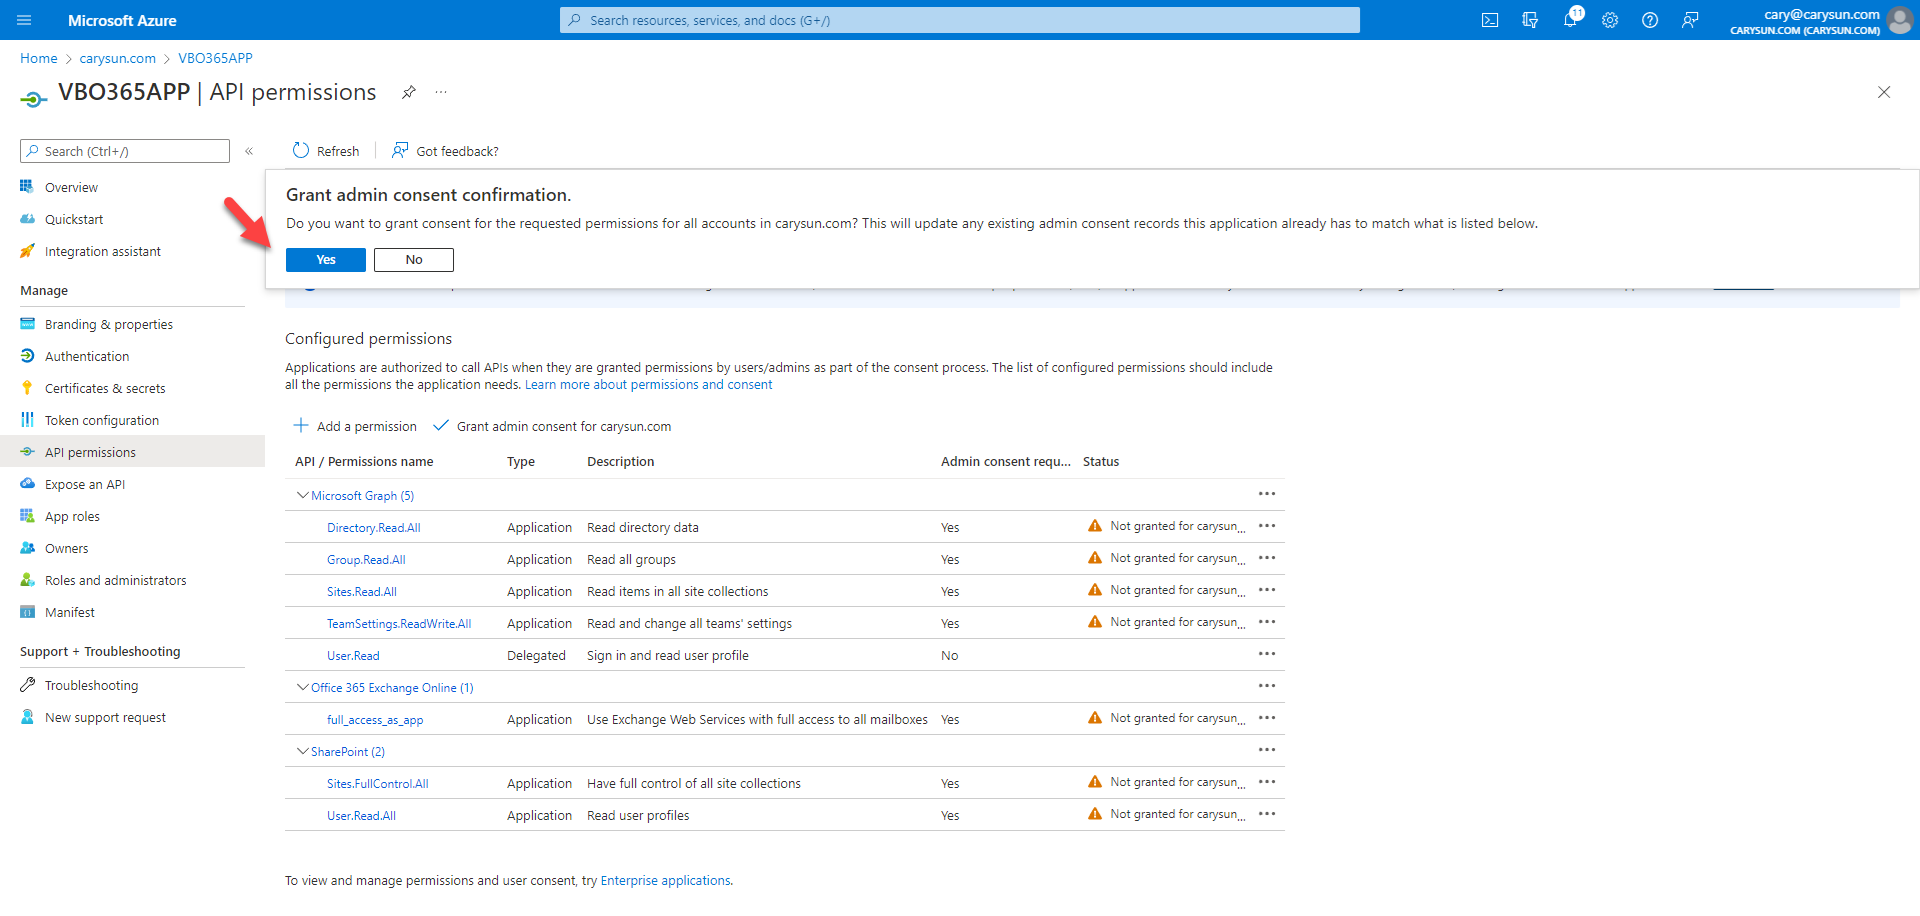
24.On the Configured permissions page, click Grant admin consent for domain name (in my case is carysun.com).

25.On the Grant admin consent confirmation page, click Yes.
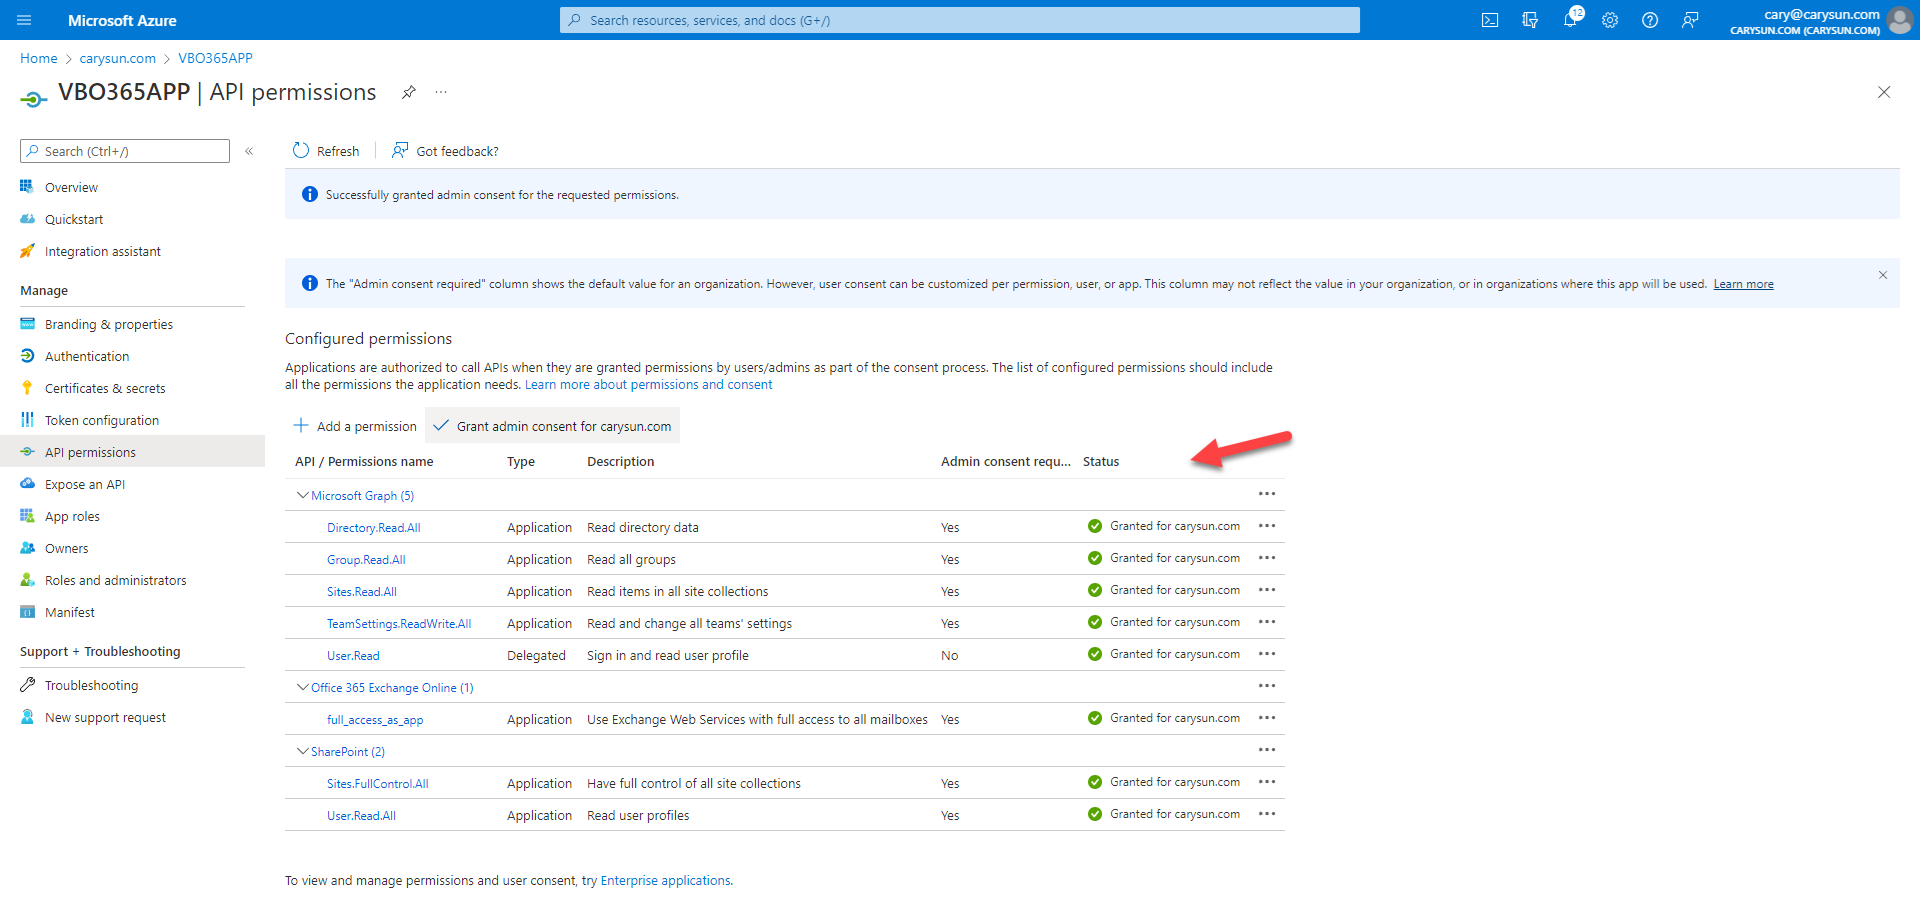
26.Verify status of all API without warning.
Create Application secrets (Optional)
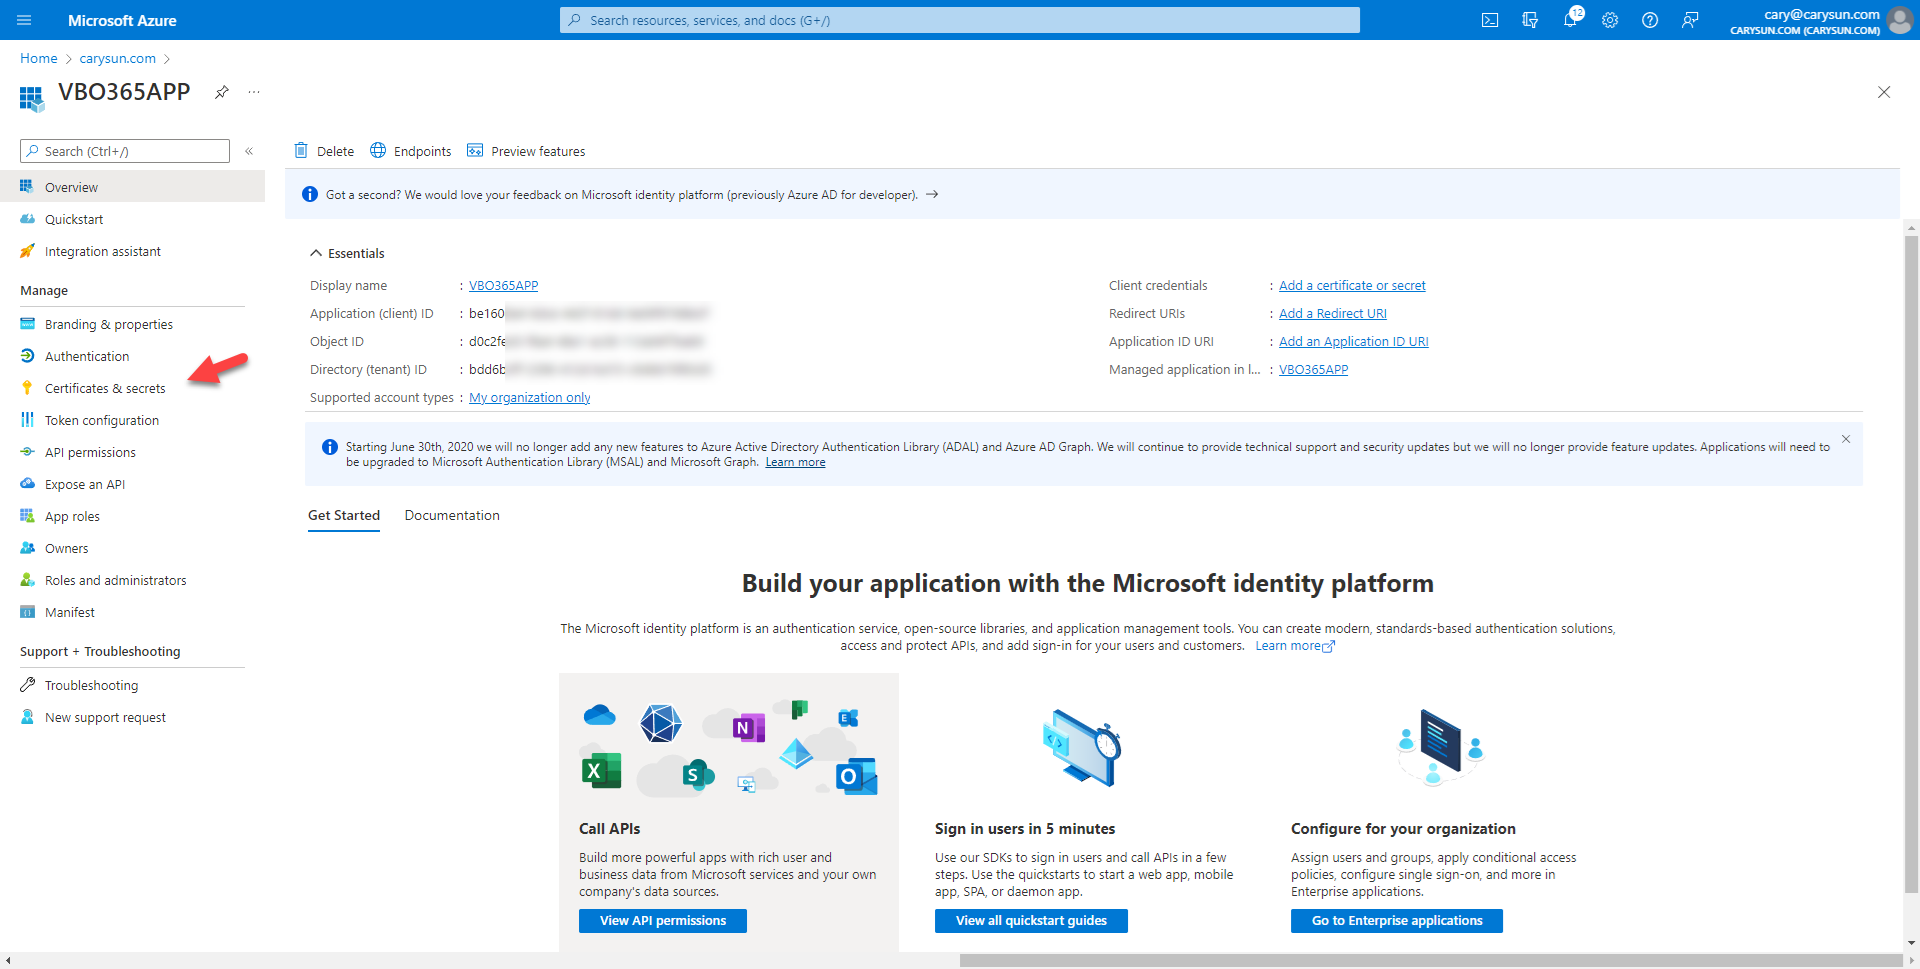
If you would like to use Application secret on Exchange Online credentials settings of VBO365, you need to create Application secret from Certificate & secrets settings.
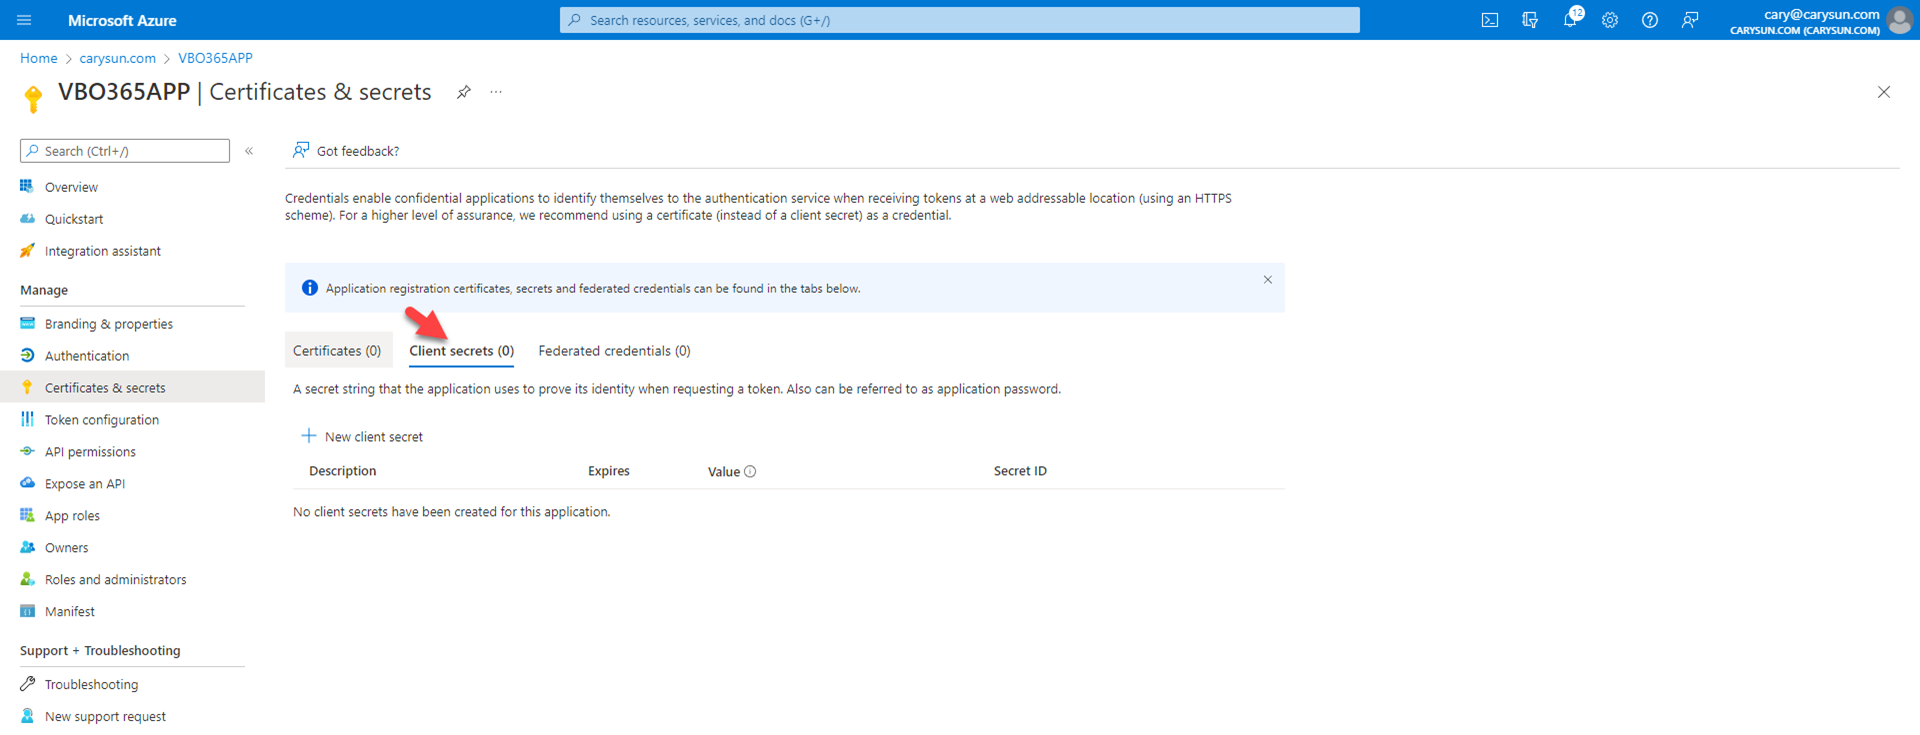
1.On the Application page, select Certificates & Security.
2.On the Certificates & secrets page, select Clients secrets.
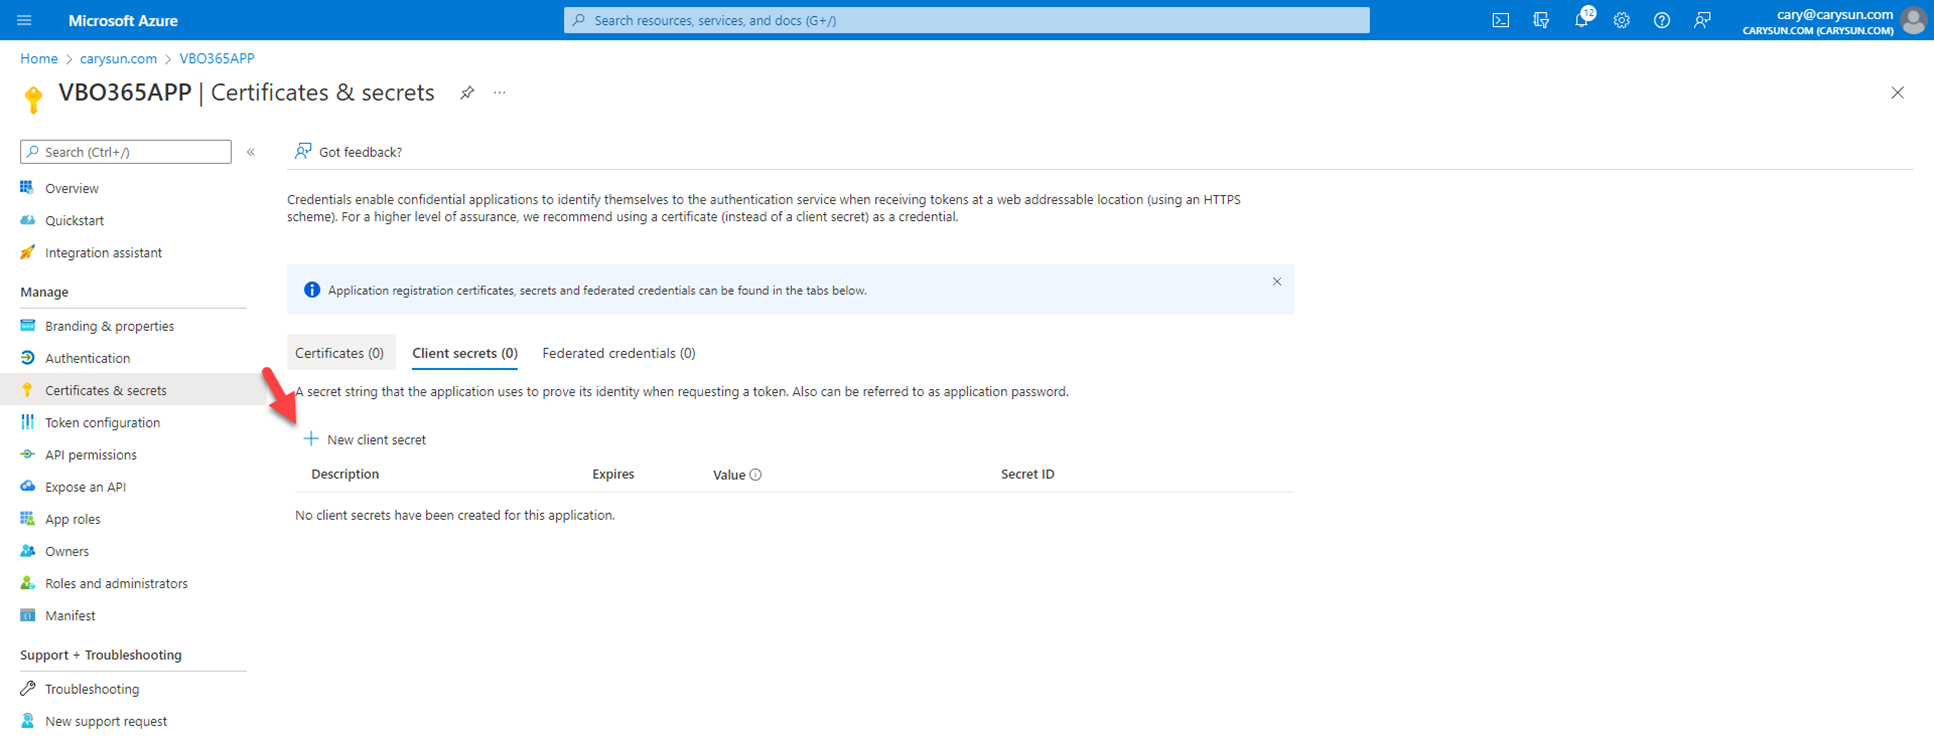
3.On the Client secrets page, select +New client secret.
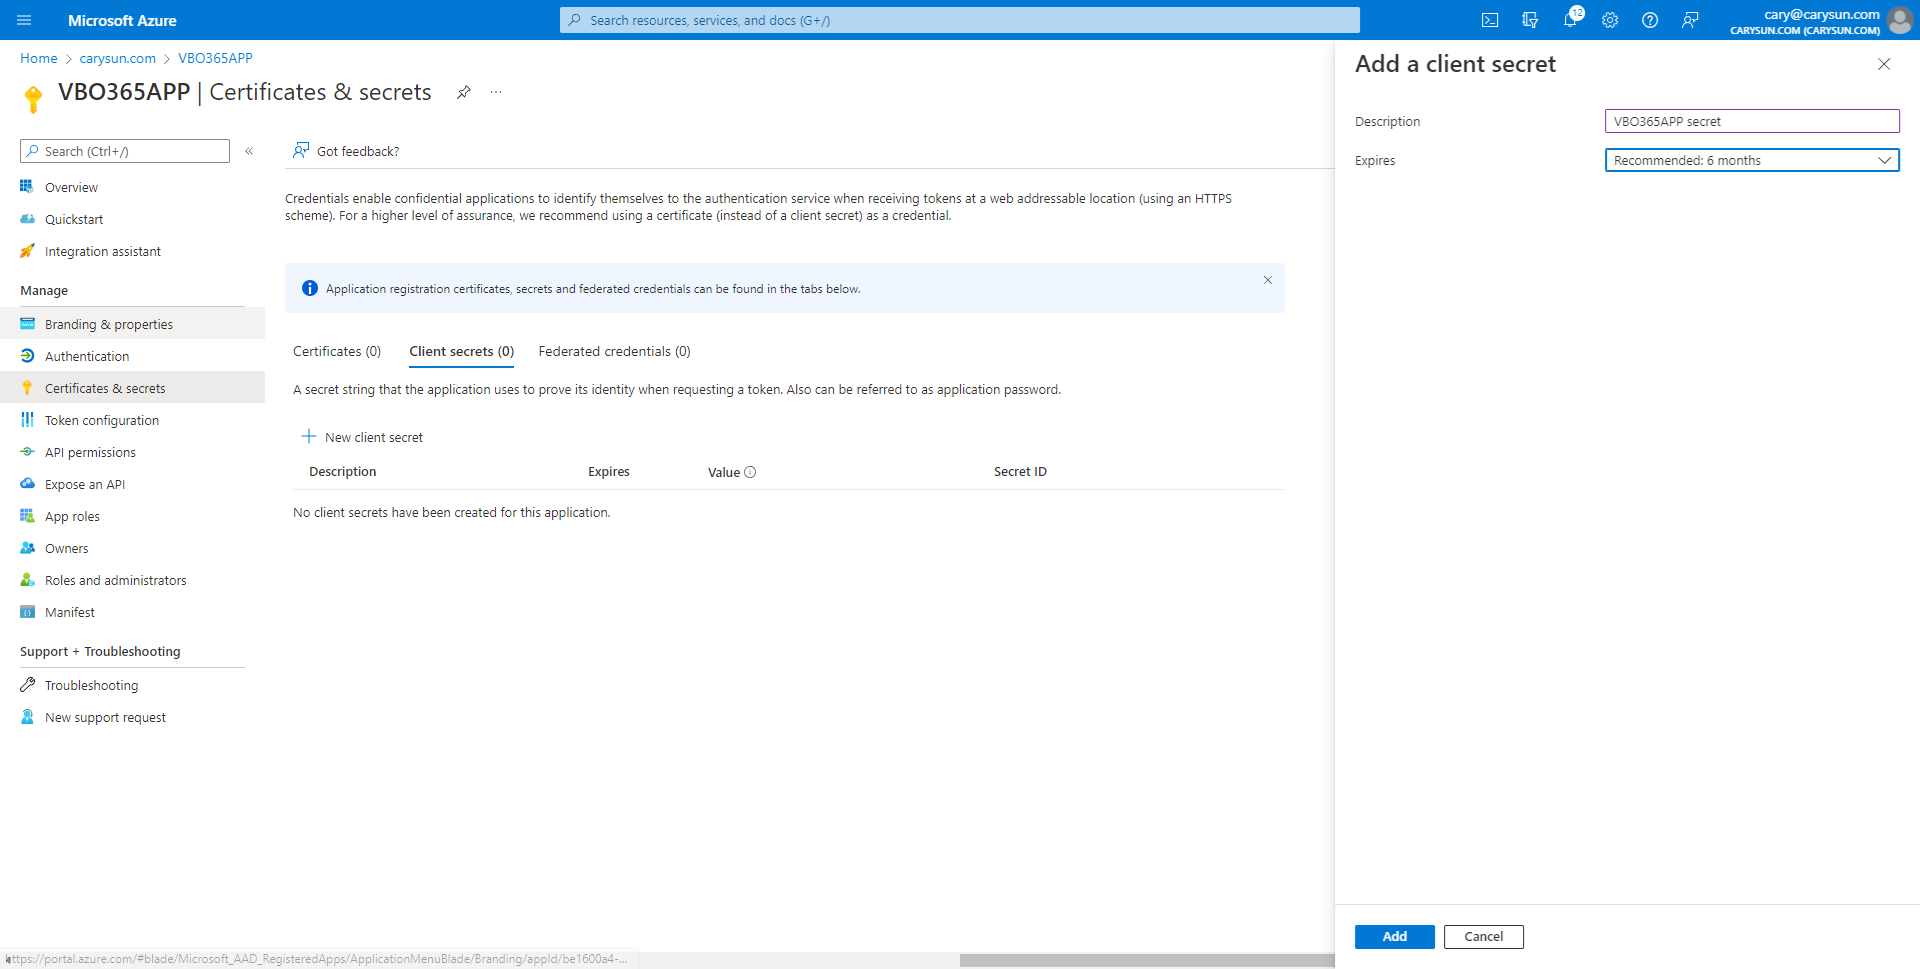
4.On the Add a client secret page, enter information for the secret description, select Expires period, click Add.
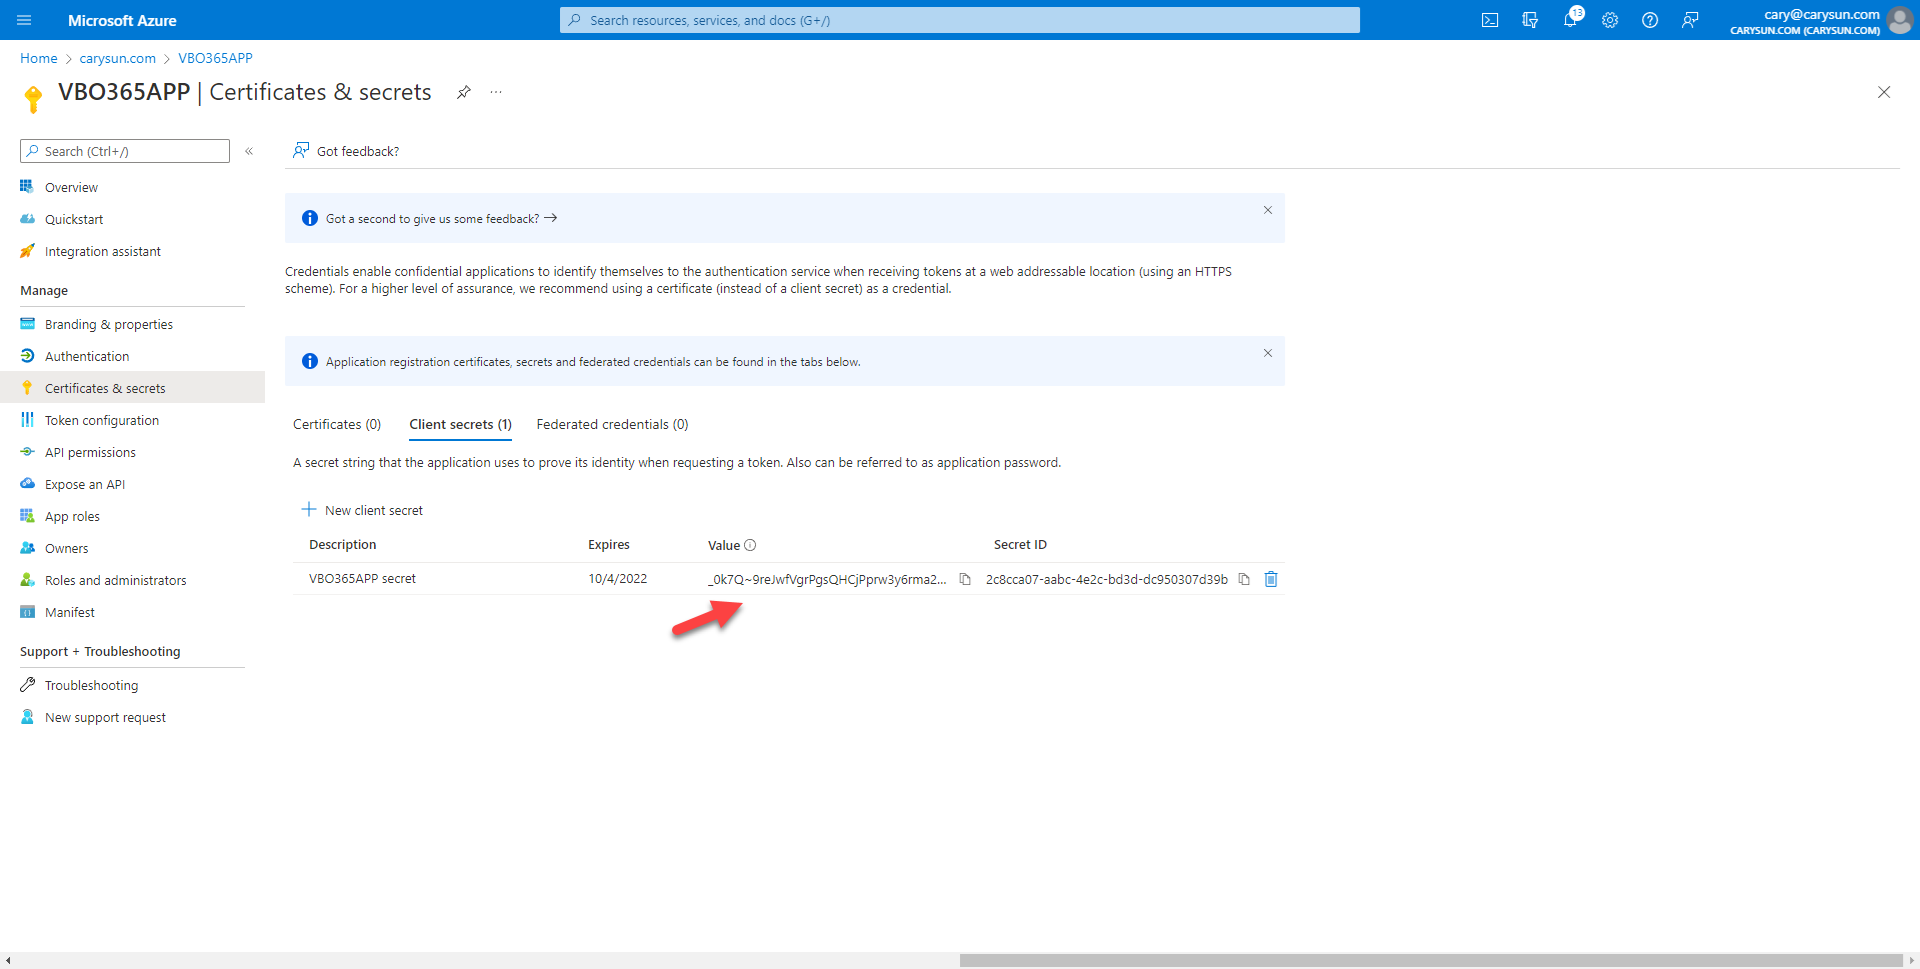
5.Copy the Value, it will be as the Application secret of VBO settings.
Hope you enjoy this post.
Cary Sun
Twitter: @SifuSun
Web Site: carysun.com
Blog Site: checkyourlogs.net
Blog Site: gooddealmart.com