
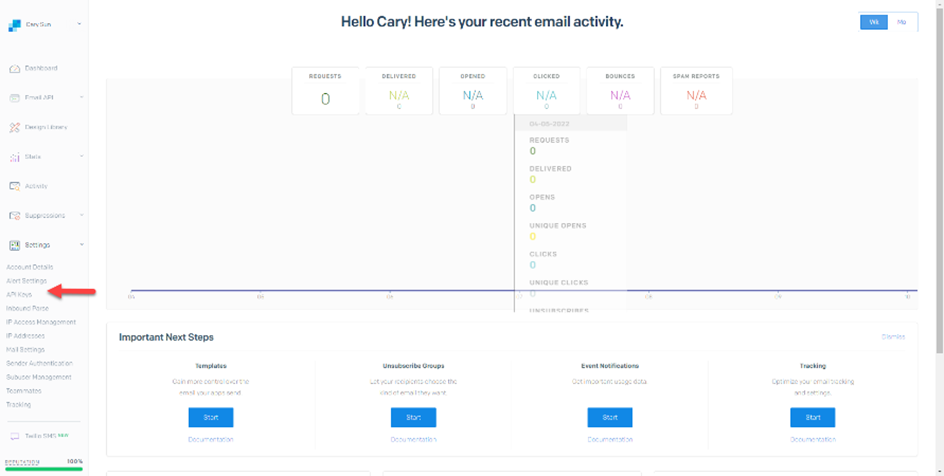
You can configure the SendGrid account as an SMTP relay for notification settings if you want Veeam Backup & Replication to send email notifications about backup job results.
1. Sign in Azure portal with a global admin account.
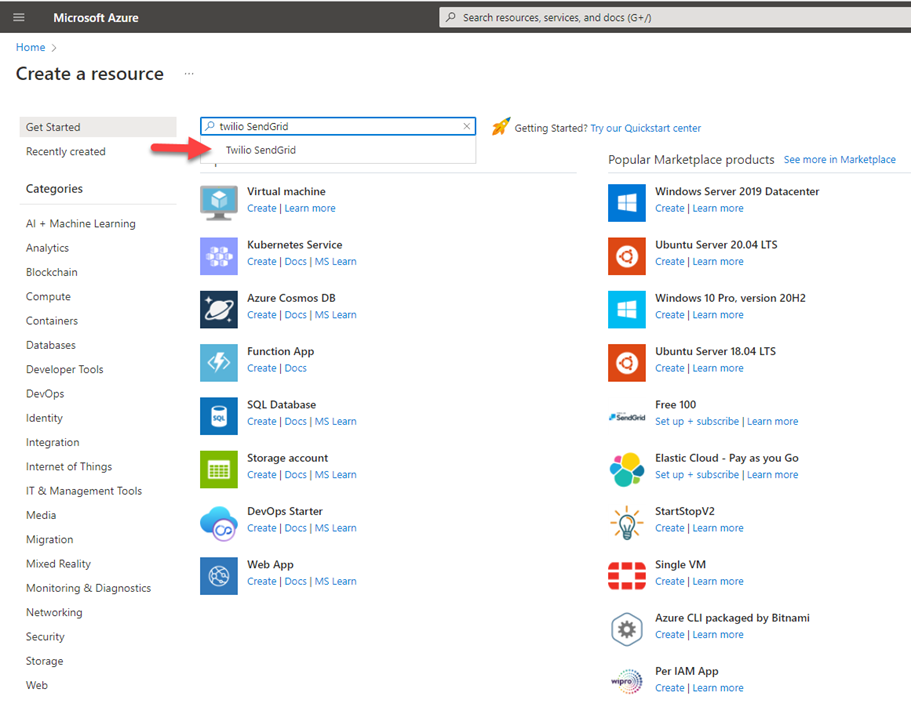
2. On the Azure services page, select +Create resource.

3. On the Create a resource page, search and select Twilio SendGrid.
4. On the Create Twilio SendGrid page, select subscribe Plan and click Subscribe.

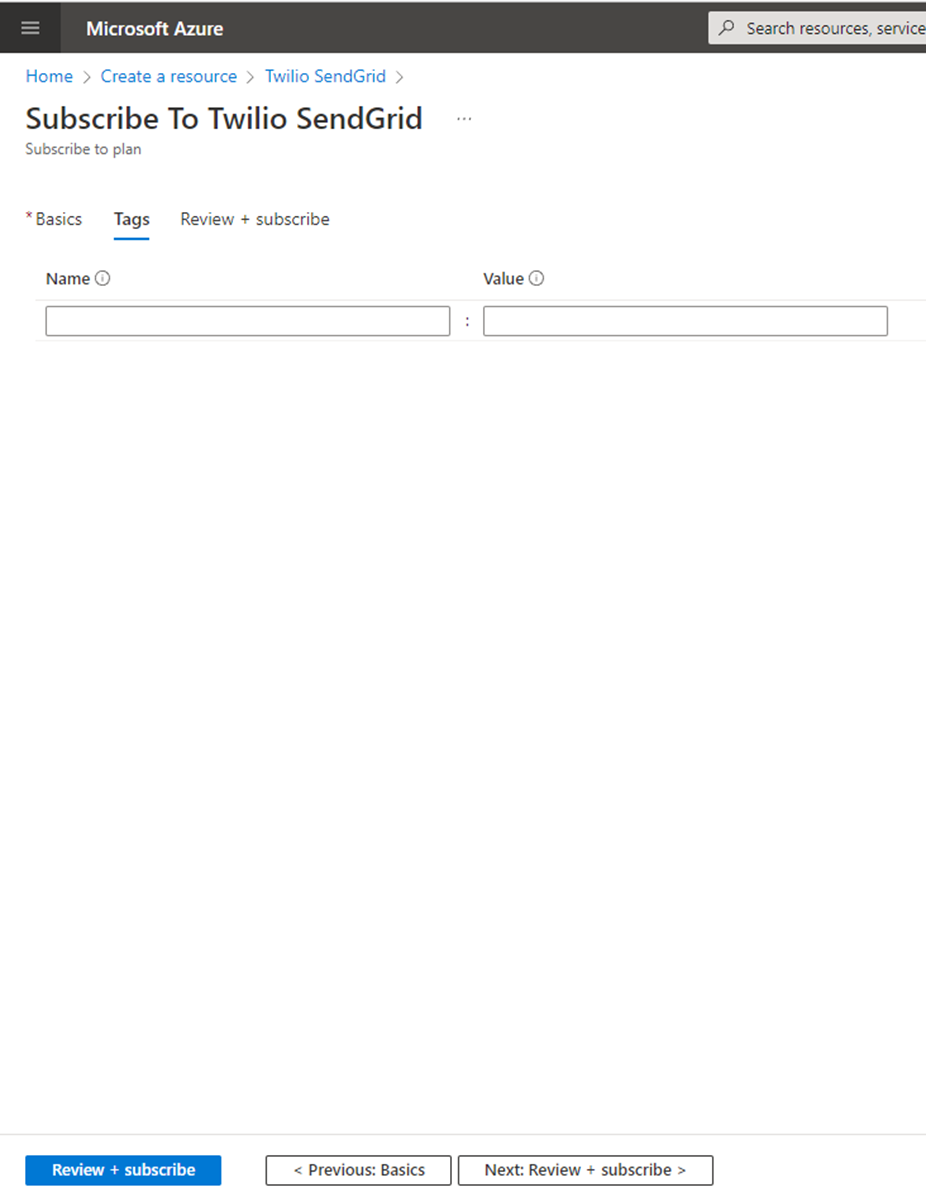
5. On the Create SendGrid Account page, select Basics, file in all the information and then click Next: Tags.

6. On the Tags page, click Next: Review + subscribe.
7. On the Review + subscribe page, select I give Microsoft permission to use and share my contact information so that Microsoft or the provider can contact me.

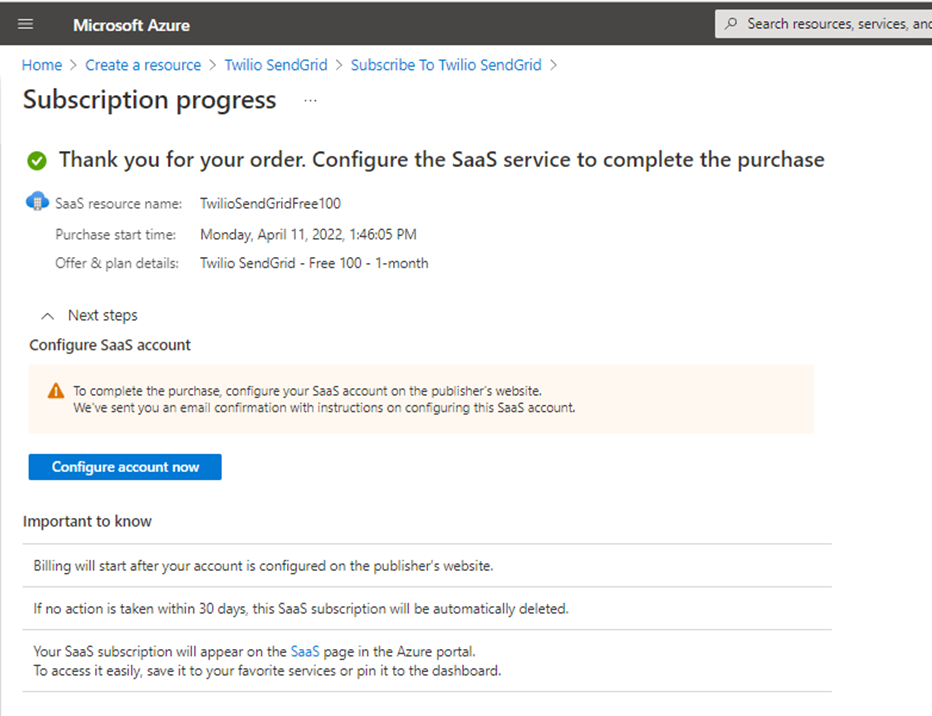
8. On the Configure SaaS account page, click Configure account now.
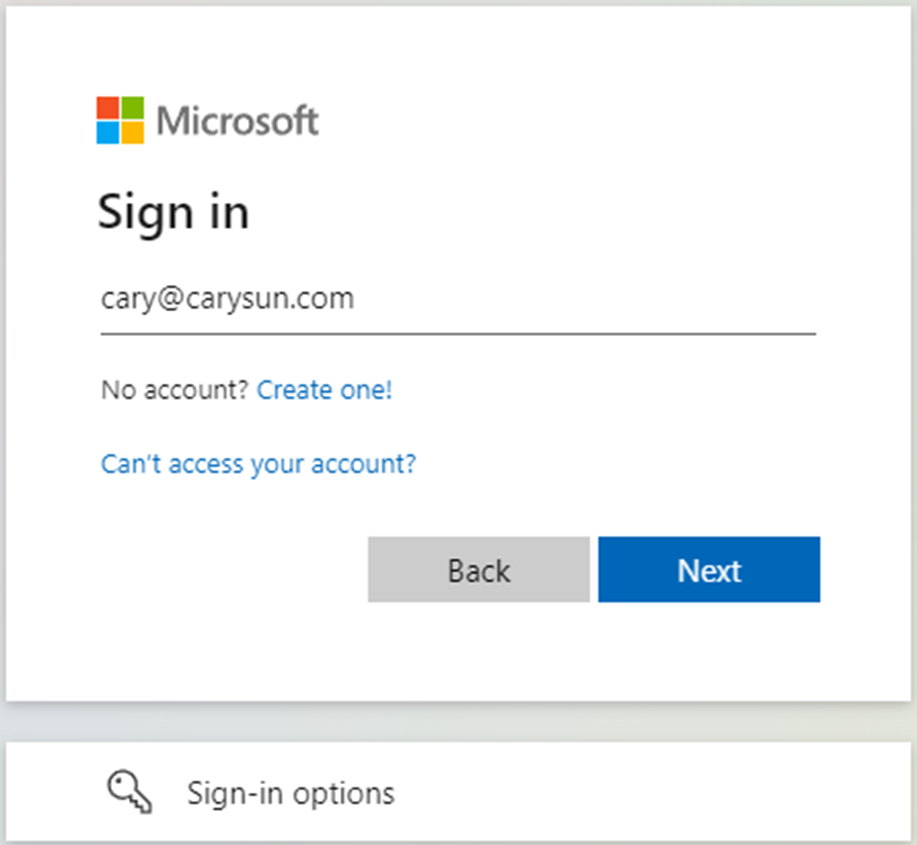
9. On the Microsoft Sign-in page, enter your account name and click Next.
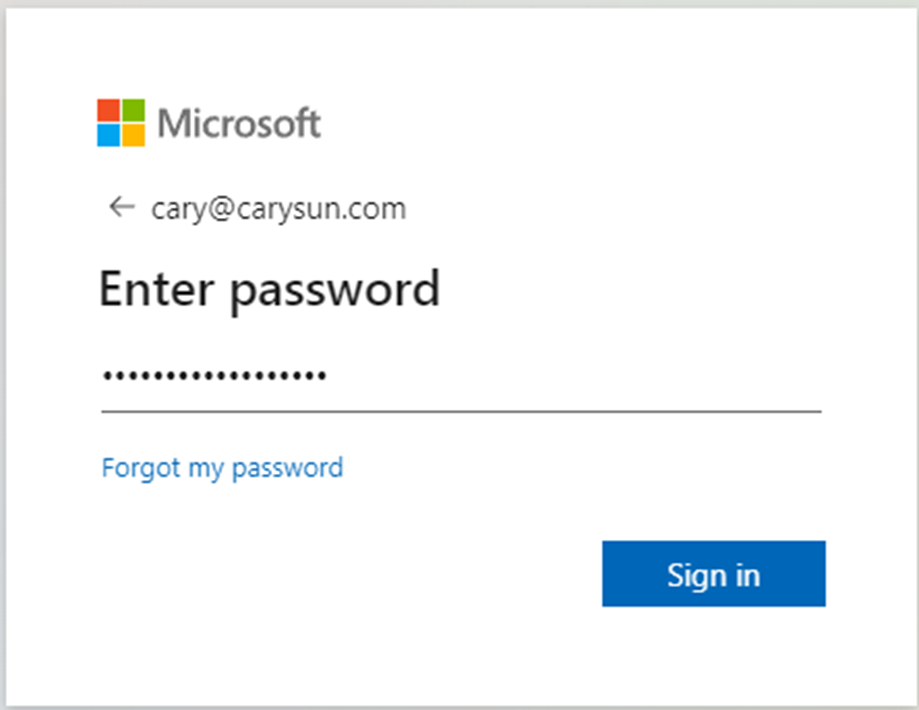
10. Enter a password, and click Sign in.
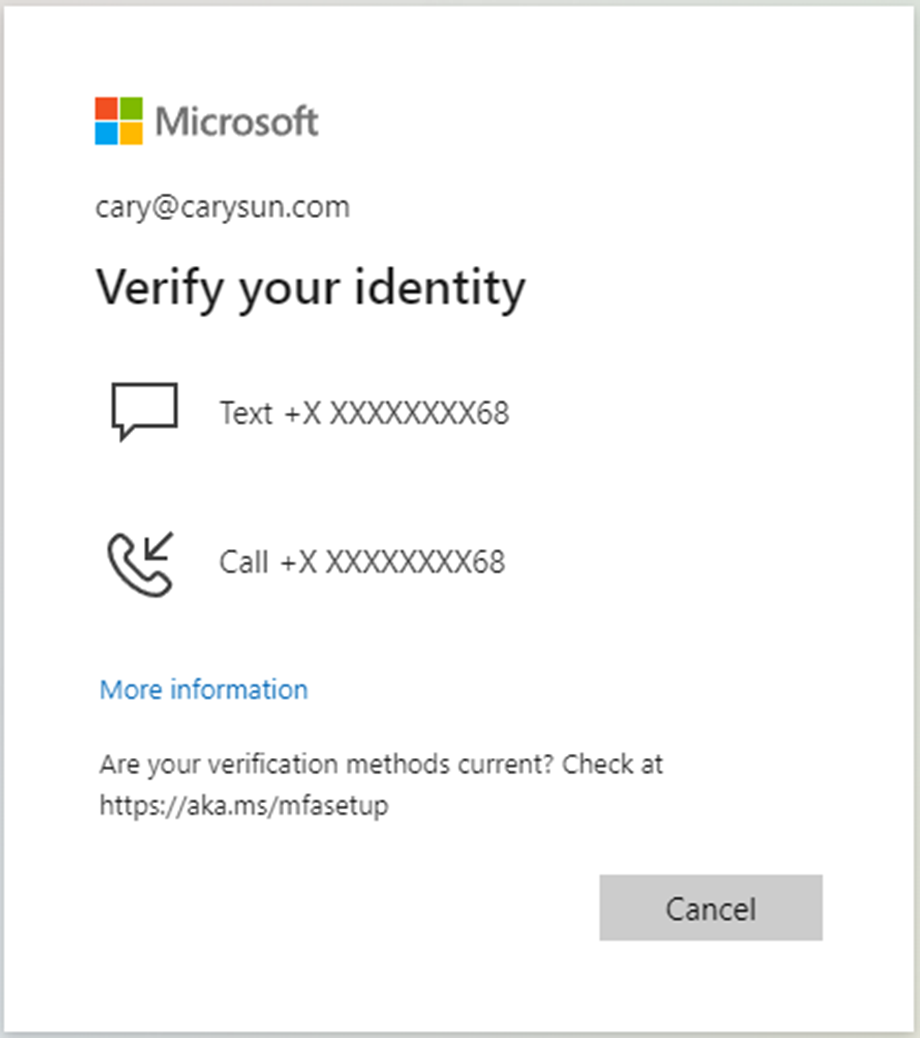
11. On the Verify your identity page, select the identity method.
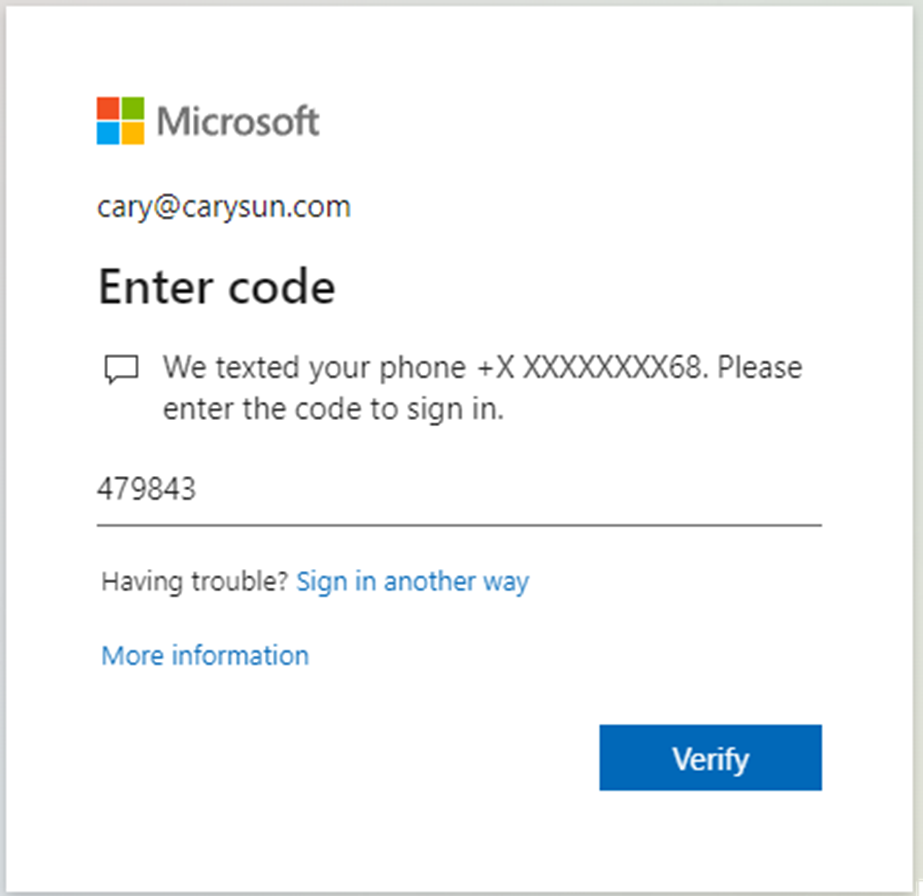
12. Enter the code and click Verify.
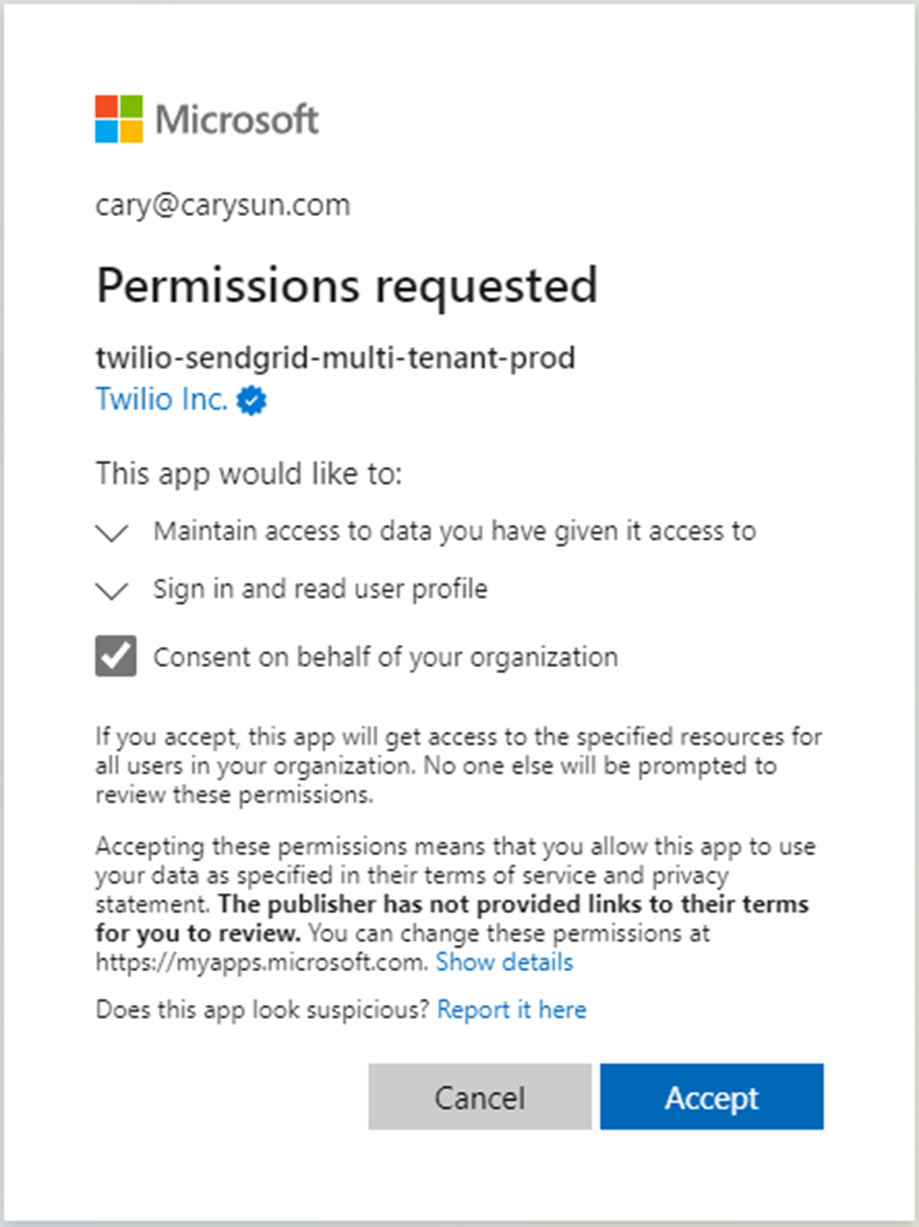
13. On the Permissions requested page, select Consent on behalf of your organization and click Accept.
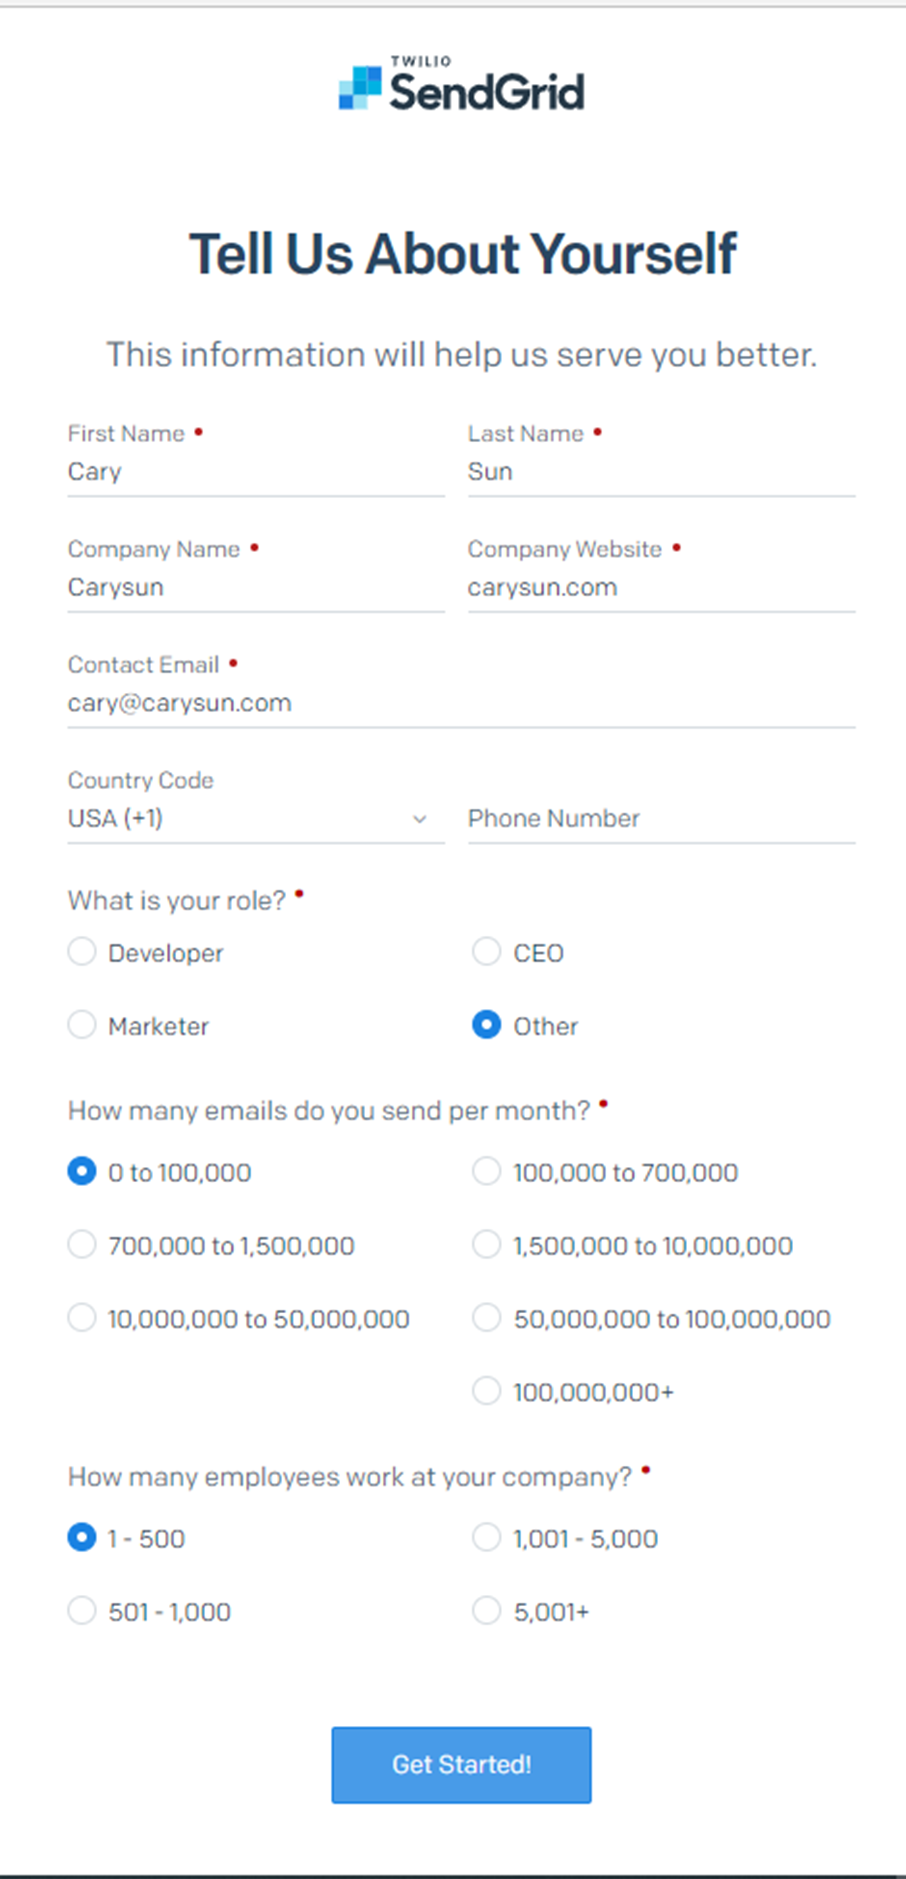
14. Fill in the information and click Get Started!
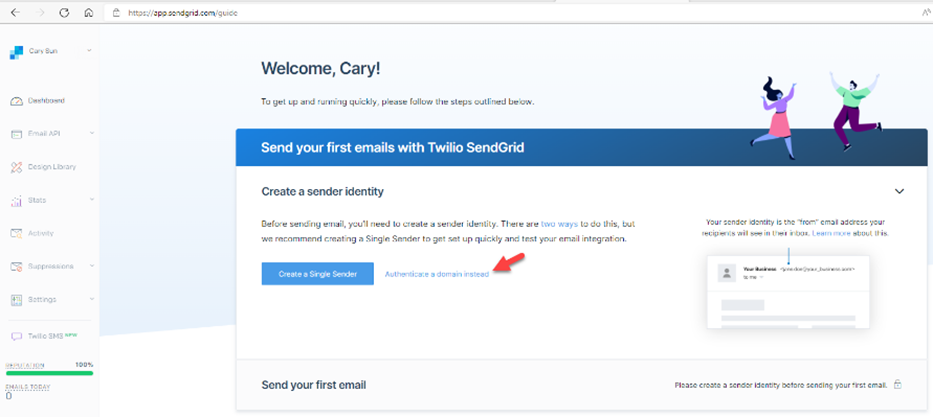
15. On the SendGrid Welcome page, select Authentication a domain instead.
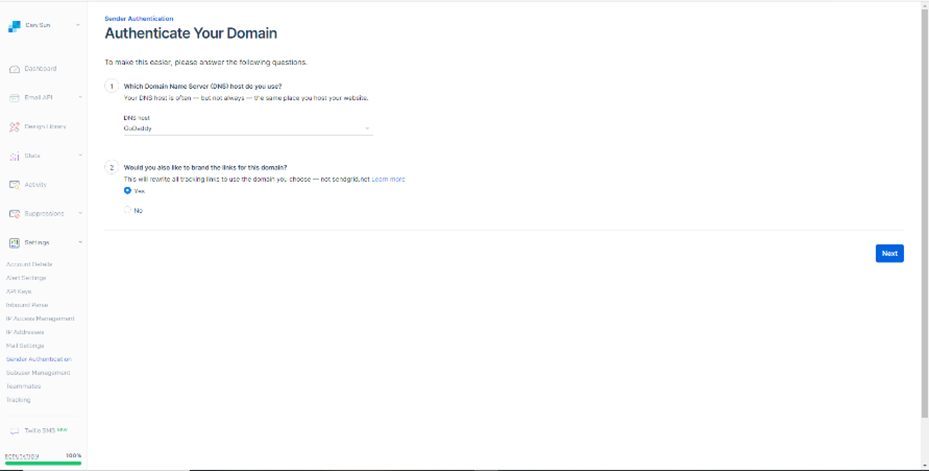
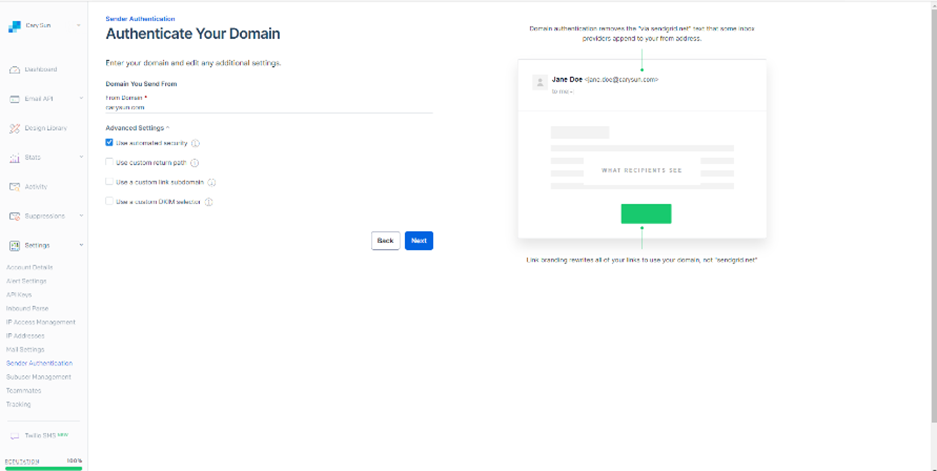
16. On the Authenticate Your Domain page, select your DNS host, select Yes to rewrite all tracking links to use your chosen domain –not sendgrid.net, and click Next.
17. Enter your domain name on the Domain You Send From page and click Next.
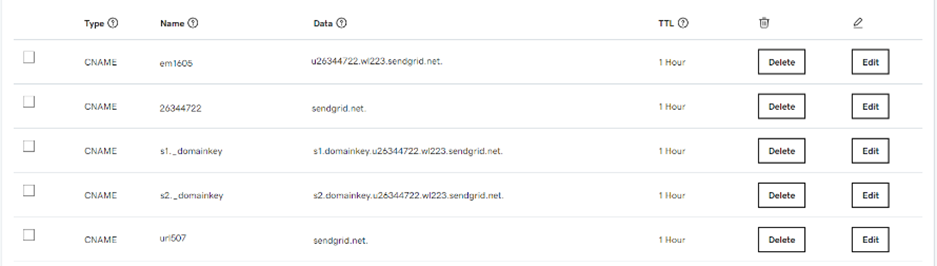
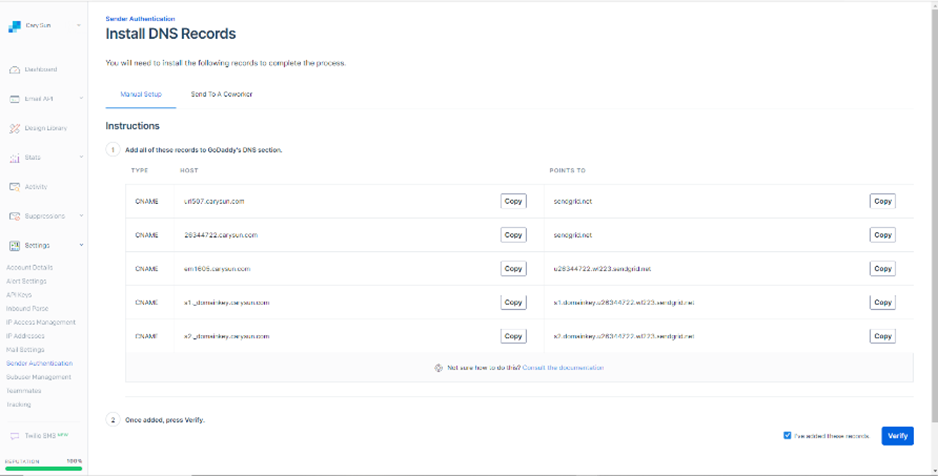
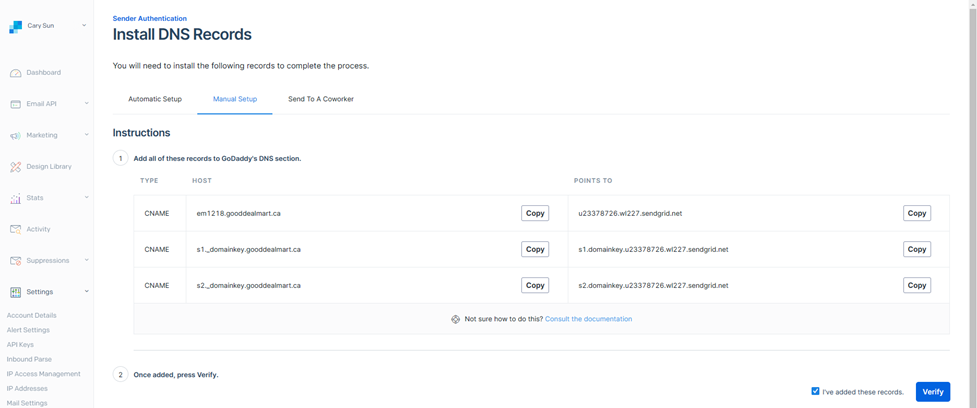
18. On the Install DNS Records page, copy and add all these records to your External DNS records.
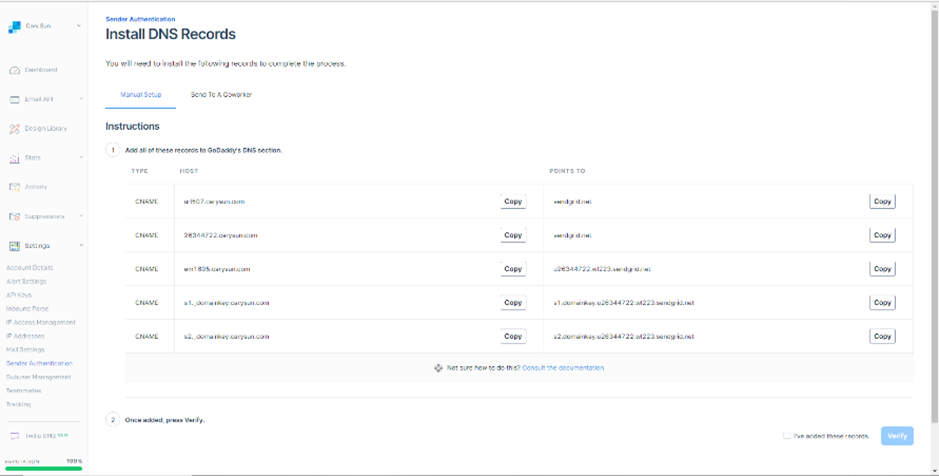
19. In my case, add them to GoDaddy.
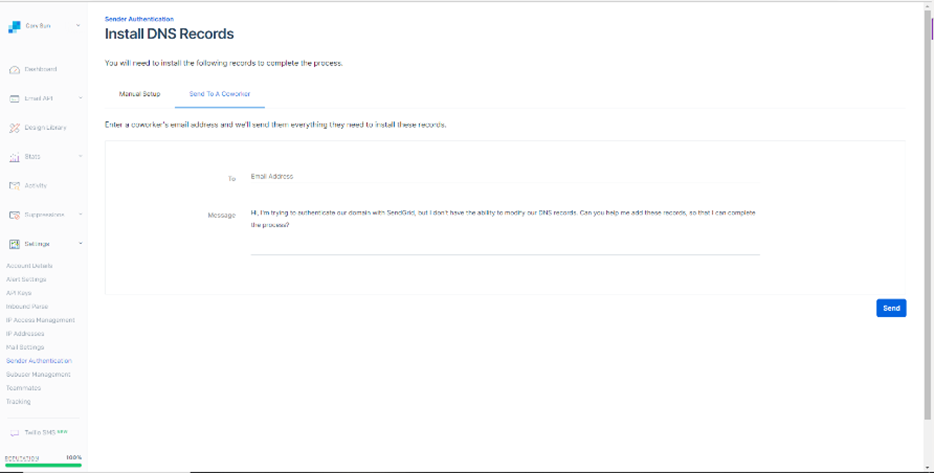
20. If you cannot add DNS records, select Send To A Coworker.
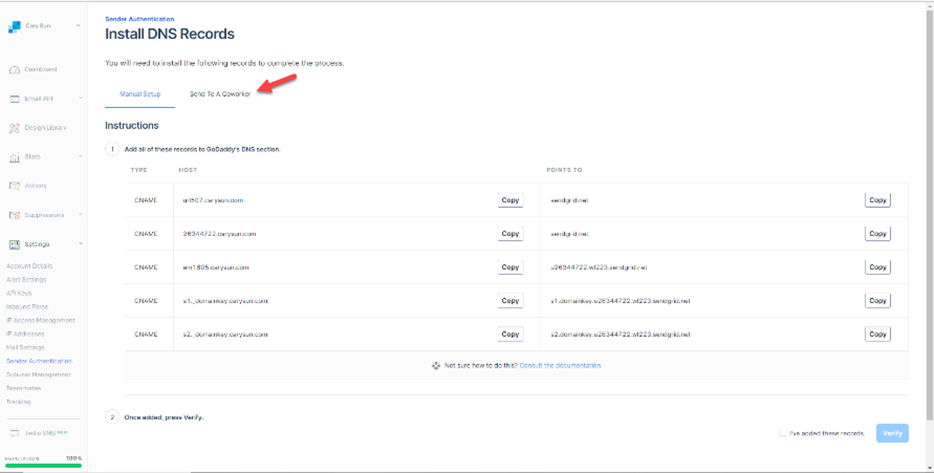
21. Type your coworker’s email address and click Send. Ask your coworker to add these DNS records.
22. On the Install DNS Records page, select I’ve added these records, click Verify.
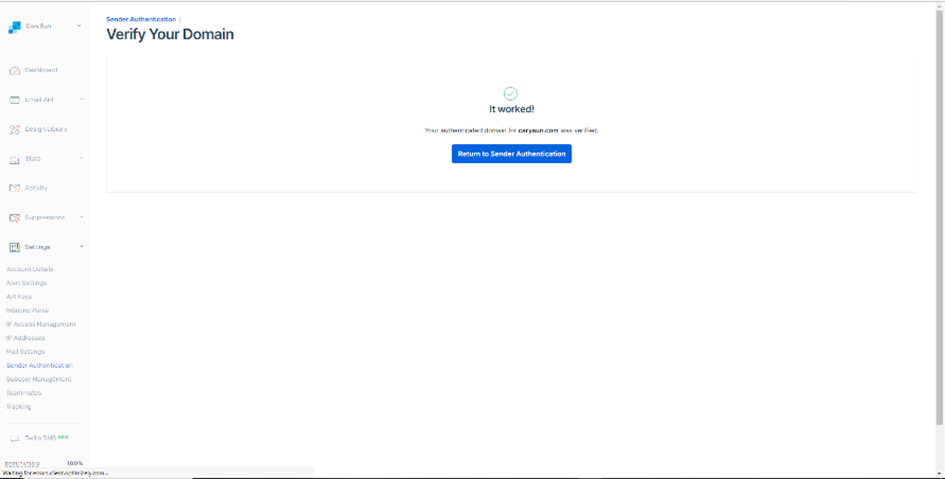
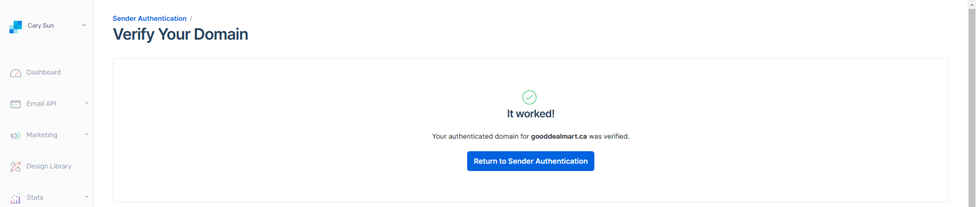
23. On the Verify Your Domain page, make sure your authenticated domain for the domain name was verified without issues and click Return to Sender Authentication.
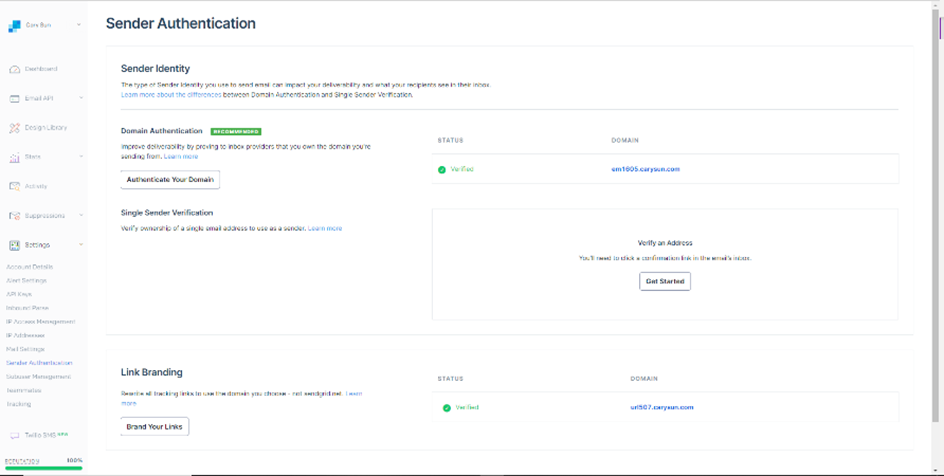
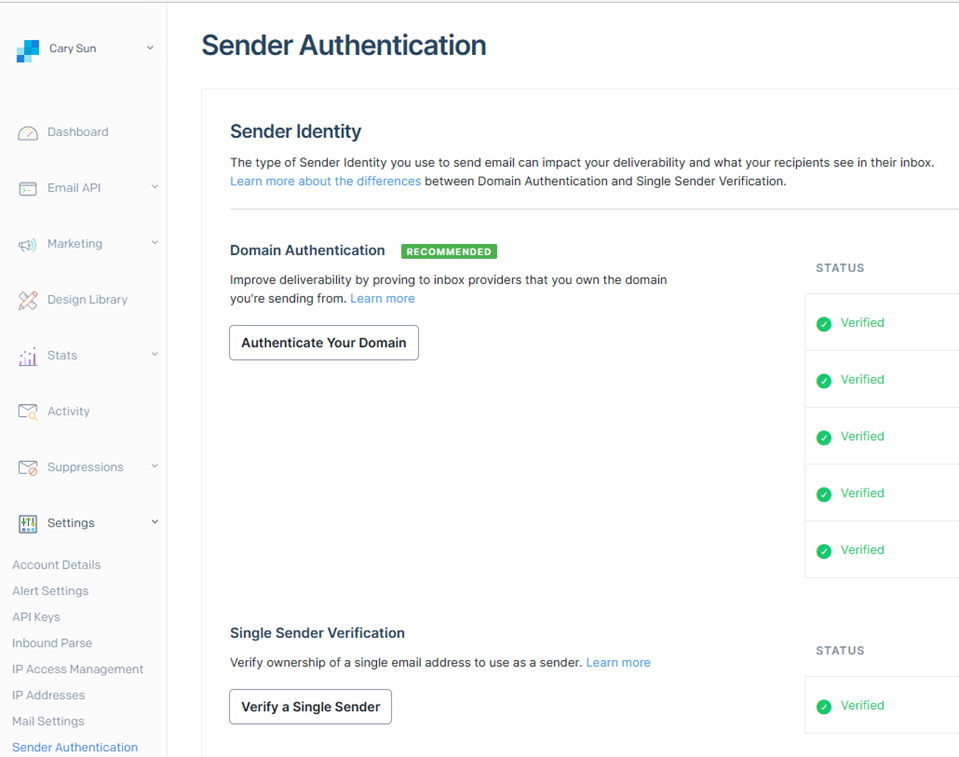
24. On the Sender Authentication page, ensure Domain Authentication and link Branding status is Verified.
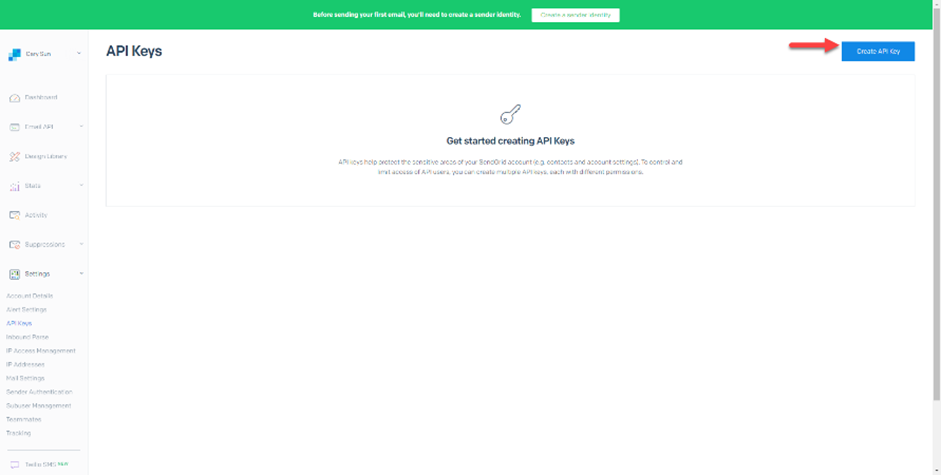
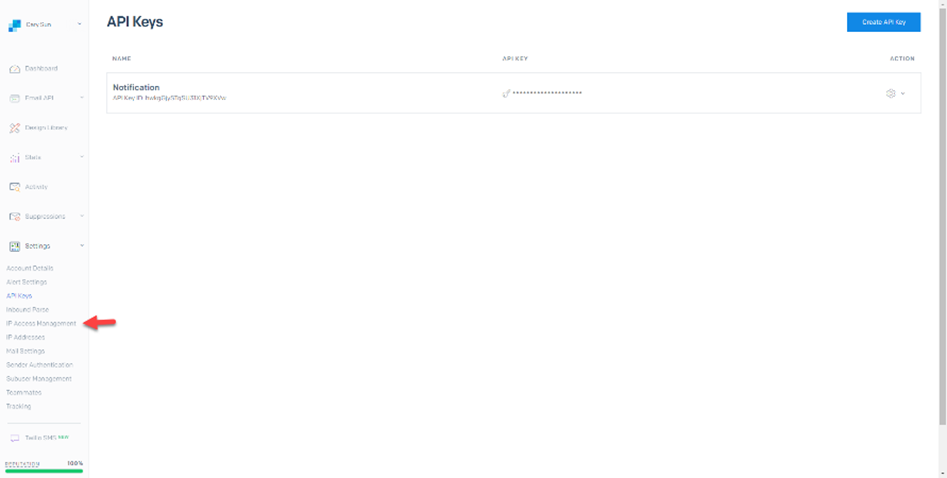
25. Under the Settings page, select API Keys.
26. On the API Keys page, select Create API Key.
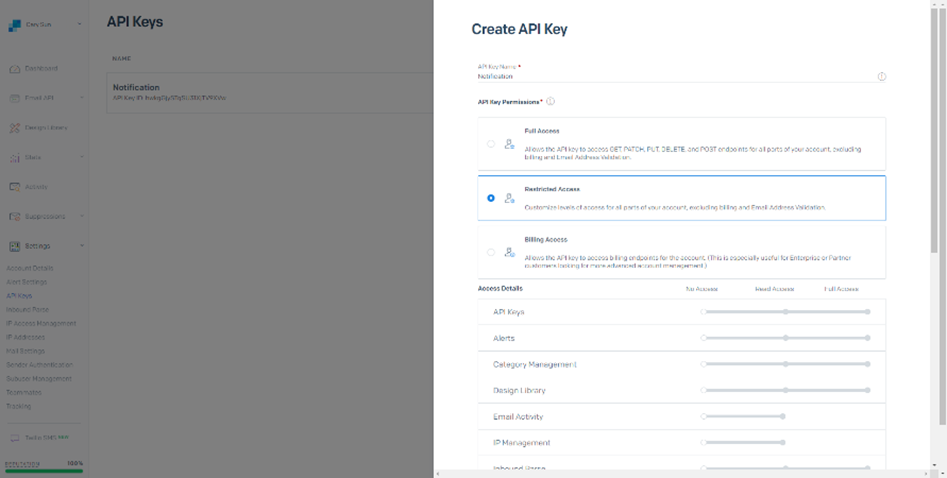
27. On the Create API Key page, type the API Key Name and select Restricted Access as API Key Permissions.
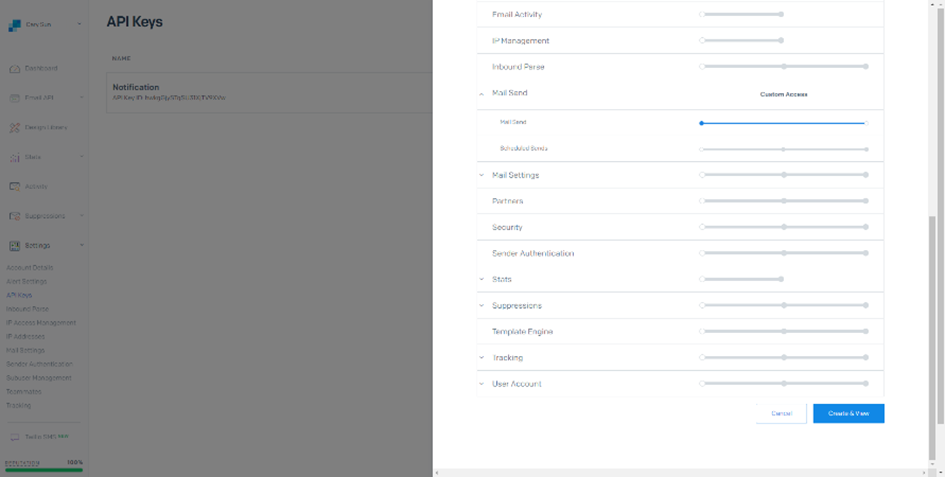
28. Enable Mail Activity as Access Details, click Create & View.
29. Copy the key on the API Key Created page, save it, and click Done.

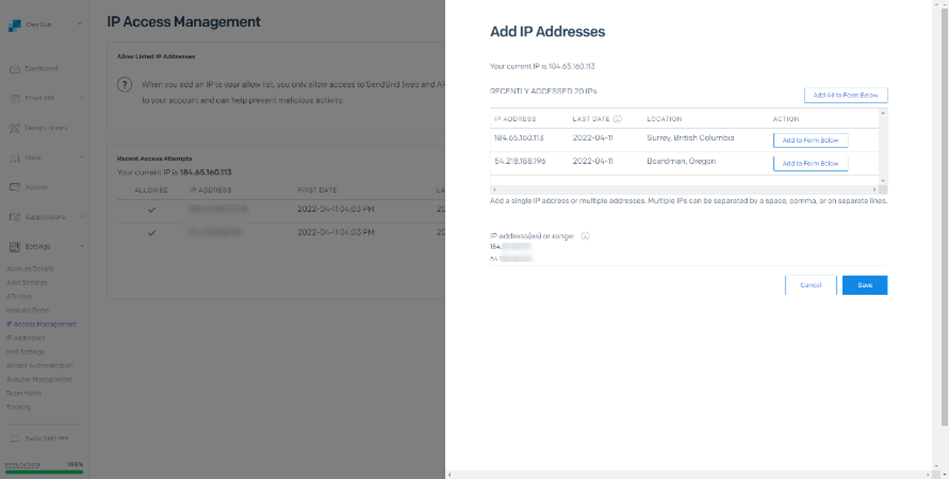
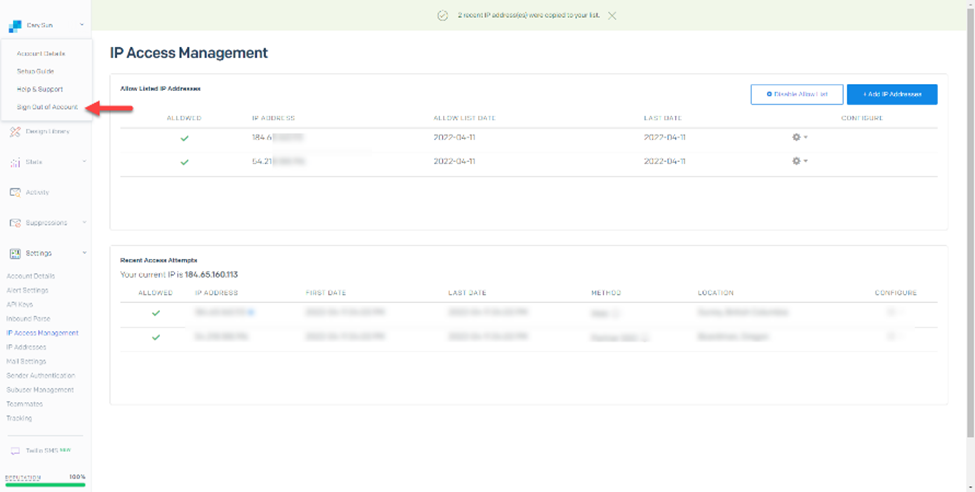
30. Under settings, select IP Access Management.
31. On the IP Access Management page, click +Add UP Address.

32. On the Caution page, select I confirm that the IP addresses I’m allow listing are dedicated and will not change without my knowledge.
33. Select I understand that I will only be able to access this account (including the API, mail sends, and user interface) from the IP address(es) I’m adding.
34. Click Confirm and Continue.

35. On the Add IP Addresses page, add IP addresses or ranges you would like to allow access to SendGrid. Make sure to include the public IP address of the Veeam management server and click Save.
36. On the Home page, expand Settings and click Sender Authentication.
37. On the Sender Authentication page, click Authenticate Your Domain.
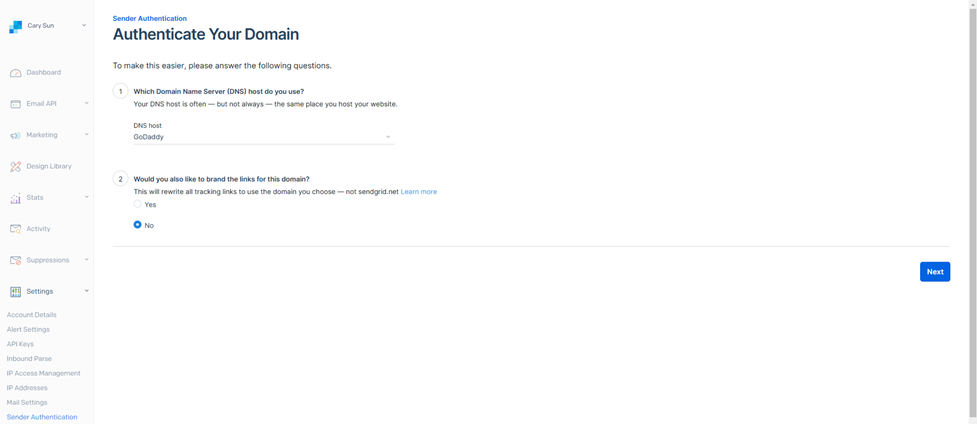
38. Specify your DNS host from the drop-down list on the Authentication Your Domain page.
39. Select No Would you also like to brand the links for this domain?
40. Click Next.
41. On the Domain You send From page, specify your FQDN name, and click Next.

42. Add those CNAME records to your domain on the Install DNS Records page, select I’ve added these records, and click Verify.
43. On the Verify Your Domain page, ensure verification is successful and click Return to Send Authentication.
44. Sign Out of Account.
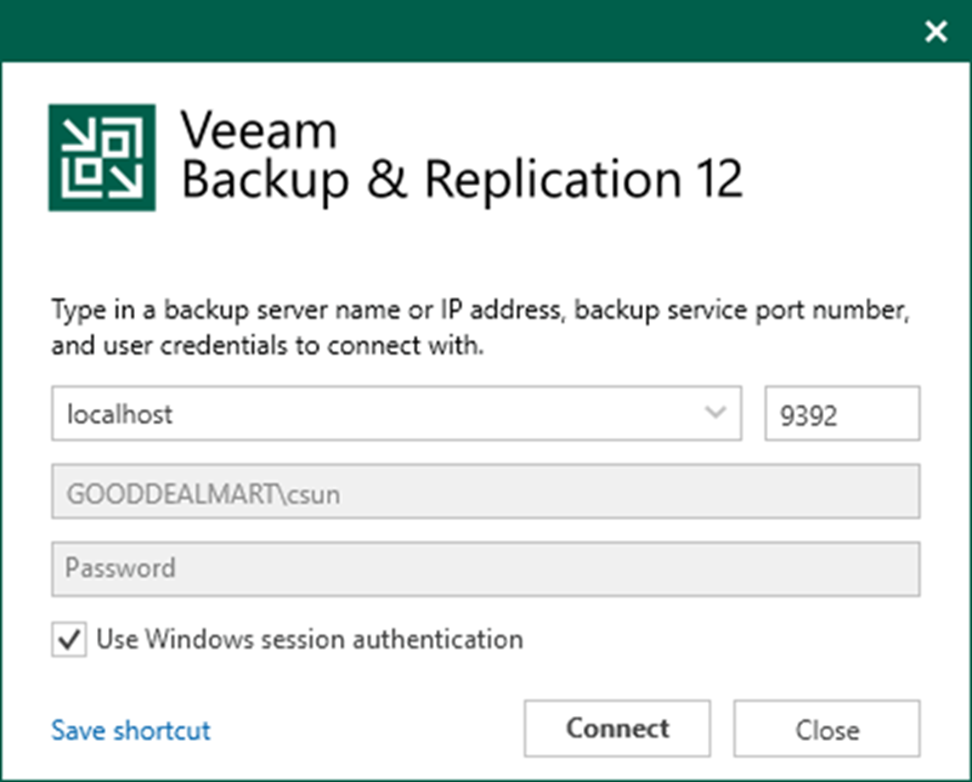
45. Login to the Veeam Backup and replication manager server.
46. Open the Veeam Backup & Replication Console and click Connect.
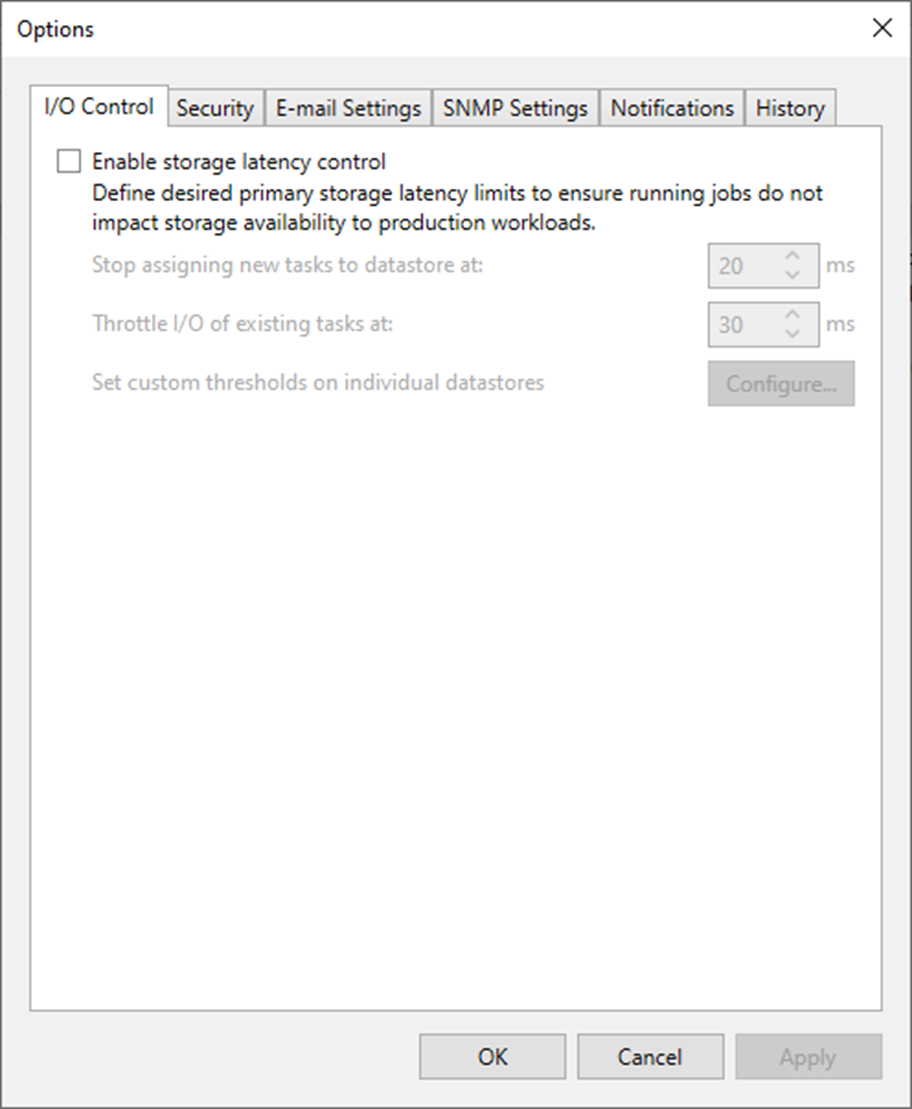
47. Select General Options from the main menu.

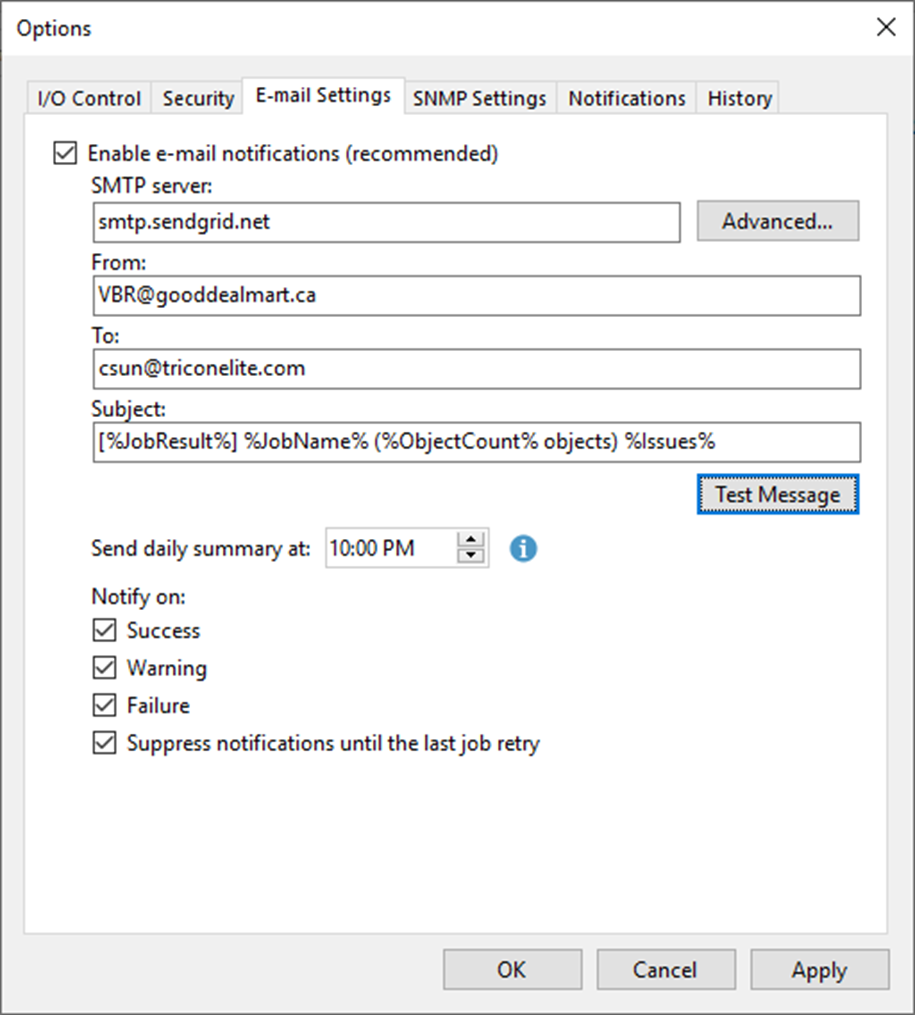
48. On the Options page, select Email Settings.
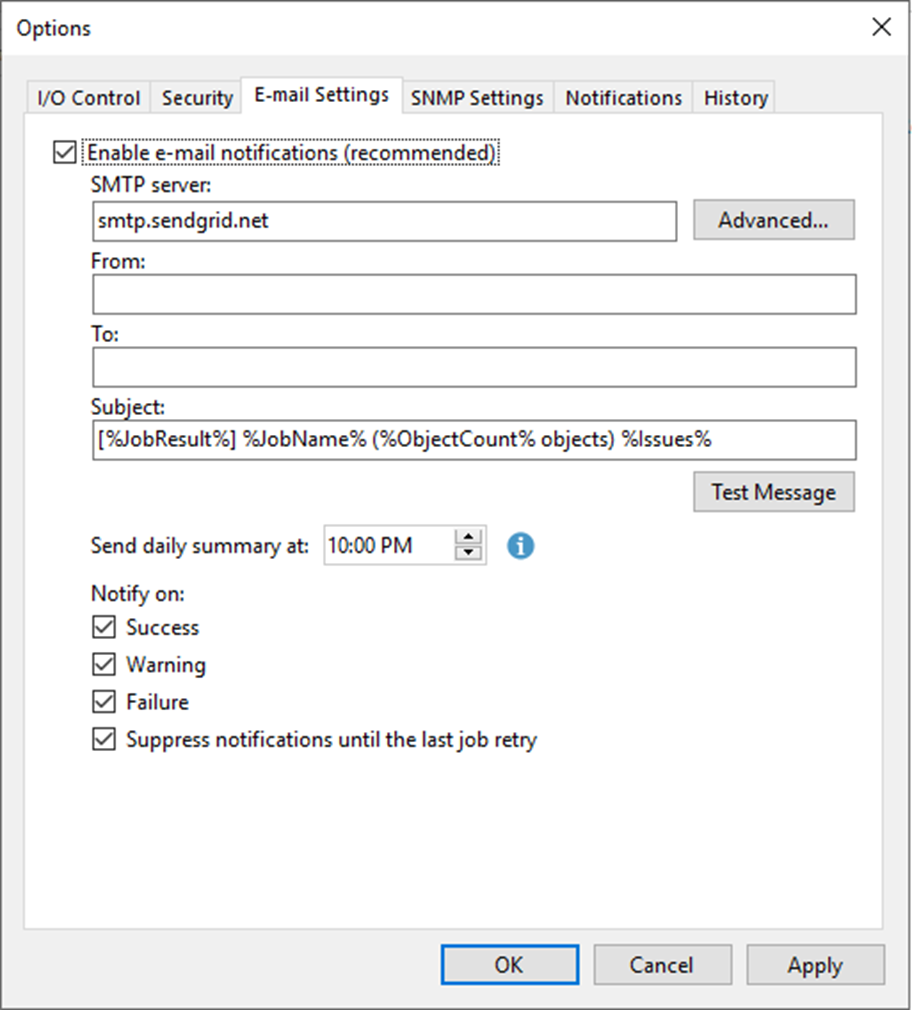
49. Select Enable e-mail notification (recommend) on the Email Settings page.
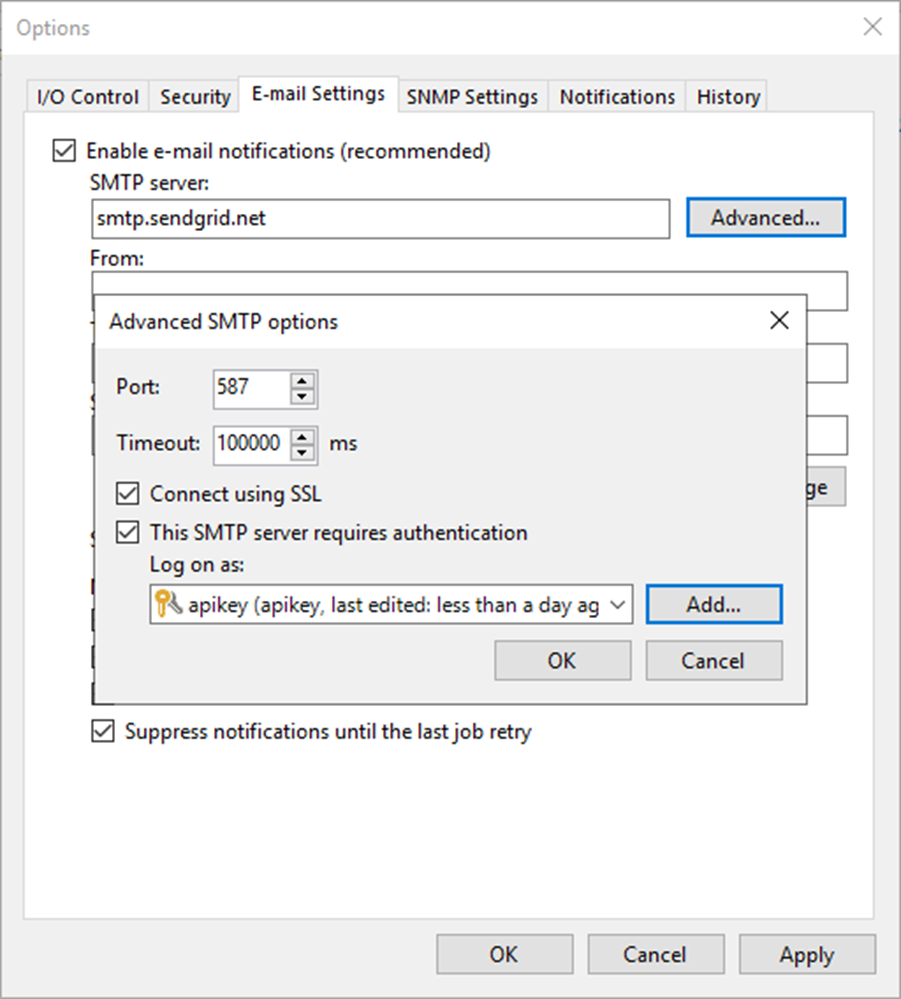
50. In the SMTP server field, enter smtp.sendgrid.net, and click Advanced.
51. On the Advanced SMTP options page, type 587 in the Port field.
52. Use 100000 milliseconds as the Timeout.
53. Select Connect using SSL.
54. Select This SMTP server requires authentication.
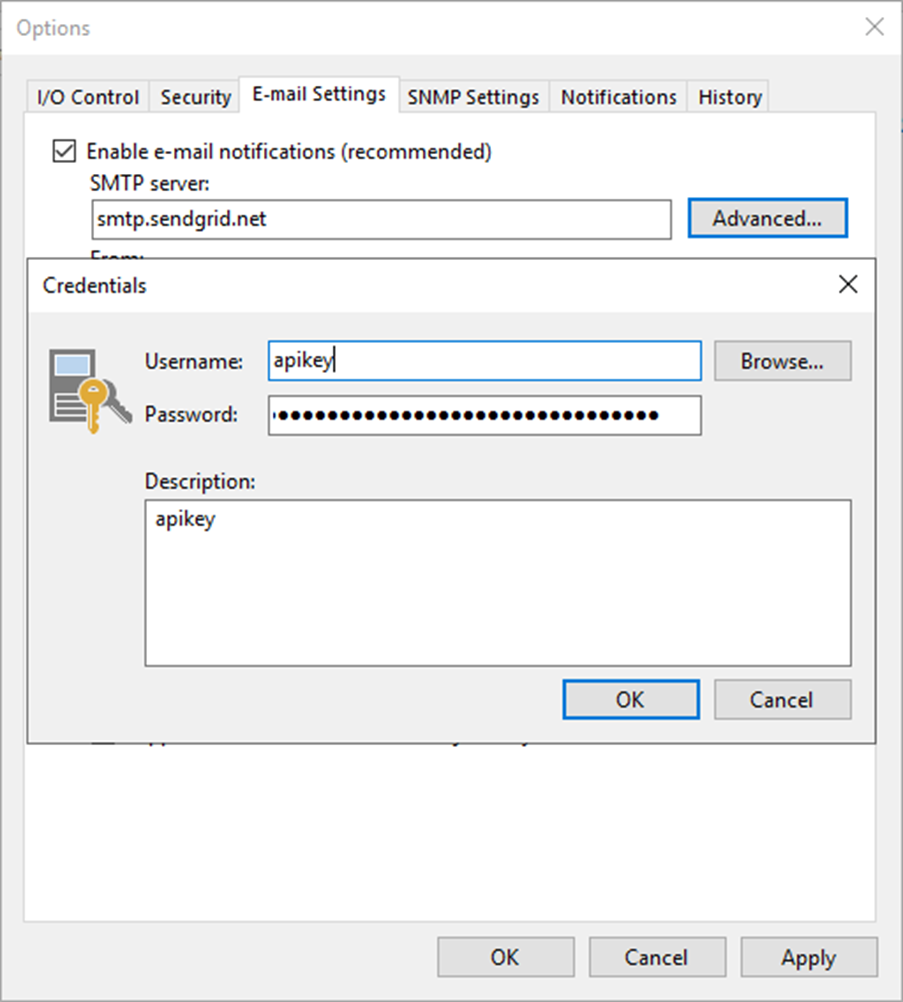
55. Click Add to add a credential as Log on as account.
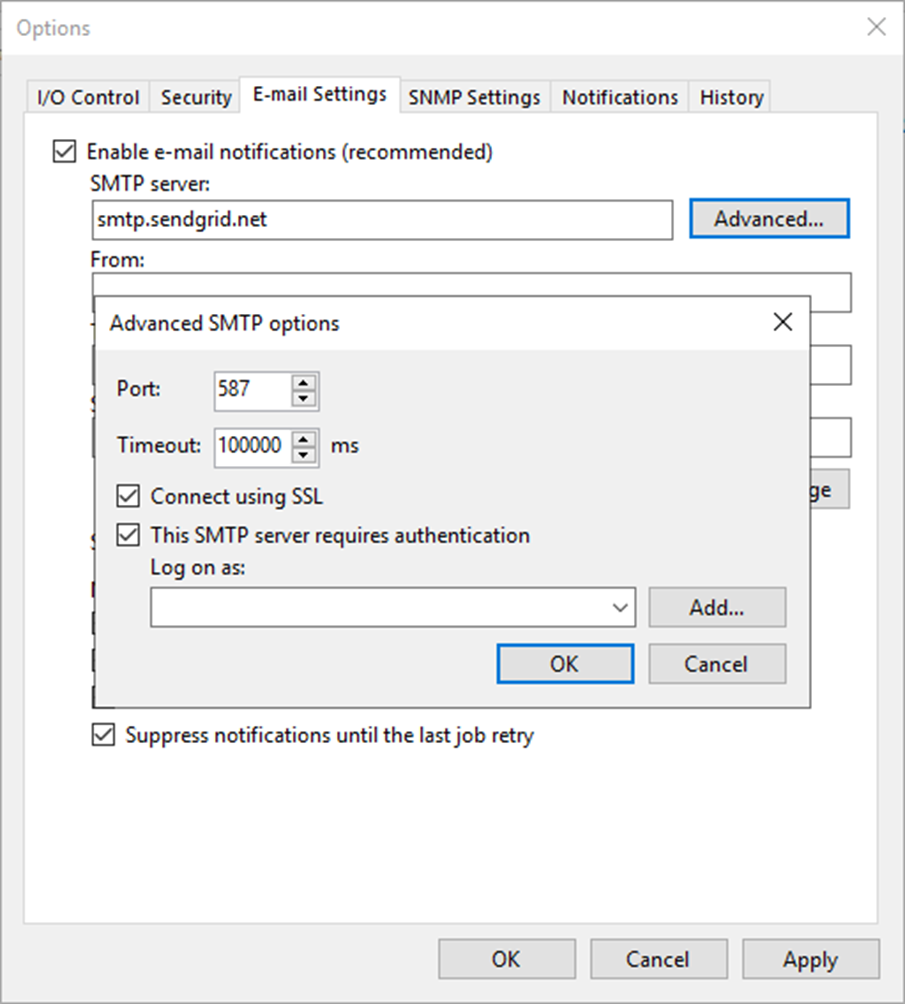
56. Type apikey as Username.
57. Paste the apikey number as a password.
58. Click OK.
59. On the Advanced SMTP options page, click OK.
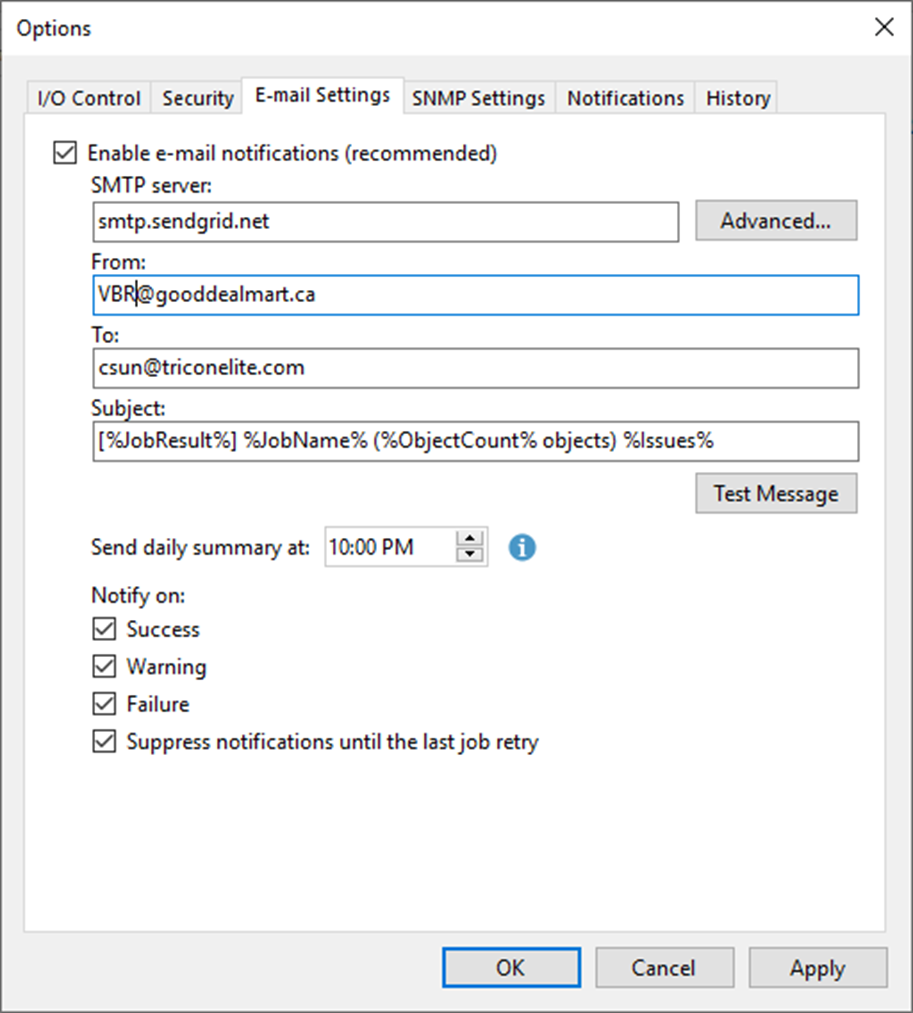
60. In the From field, enter an email address you want to use as a sender.
61. In the To field, enter an email address of a notification recipient. To specify multiple email addresses, use a semicolon.
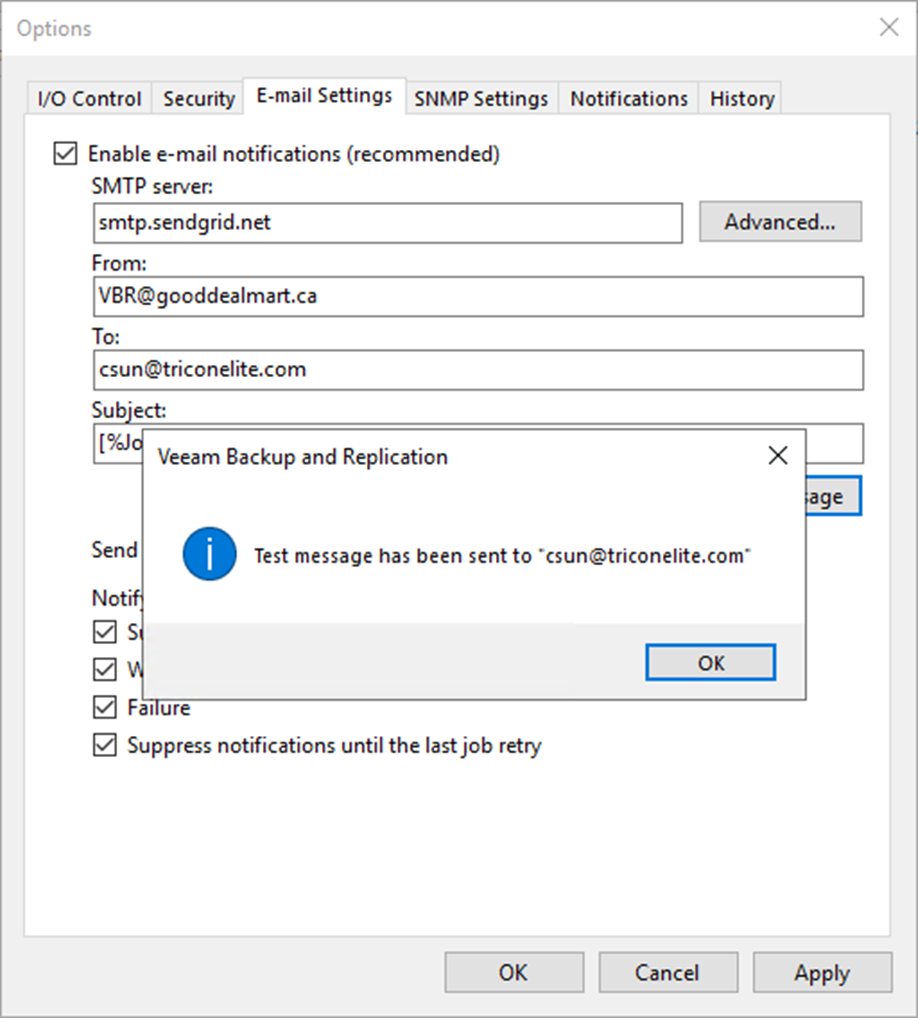
62. Click Test Message.
63. Verify the test message sent successfully and click OK.
64. On the Options page, click OK.
I hope you enjoy this post.
Cary Sun
Twitter: @SifuSun
Web Site: carysun.com
Blog Site: checkyourlogs.net
Blog Site: gooddealmart.com