
This procedure uses the managed by agent mode to create a backup job to back up the specific physical production machines.
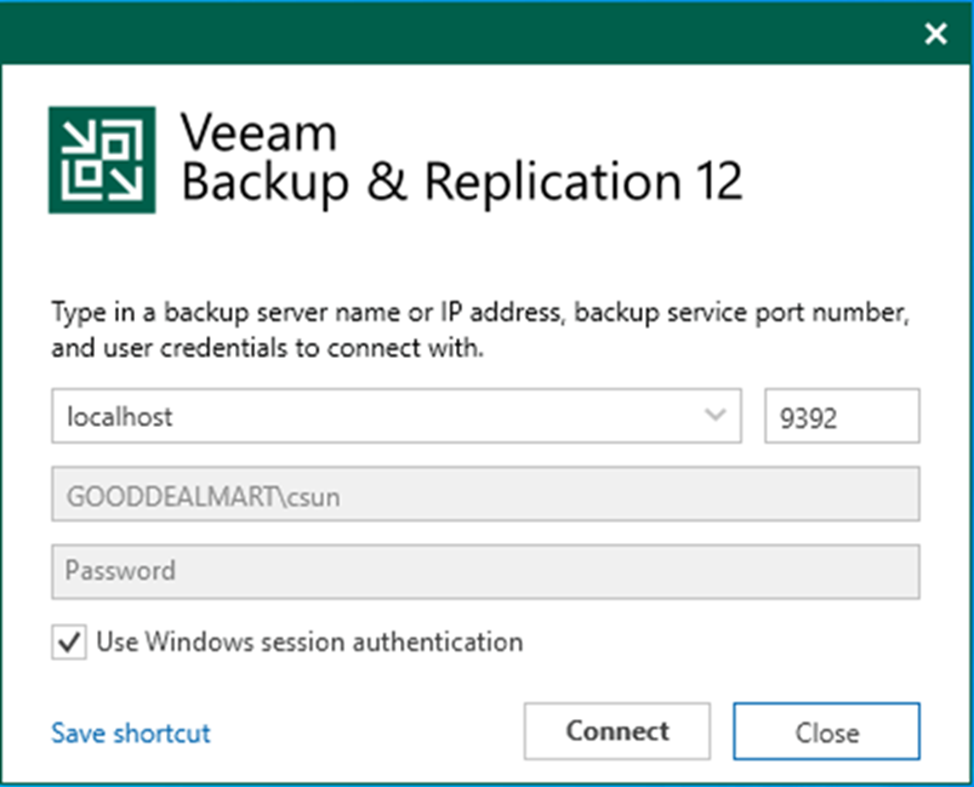
1. Login to the Veeam Backup and replication manager server.
2. Open the Veeam Backup & Replication Console and click Connect.
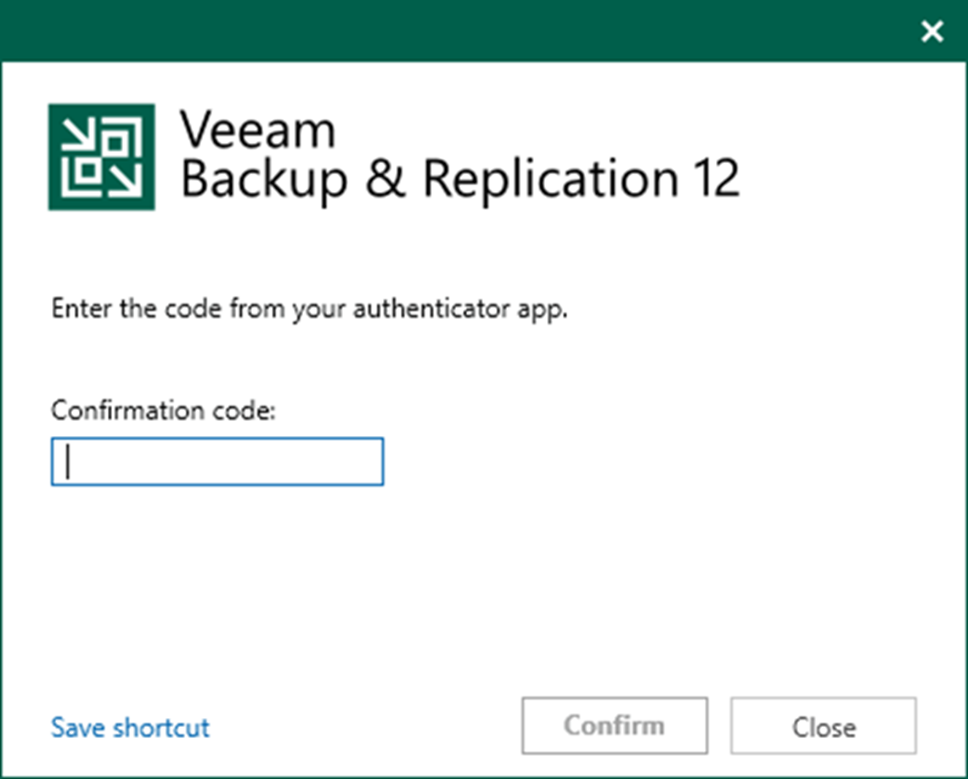
3. Enter the MFA Confirmation code and click Confirm.
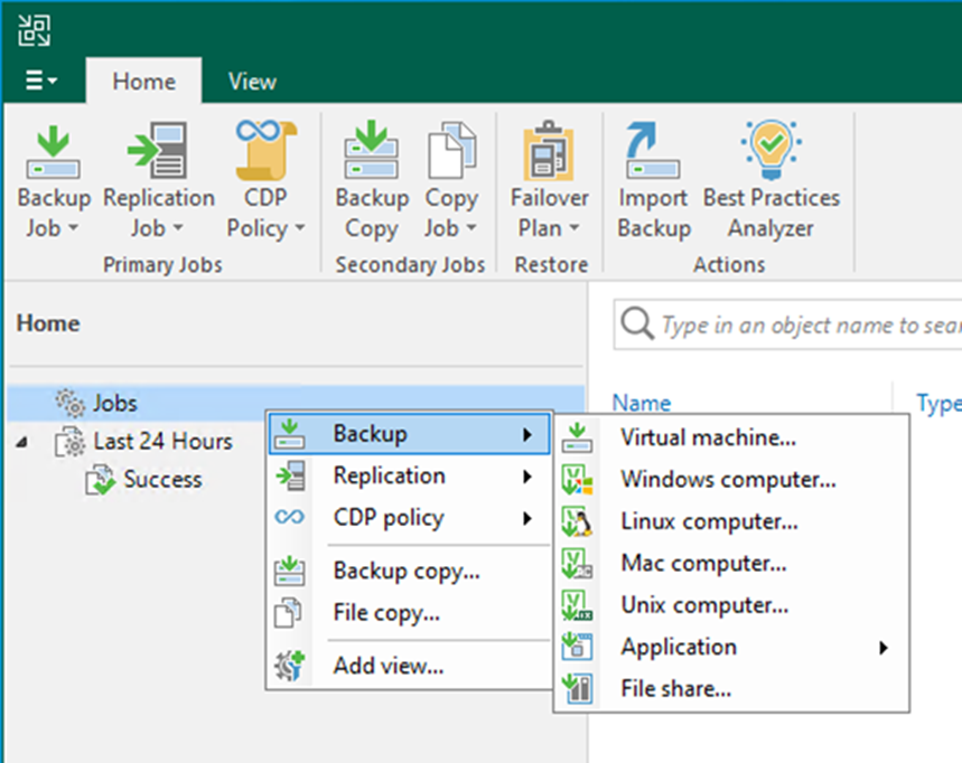
4. Select Jobs on the Home page and right-click Jobs.
5. Select Backup and click Windows computer.
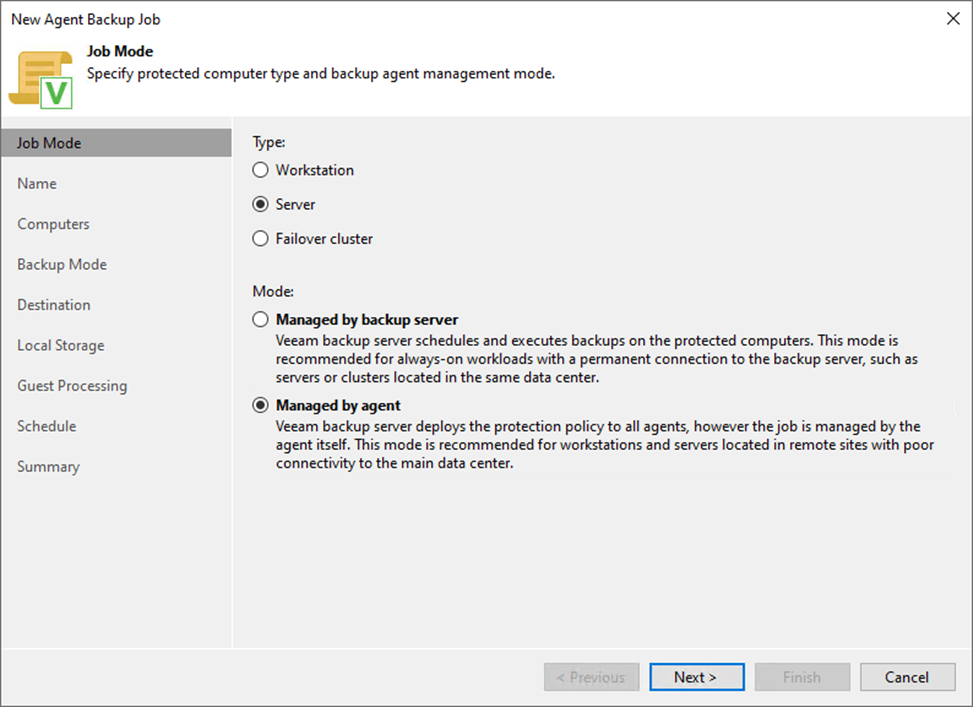
6. On the Job Mode page, select Managed by agent mode and click Next.
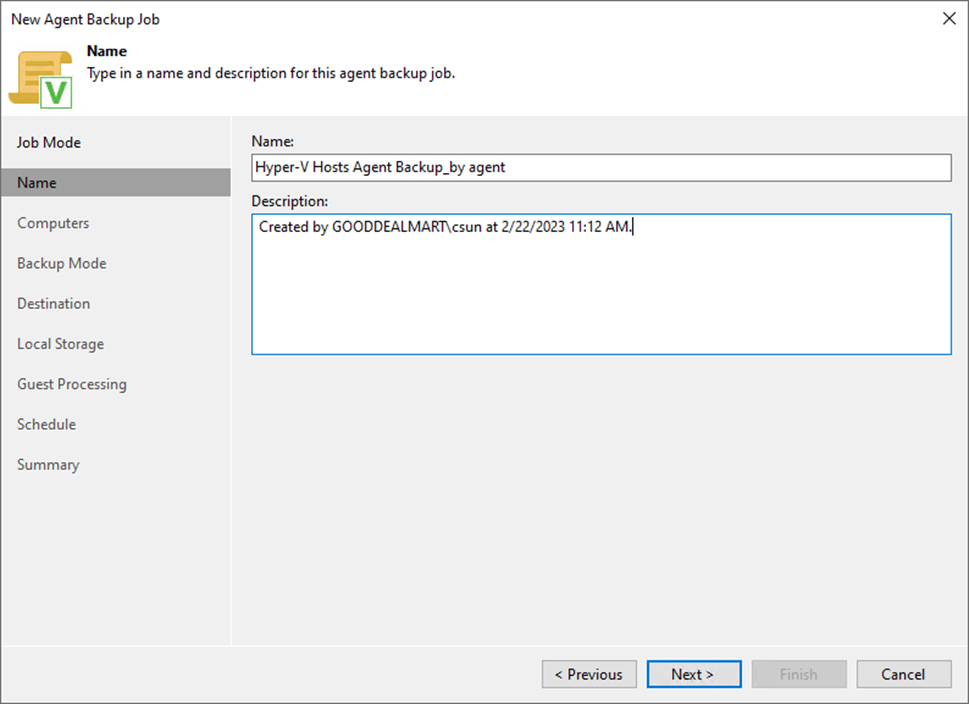
7. On the Name page, enter a name for the backup job in the Name field.
8. Give a brief description in the Description field for the future.
9. Click Next.
10. On the Computers page, click Add and select Protection group.
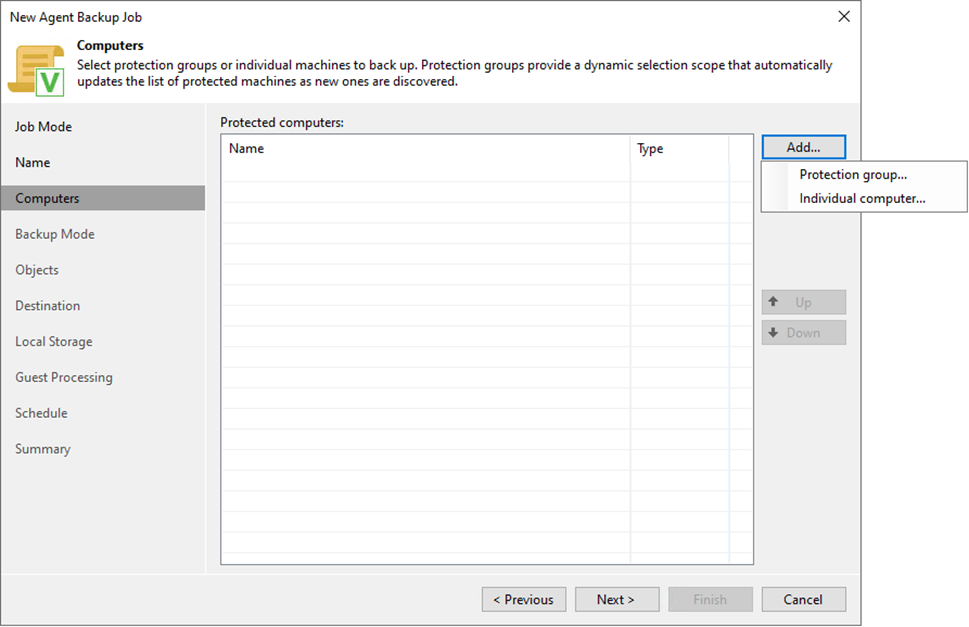
11. Select the protection group on the Select Objects page and click OK.
12. You can select multiple protection groups for the same backup job and repeat the step to add them.

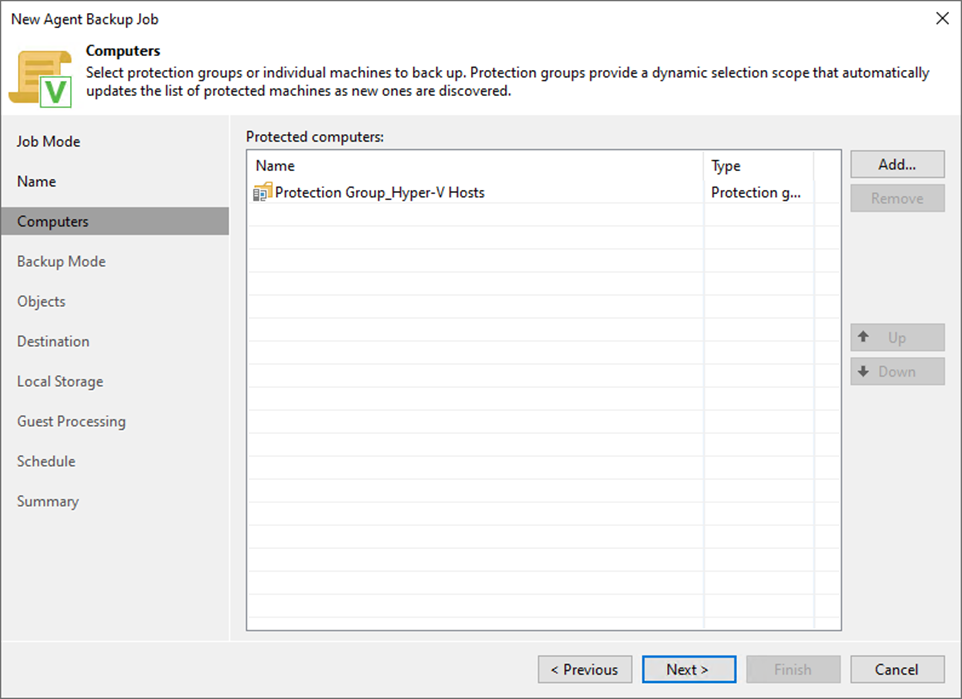
13. Click Next on the Computers page.
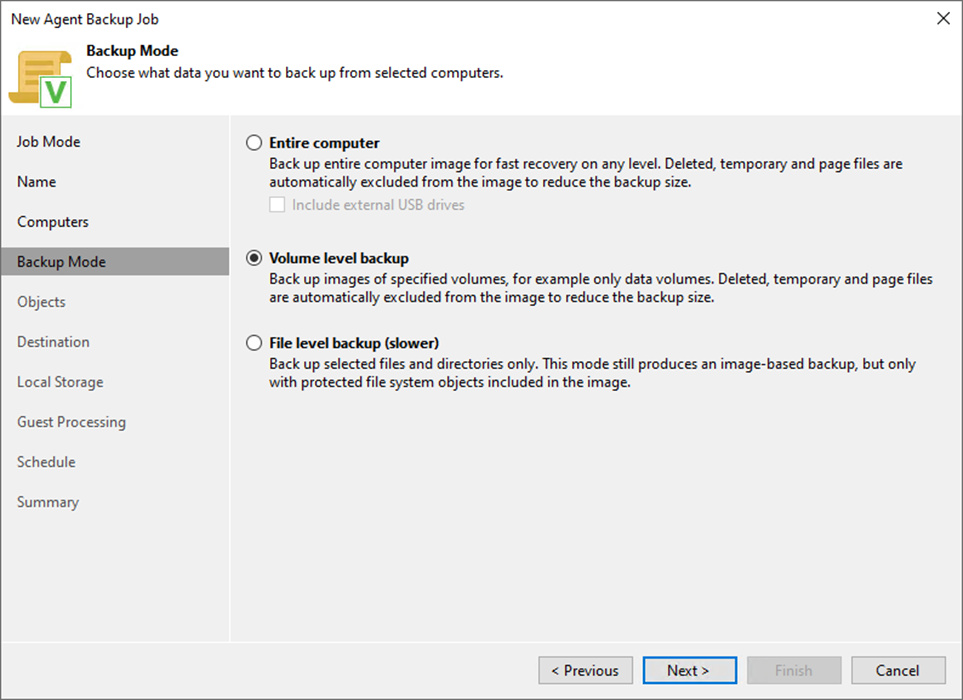
14. Select Volume level backup mode on the Backup Mode page to back up the specified computer volumes and click Next.
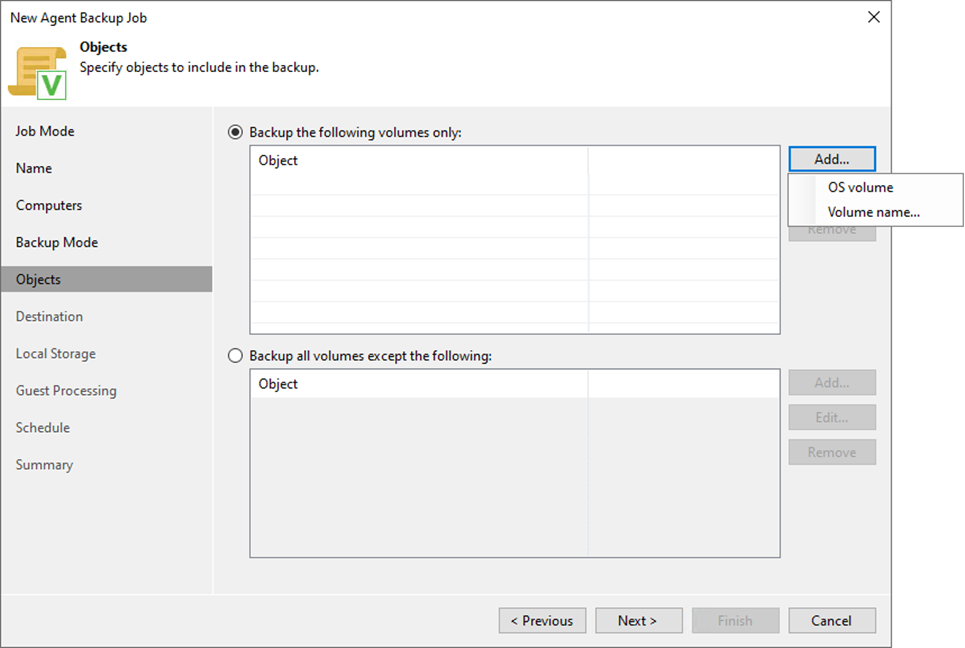
15. On the Objects page, select Backup the following volumes only.
16. Click Add and select OS volume.
17. Click Next.
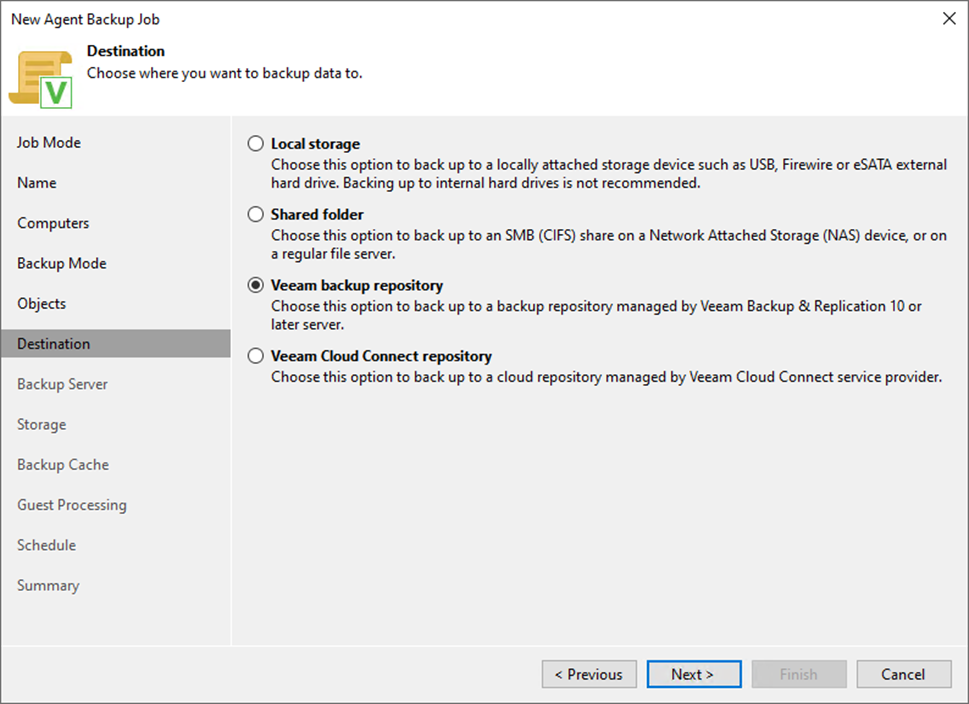
18. Select the Veeam backup repository and click Next.
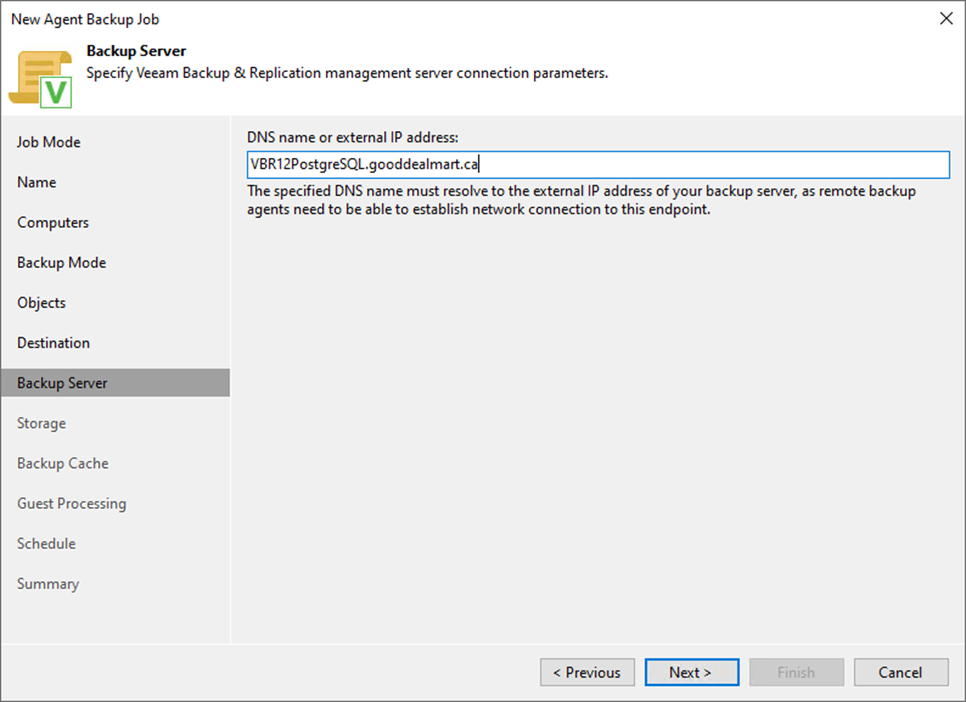
19. Enter the Veeam Backup and Replication manager server name or IP address in the DNS name or external IP address field on the Backup Server page.
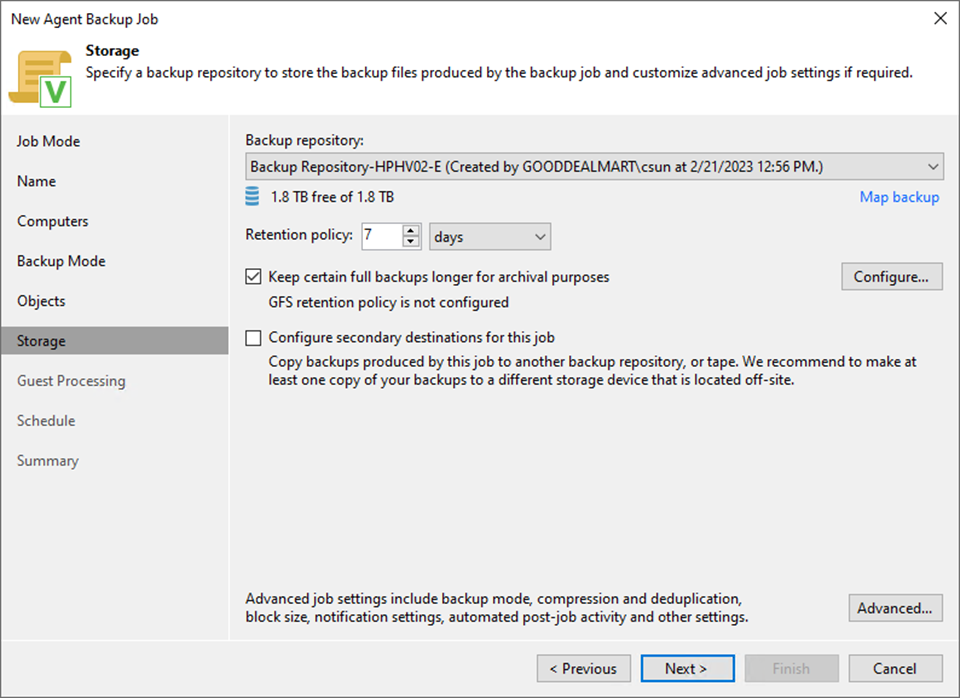
20. Select the backup repository from the Backup repository drop-down list on the Storage page.
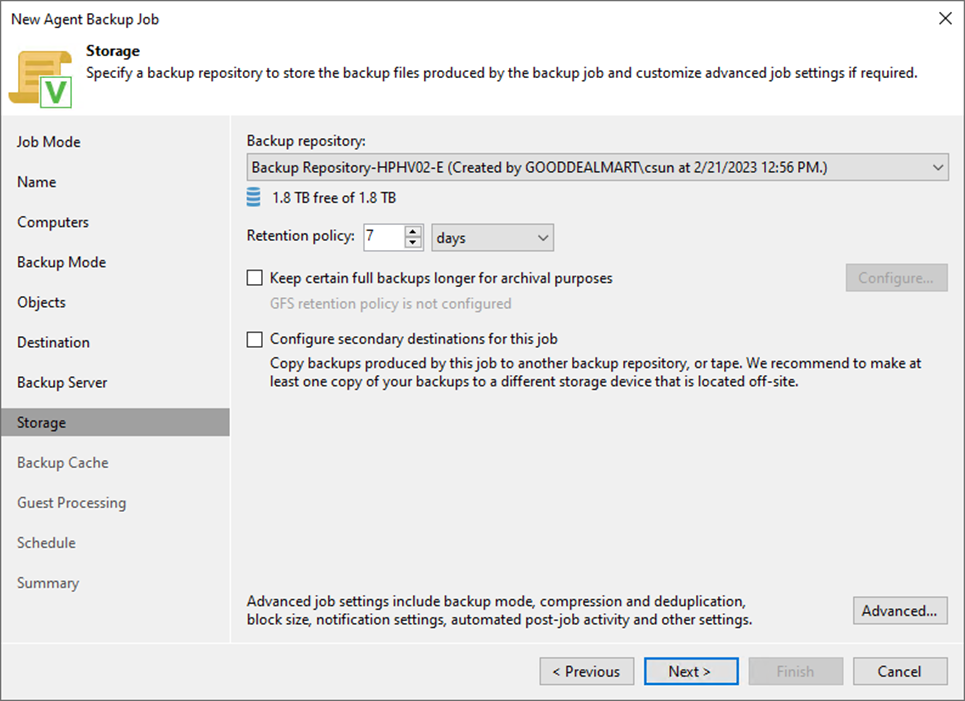
21. Set the retention policy settings for restore points in the Retention Policy field.
22. Select days or restore points from the drop-down list.
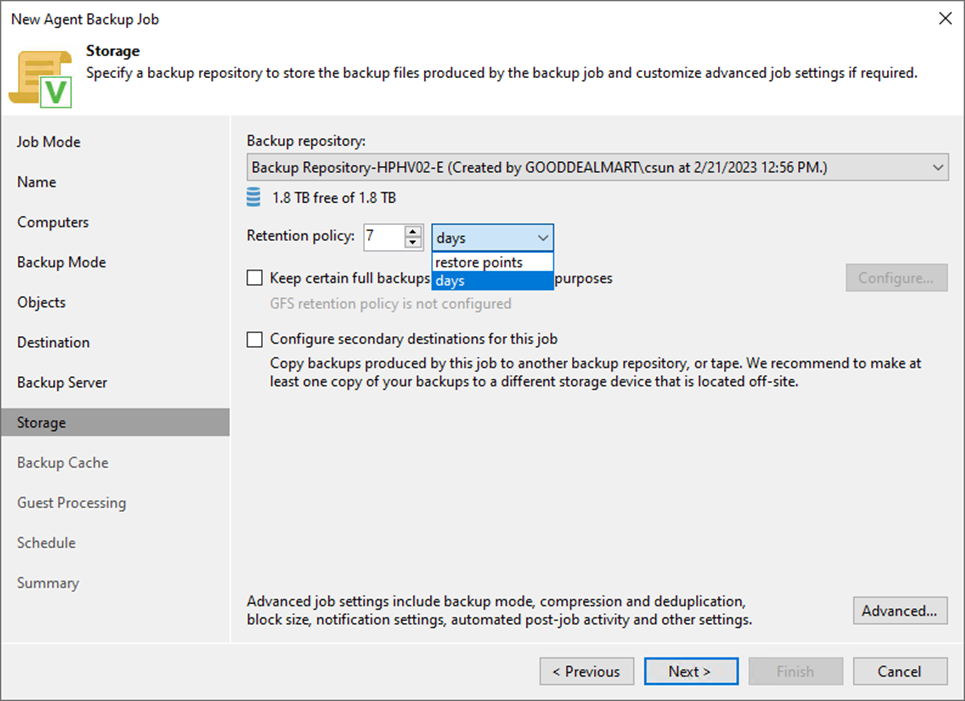
23. You can configure GFS retention policy settings for the backup job to ignore the short-term retention policy for some full backups and store them for long-term archiving.
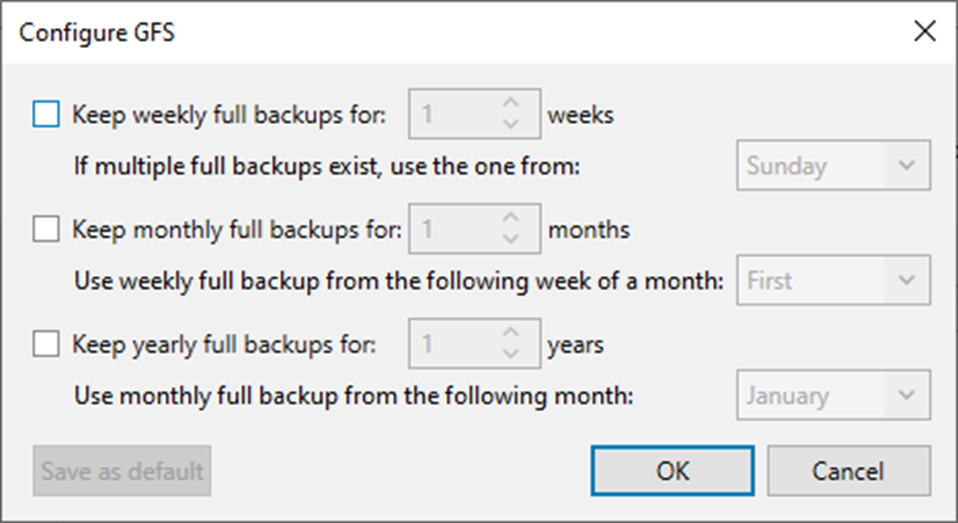
24. Select the Keep certain full backups for longer for archival purposes. If you need it, click Configure.

25. Select the Keep weekly full backups for checkbox and specify the number of weeks you want to prevent restore points from being modified and deleted.
26. Select the Keep monthly full backups for checkbox and specify the months you want to prevent restore points from being modified and deleted.
27. Select the Keep yearly full backups for checkbox and specify the years you want to prevent restore points from being modified and deleted.
28. Click OK.
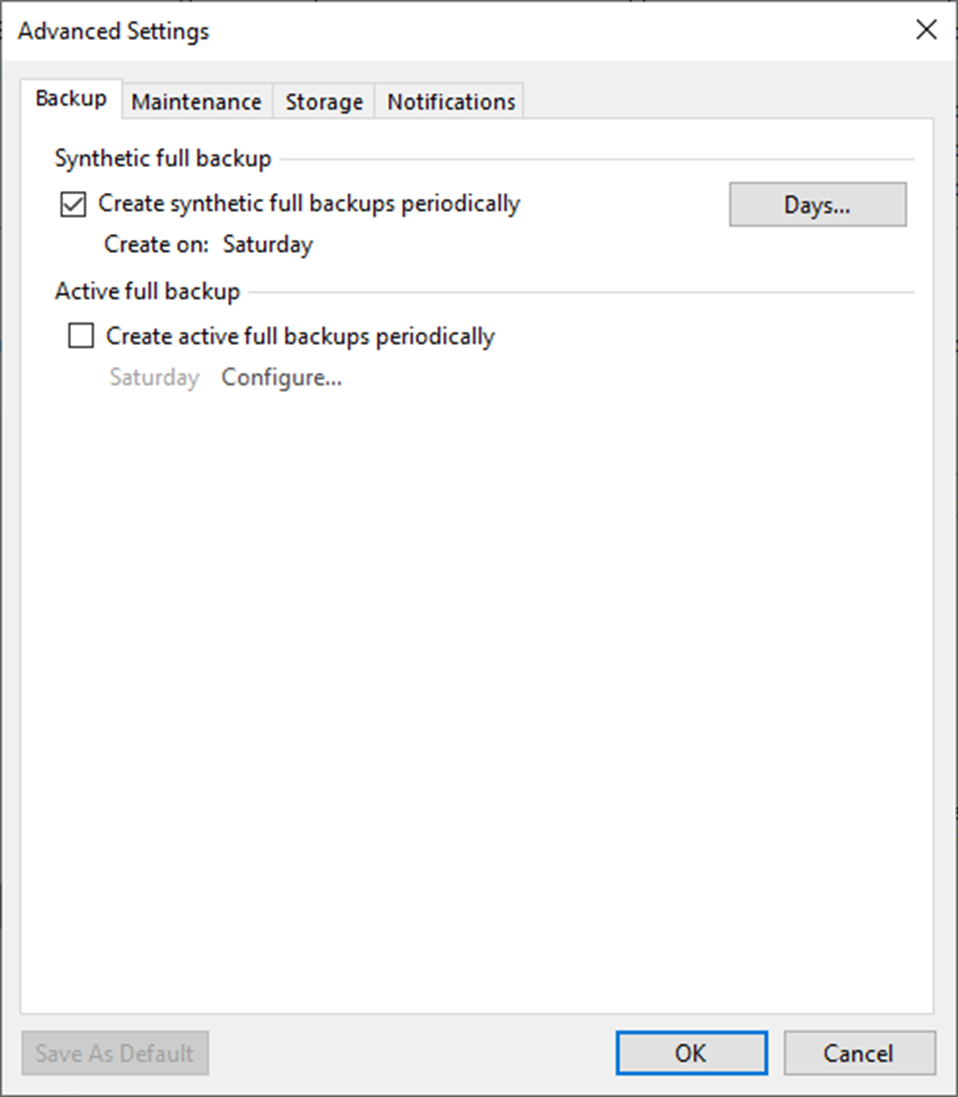
29. On the Storage page, click Advanced.
30. Select Create synthetic full backups or Active full backups periodically checkbox.
31. Schedule full backups periodically and click OK.
32. On the Advanced Settings, select Maintenance.
33. To regularly perform a health check on the backup chain’s most recent restore point, select the Perform backup files health check (detects and auto-heals corruption) checkbox in the Storage-level corruption guard section.
34. Click Configure to set a timetable for the health check.

35. Select the Remove deleted items data after the checkbox and enter the few days you want backup data for deleted VMs to be kept.
36. Select the Defragment and compact full backup file checkbox and click Configure.
37. Set the schedule for the compact operation to compact a full backup periodically.
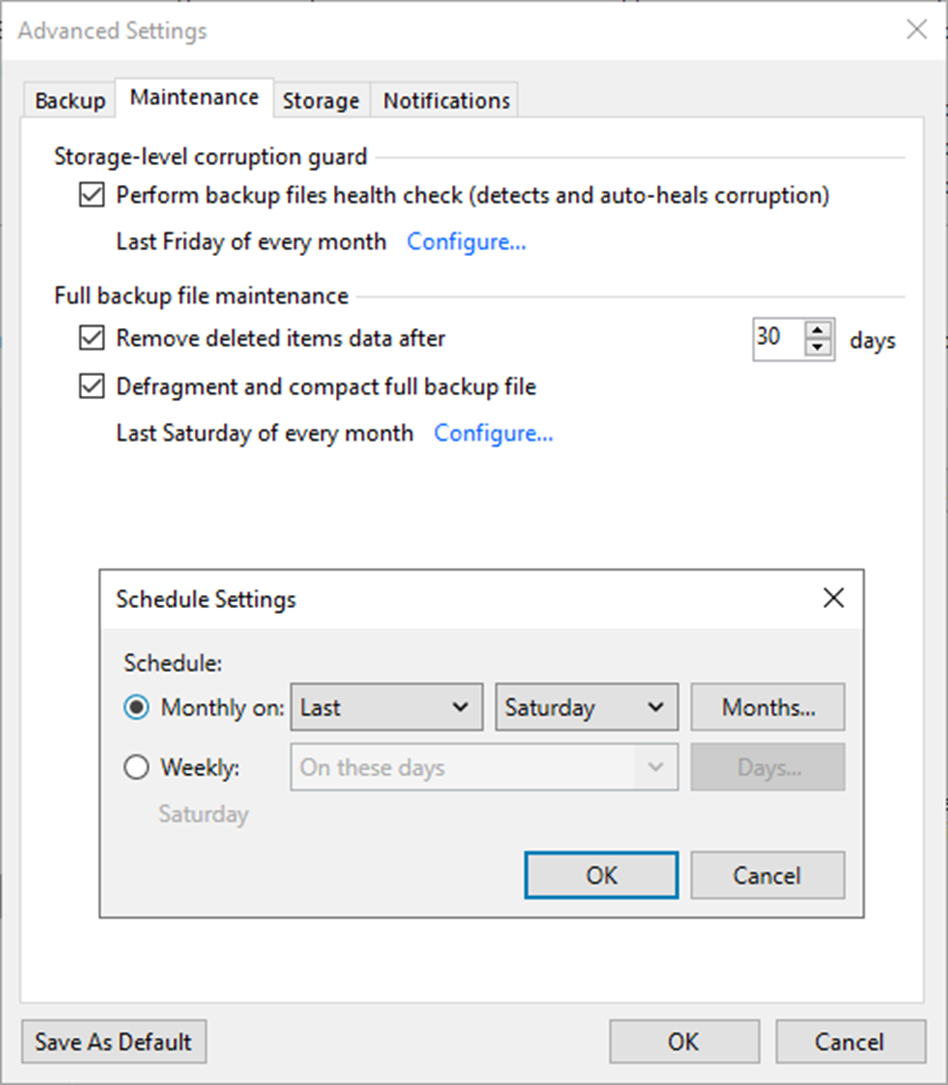
Note:
You don’t need to enable the defragment and compact functionality checkbox if GFS retention is enabled.
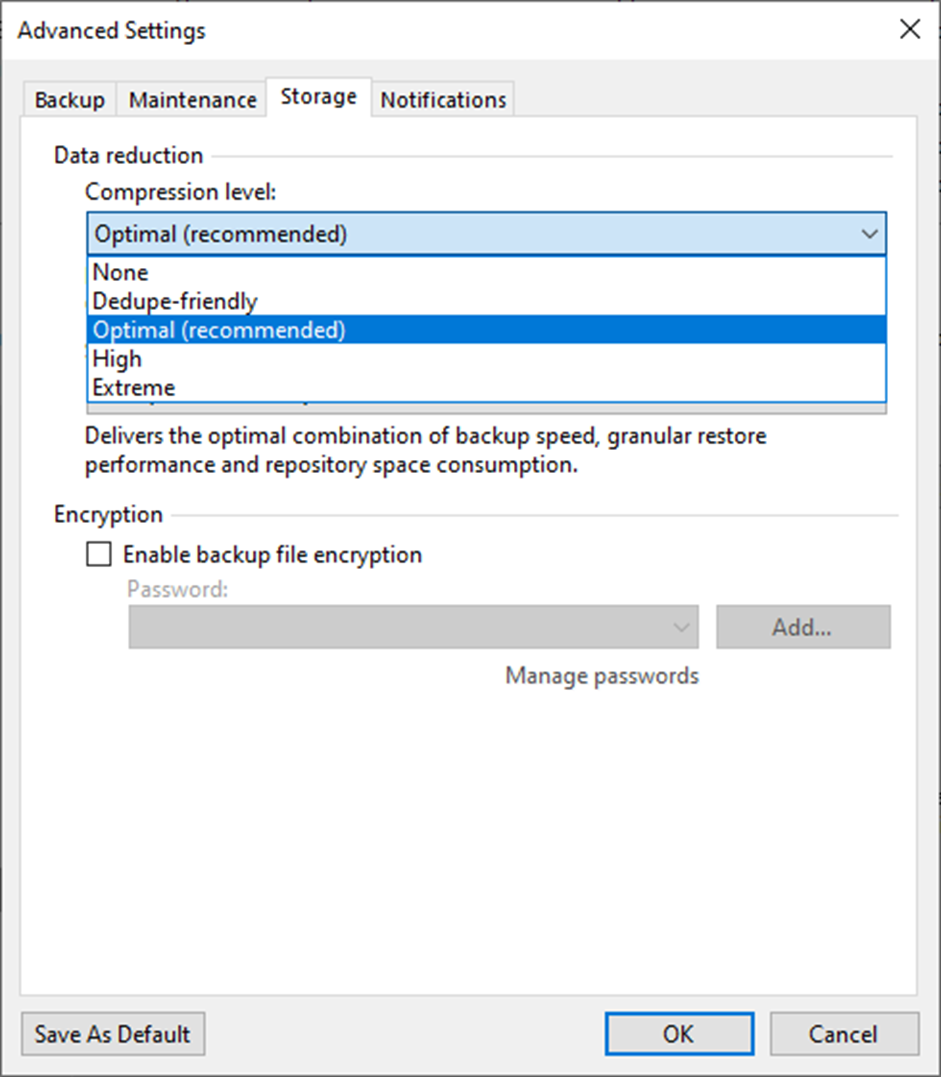
38. On Advanced Settings, select Storage.
39. Select the Compression level from the drop-down list.
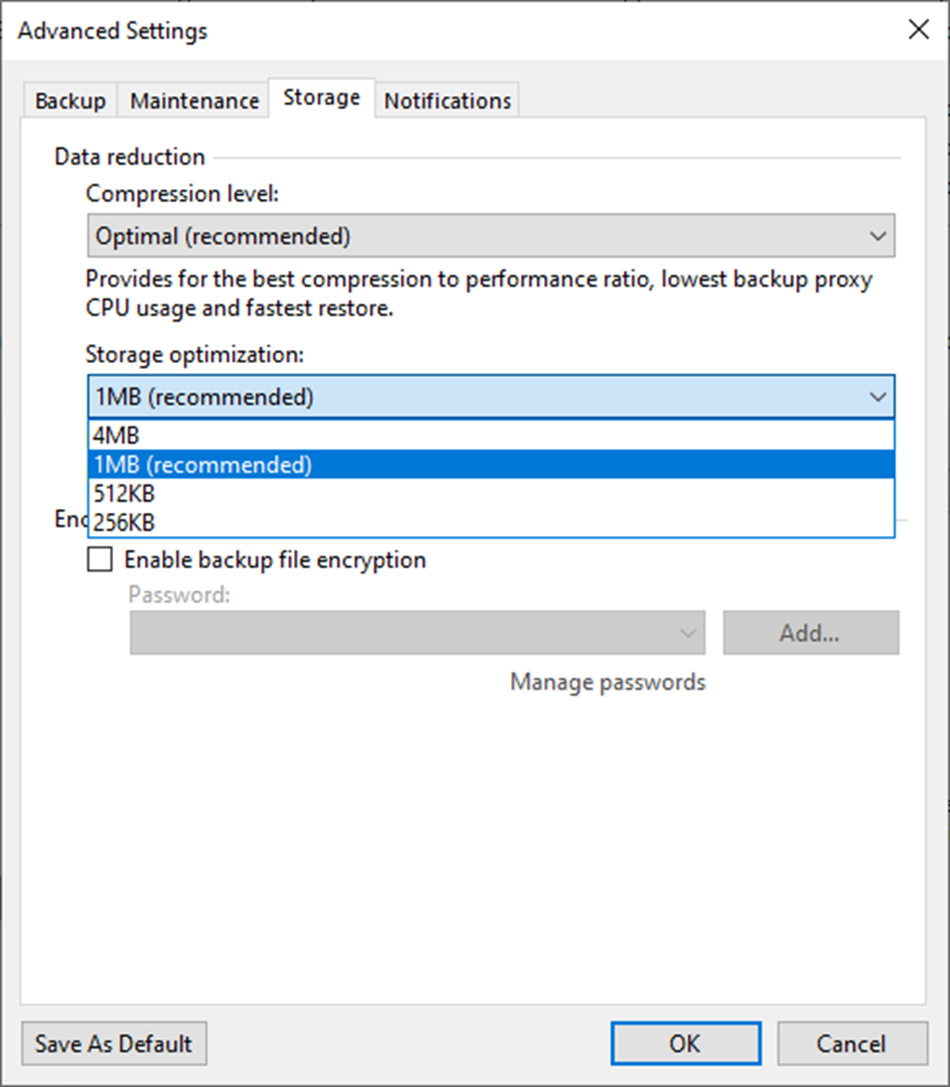
40. Select Storage optimization from the drop-down list.
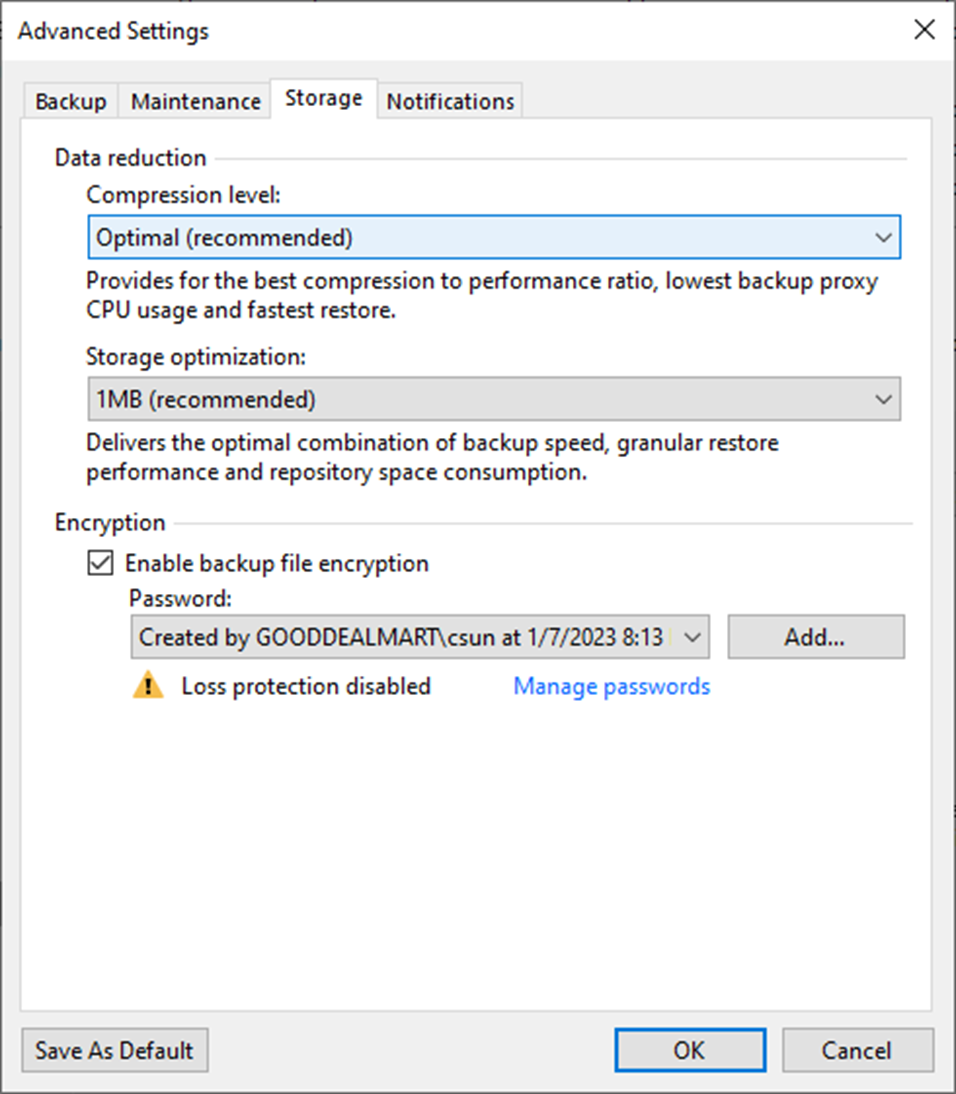
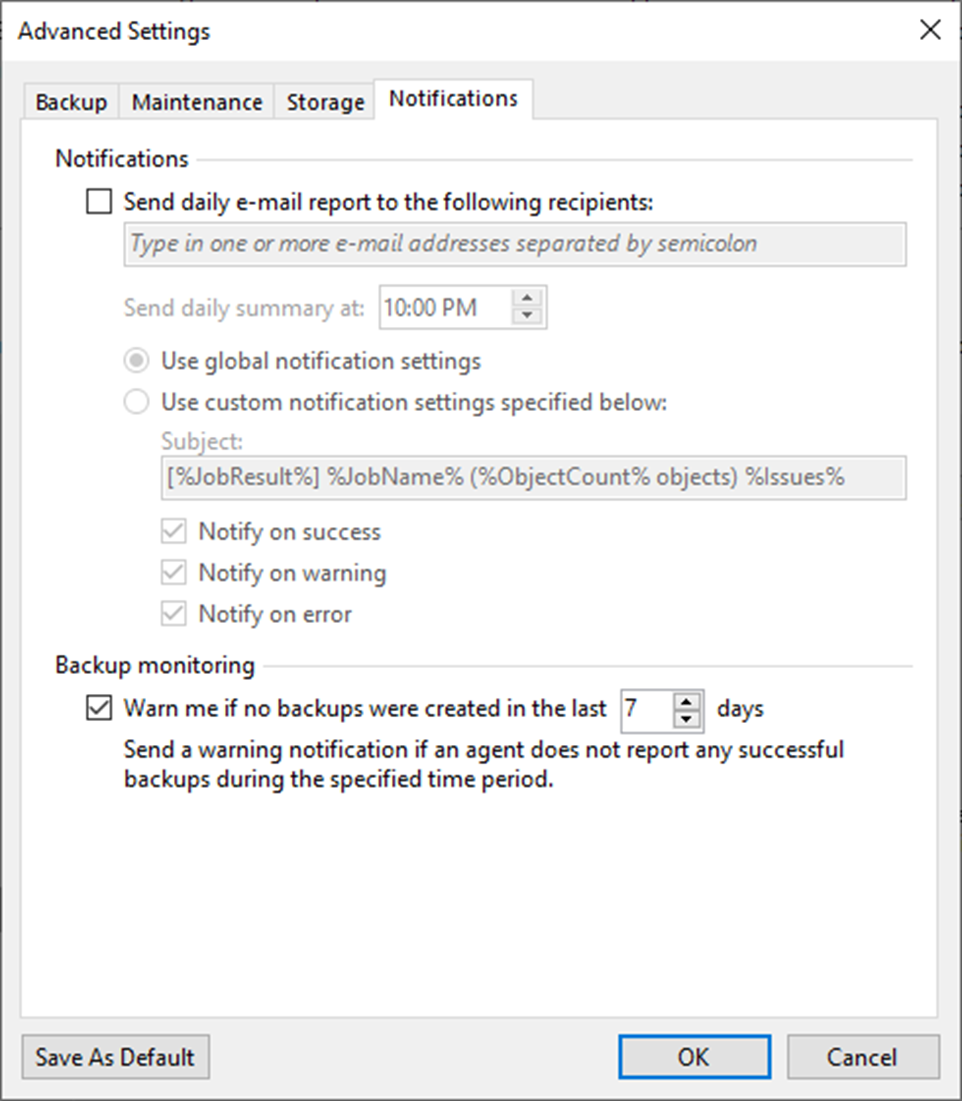
41. Select the Enable backup file encryption checkbox to encrypt the content of backup files.
42. Select a password from the drop-down list. If you still need to do, click Add or use the Manage passwords link to create a new password.
43. On the Advanced Settings, select Notifications.
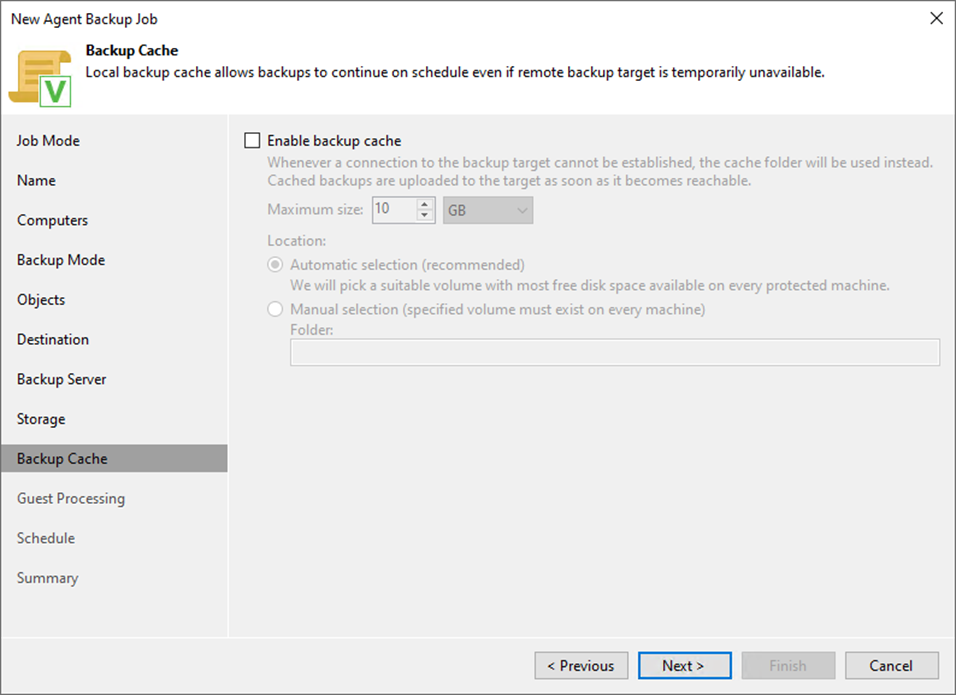
44. Keep the default settings and click OK.
45. On the Storage page, click Next.

46. On the Backup Cache page, keep the default settings and click Next.
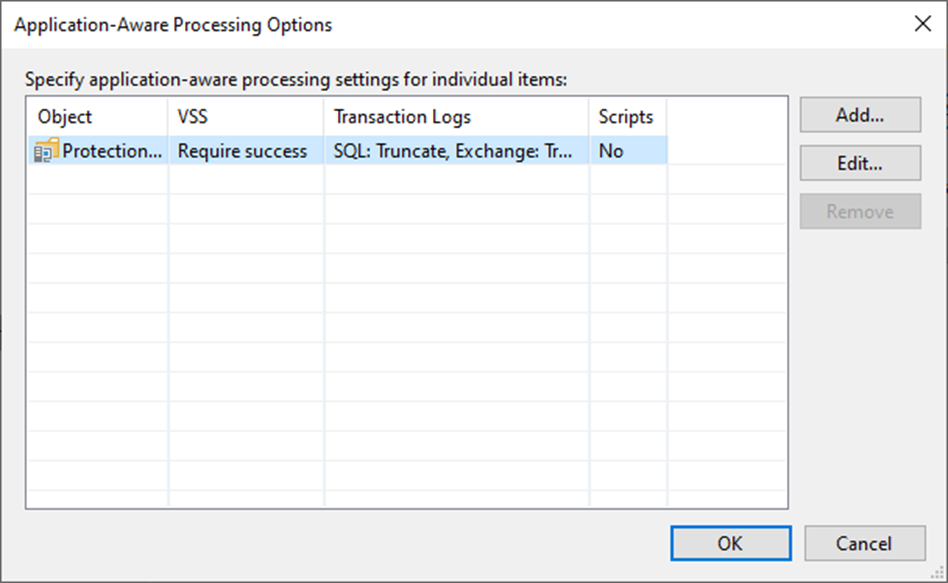
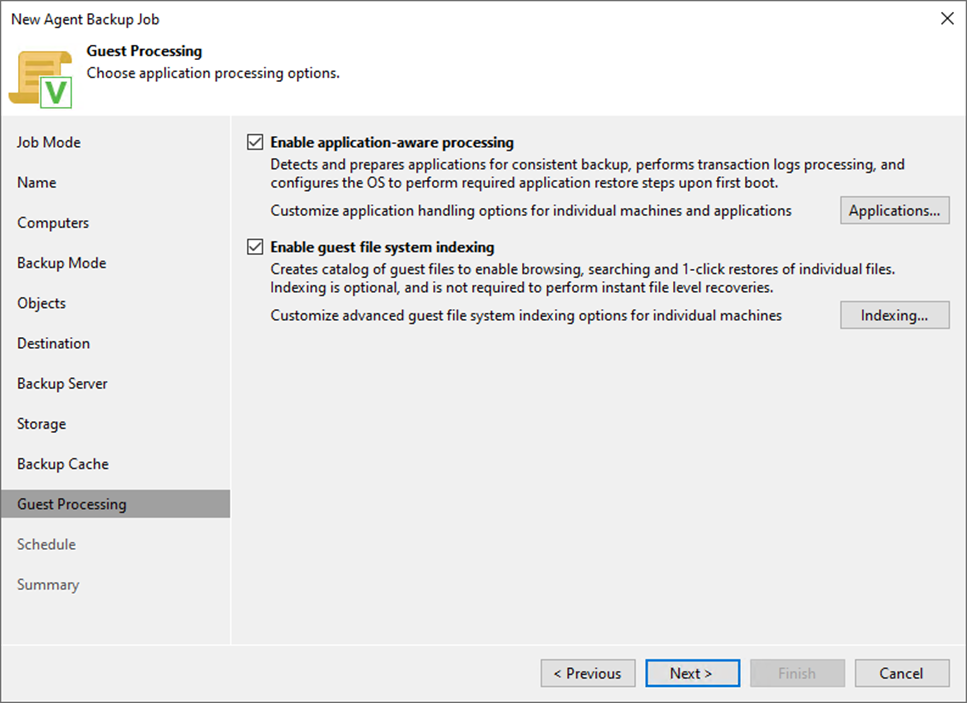
47. When you add Physical machines running VSS-aware applications to the backup job, you can enable application-aware processing to create a transactionally consistent backup. The transactionally consistent backup ensures that applications on VMs can be recovered without data loss.
48. Select the Enable application-aware processing checkbox on the Guest Processing page and click Applications.

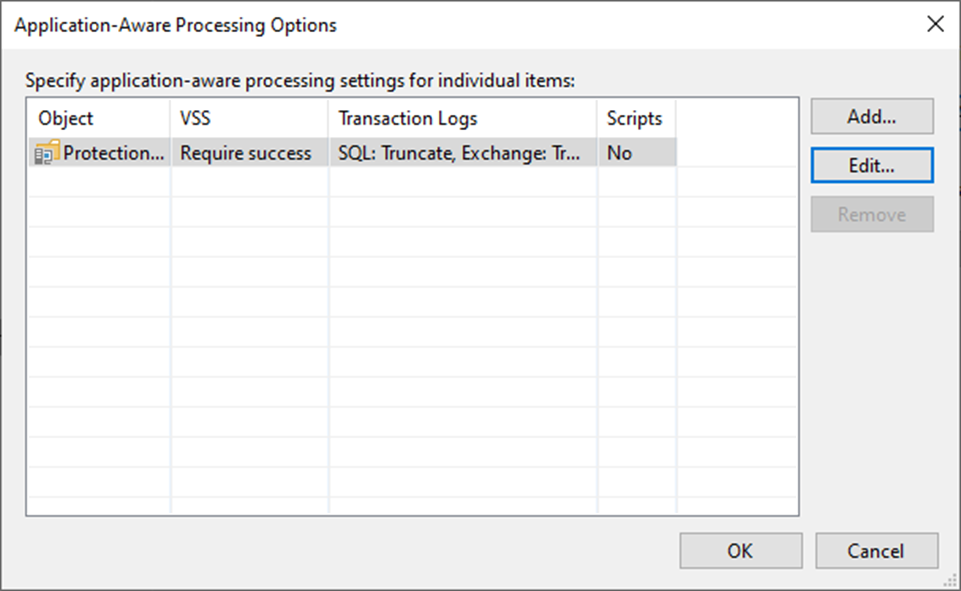
49. On the Application-Aware Processing Options page, select the Object and click Edit.
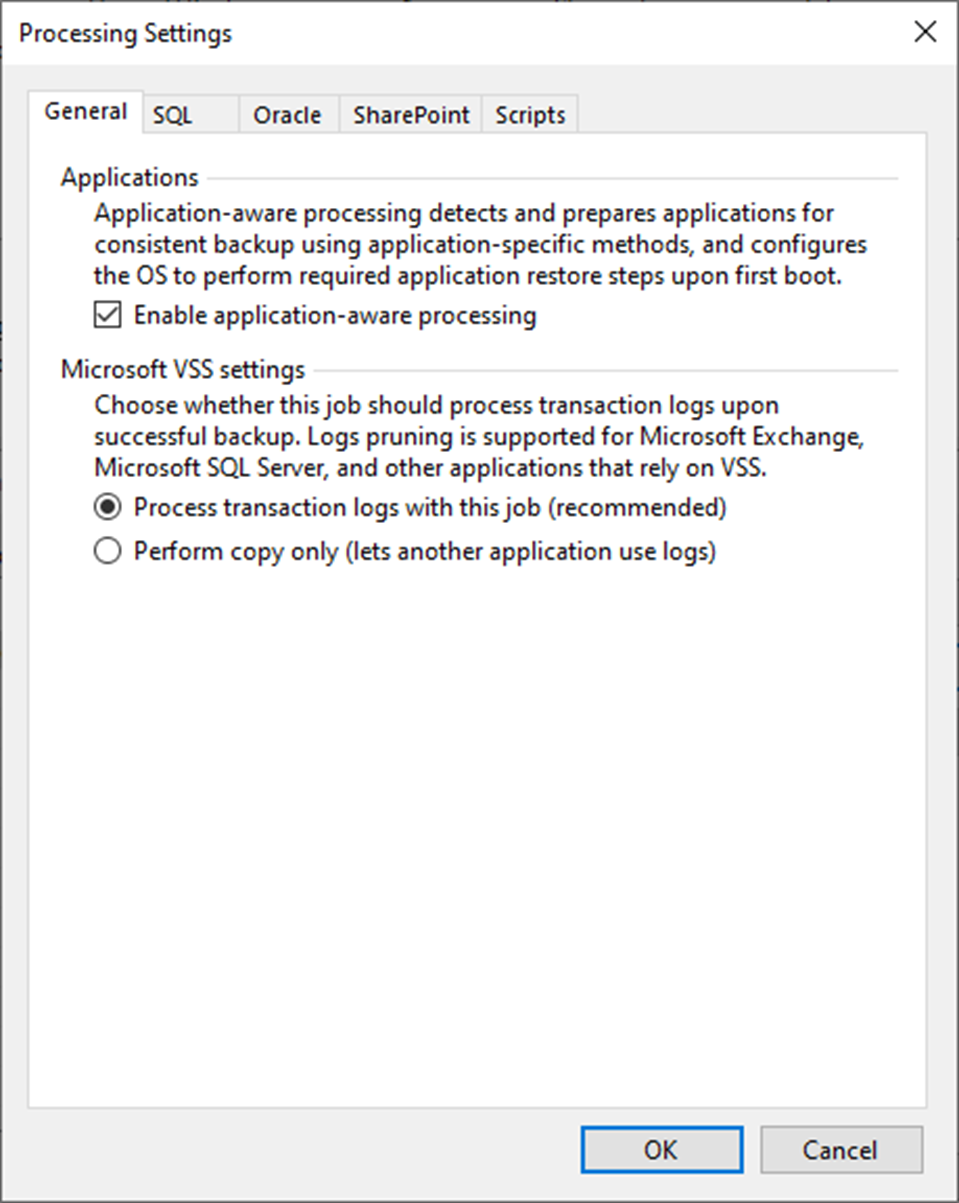
50. On the Processing Settings page, select General.
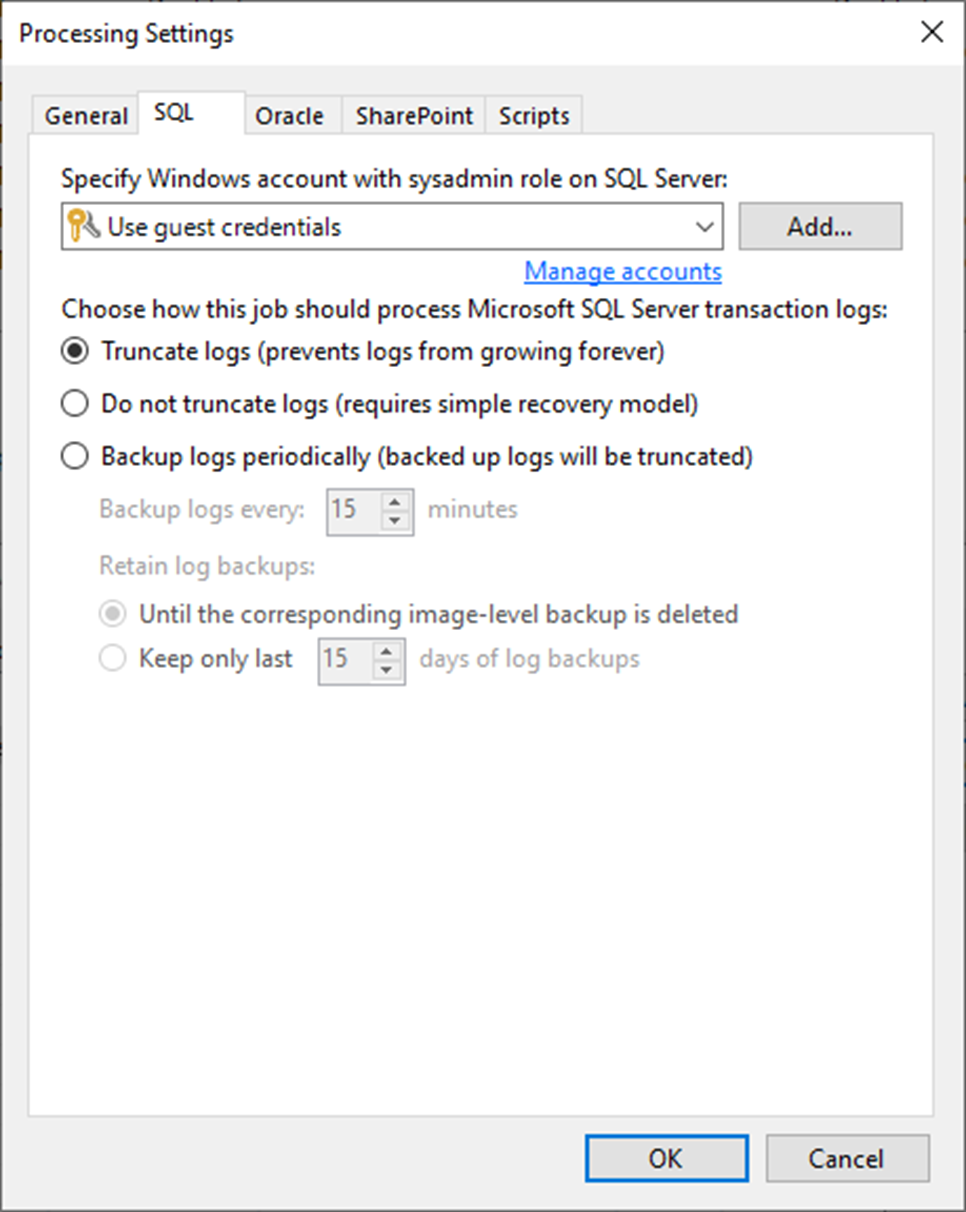
51. Select Enable application-aware processing checkbox.
52. Select Process transaction logs with this job (recommended).
53. On the Processing Settings page, click SQL if the Physical Machine is a Microsoft SQL Server.
54. Select a user account from the drop-down list.
55. Select Truncate logs (Prevents logs from growing forever).
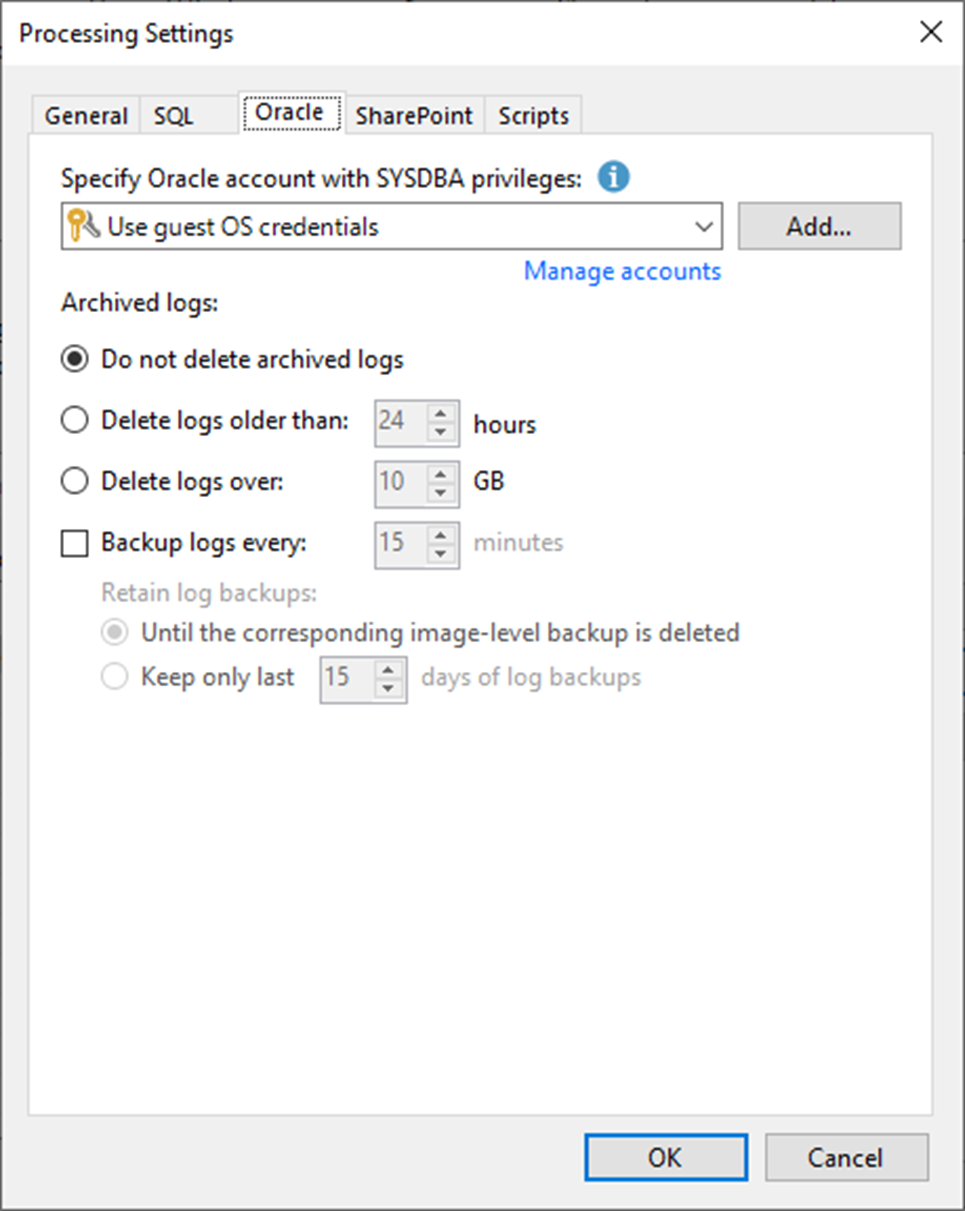
56. Select Oracle on the Processing Settings page if the Physical Machine is an Oracle Server.
57. Select a user account from the drop-down list.
58. Select Do not delete archived logs.
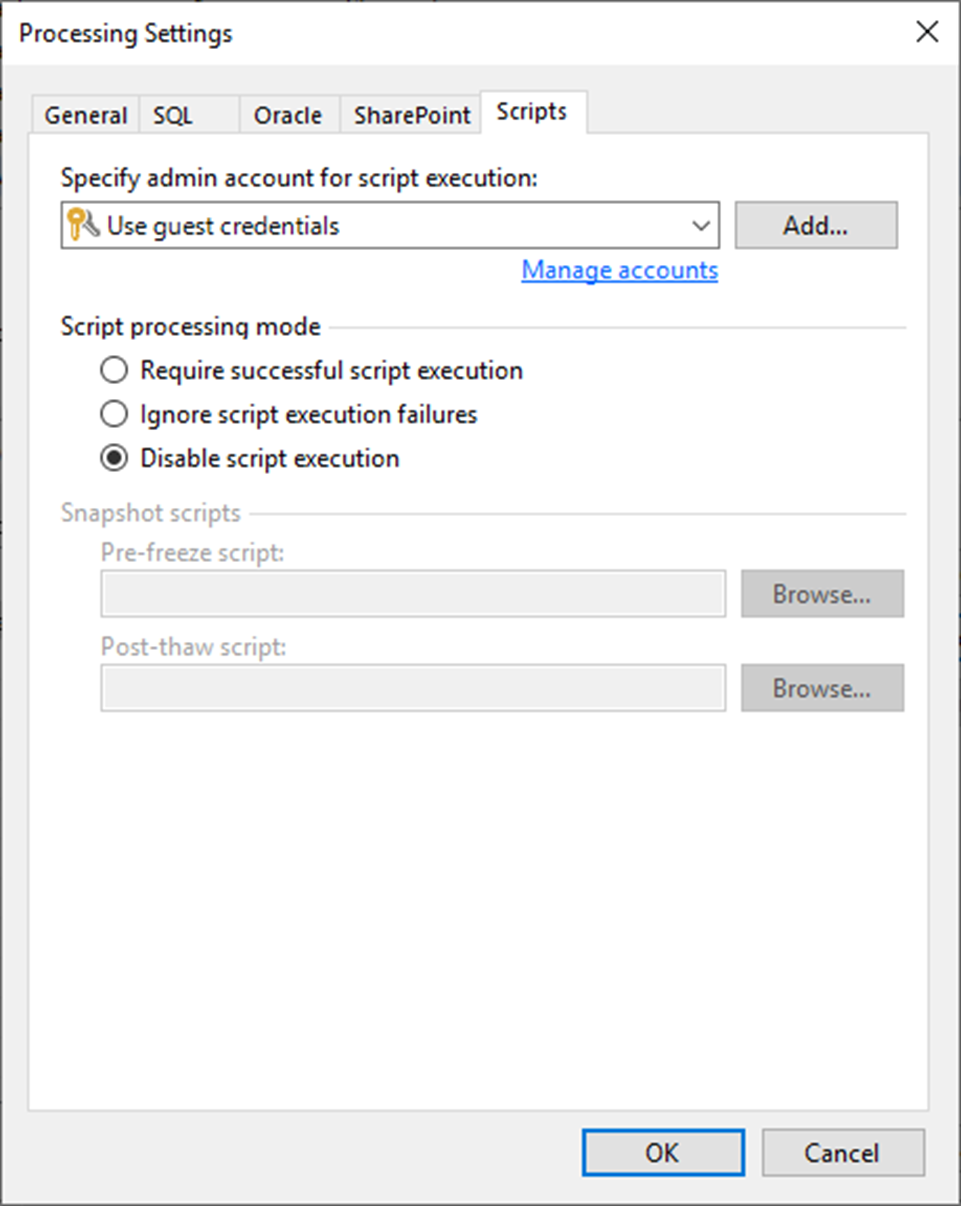
59. On the Processing Settings page, select SharePoint if the Physical Machine is a SharePoint Server.
60. Select a user account from the drop-down list.

61. On the Processing Settings page, select Scripts.
62. Keep the default settings and click OK.
63. On the Application-Aware Processing Options page, click OK.
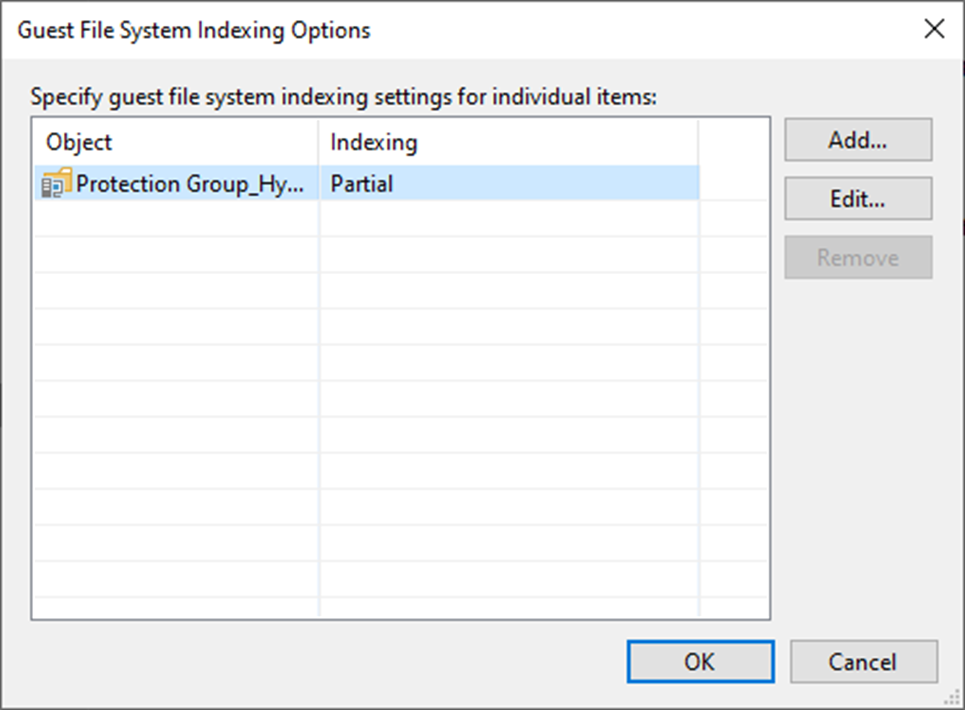
64. Select the Enable guest file system indexing checkbox and click Indexing.
65. On the Guest File System Indexing Options page, select the Object, click Edit.
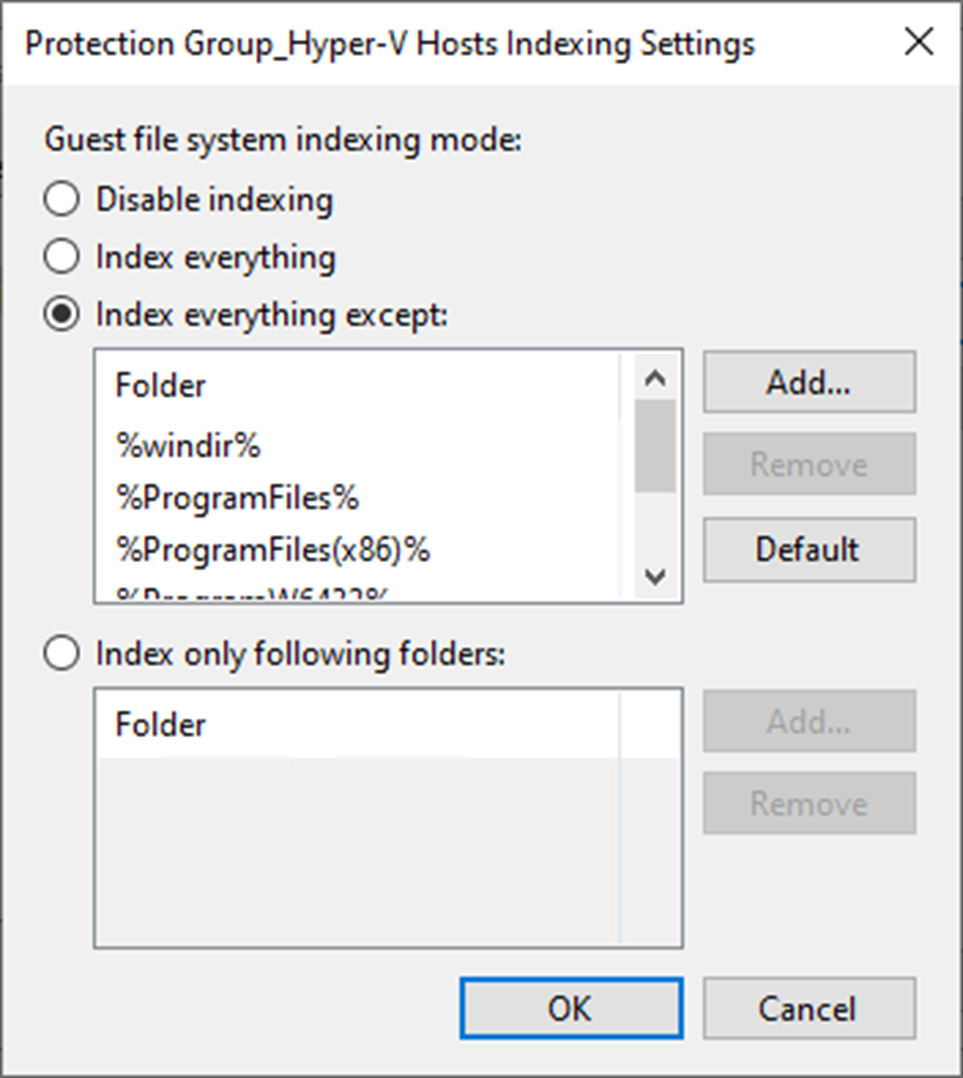
66. On the Guest file system indexing mode page, keep the default settings.
67. Click OK.
68. On the Guest File System Indexing Options page, click OK.

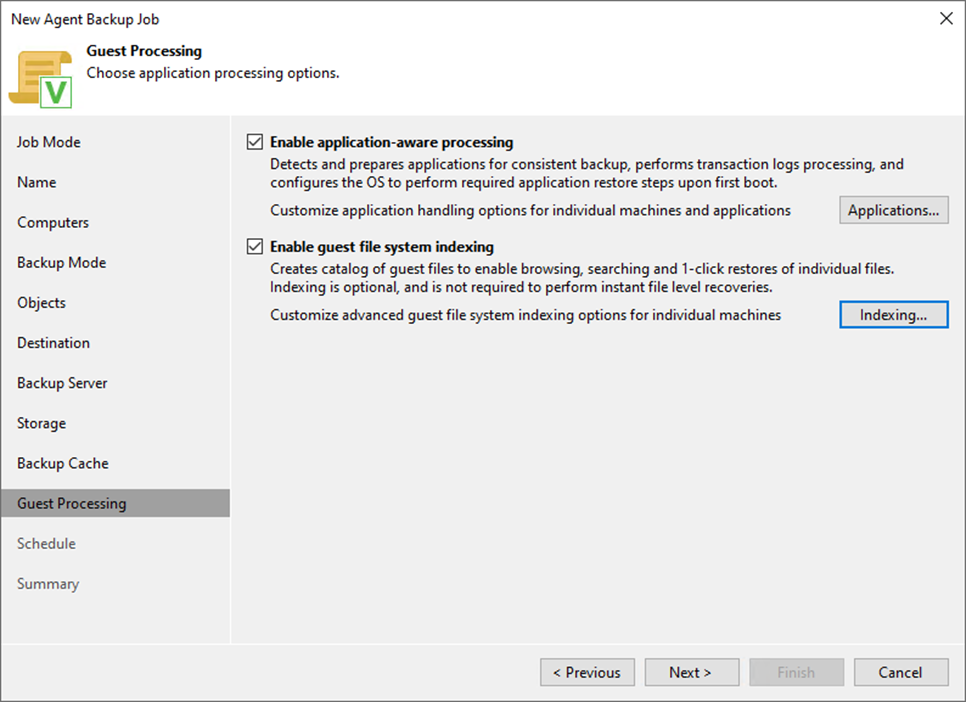
69. On the Guest Processing page, click Next.
70. Select Run the job automatically checkbox on the Schedule page and select your specified schedule.
71. Define whether Veeam Backup & Replication should retry the backup job if it fails in the Automatic retry section.
72. Define the time interval the backup job must complete in the Backup window section. The backup window ensures that the job does not overlap with production hours and that there is no unnecessary overhead on the production environment.
73. Click Apply.

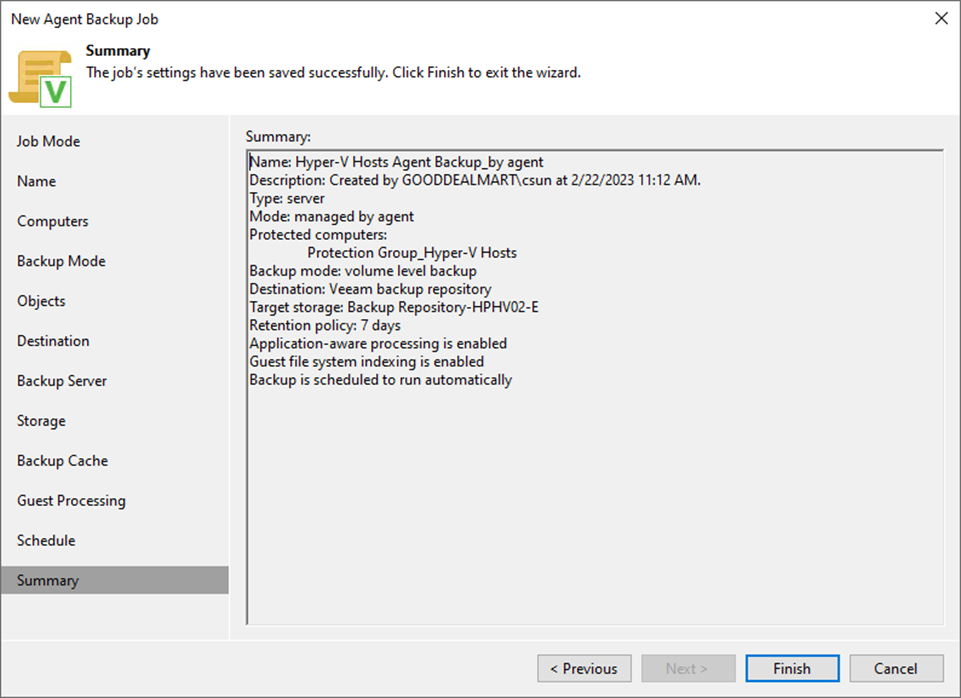
74. On the Summary page, click Finish.
75. Verify that the Machine rescan, and Job configured are completed without issues.
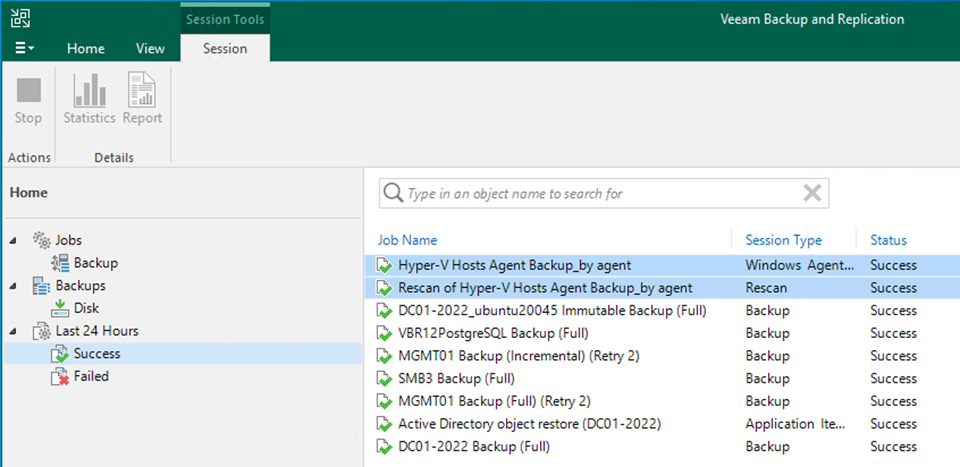
76. Verify that the backup job has been added.

I hope you enjoy this post.
Cary Sun
Twitter: @SifuSun
Web Site: carysun.com
Blog Site: checkyourlogs.net
Blog Site: gooddealmart.com